Office 365 permissions reporting – Check who has access to what with Syskit Point
Table of contents
Syskit Point is a centralized Office 365 governance solution created for both administrators and business users. It is a powerful tool that provides control and transparency for Office 365 administrators – ultimately helping you with Office 365 permissions reporting, and giving you the ability to quickly see who has access to what.
At the same time, it is highly user-friendly and adapts to the needs of less tech-savvy users such as team and group owners from HR, Legal, or Marketing departments. The intuitive interface and highly visual reports give business users the knowledge and power to control the access in their Microsoft 365 Groups, Microsoft Teams, and SharePoint sites. And they can manage the Office 365 permissions without leaving the Syskit Point interface.
Let’s look at how easy Office 365 access reporting and management is with Syskit Point.
Report on who has access to files in a team or group
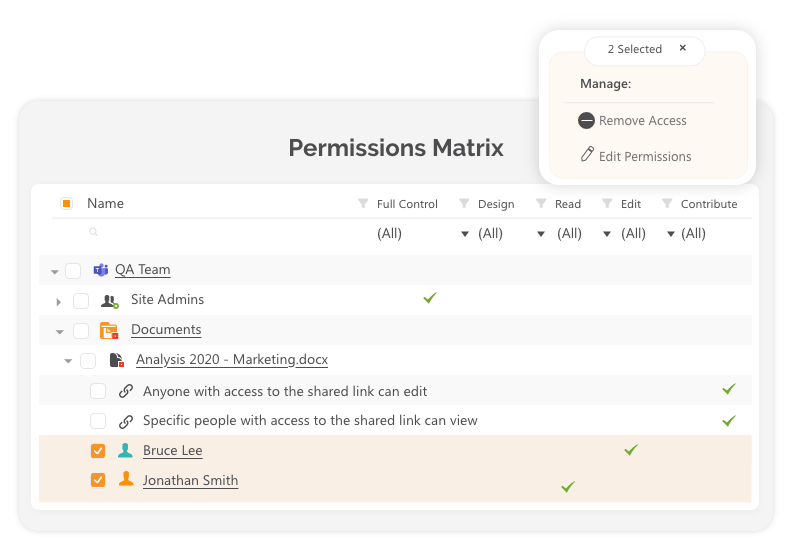
We recommend using the Office 365 Permissions Matrix report to review who has access to your team files. It provides a hierarchical, structured view of shared files alongside people who have access to it.
To generate such a report:
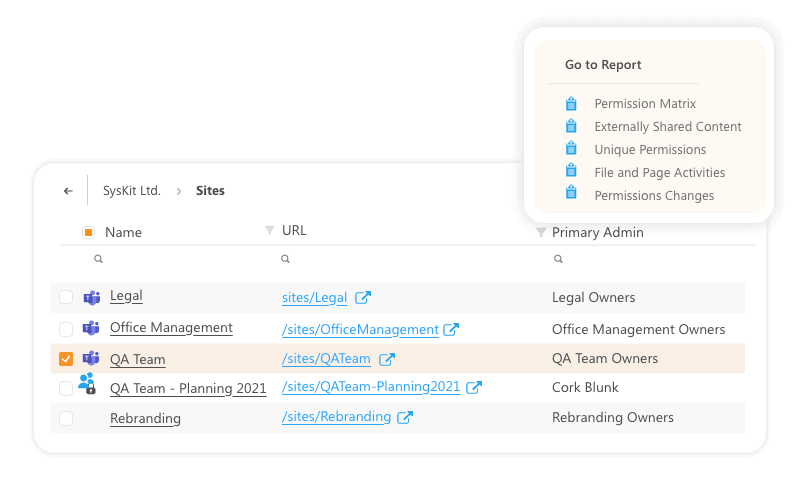
- Navigate to Sites. Here you will see a list of all the workspaces you own.
- Use global or column search to find the workspace you want to explore.
- Select the checkbox next to the name of that team, group, or site.
- Select the Permissions Matrix on the right-side menu to explore access to this team, group, or site in detail.
Pro tip to get all Office 365 permissions in a report
If you wish to report on multiple teams at once, select a checkbox next to all the workspaces you wish to review the access for and repeat the action to get all of the Office 365 permissions.
Below each shared file, you’ll find a list of people who can access this file directly and a list of sharing links giving access to additional users.
If you wish to stop sharing files using the anonymous link or remove direct access from a user, click the checkbox next to that person, and choose some of the available options:
- Remove access – stop this user from accessing your files.
- Edit Office 365 permissions – increase or decrease the level of SharePoint permissions this user has (e.g., your marketing vendor should not have full access, just read).
- Remove sharing link –prevent people from accessing this file via link by deleting it.
Actions are performed in real-time, and the report will show the latest info immediately as well.
Check access to a particular file or document
It is easy to detect who has access to a particular document as well. For example, you want to make sure that a crucial financial reporting document that is sensitive is accessible only to you and your chief financial officer. To validate who has access to it:
- Navigate to Sites.
- Using global search or column search, find the specific workspace you are interested in.
- Click on the name of the workspace you wish to review.
- Use the Content tile to select a specific file you would like to explore.
- Click on the name of the file or folder to get more info about it.
- Click on the Explore button in the Permissions tile.
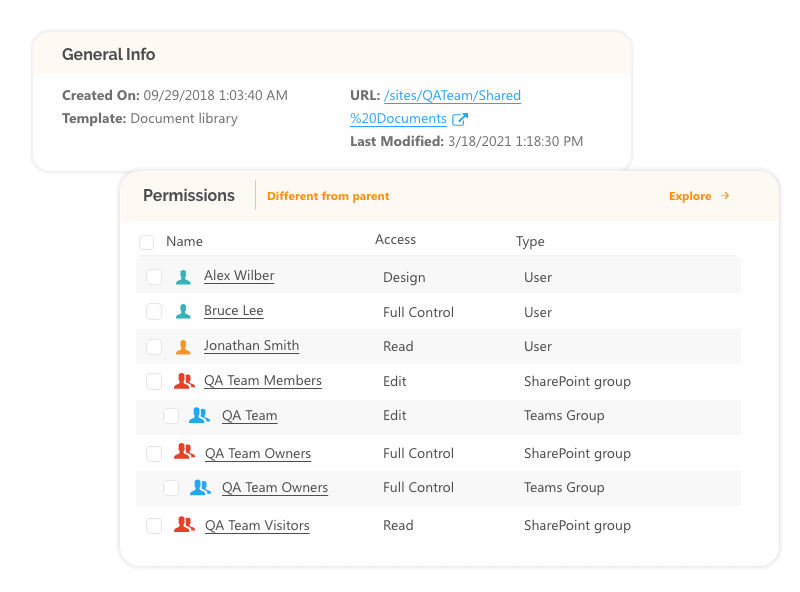
Here, you see all users and all types of groups (Microsoft 365 Groups, SharePoint groups, and security groups) that have access to this file. To remove a person or a group that are no longer valid collaborators or shouldn’t have access in the first place. Click on the checkbox next to it and use action Remove Access to manage their access directly from here.

Review all users with a user overview
Another case in which Syskit Point comes in handy is getting a list of all people who have access to your teams/groups without investigating their access file by file. To quickly get that kind of high-level overview:
- Navigate to Sites using global search or column search, find the specific workspace you are interested in.
- Click on the name of the workspace you wish to get this kind of report.
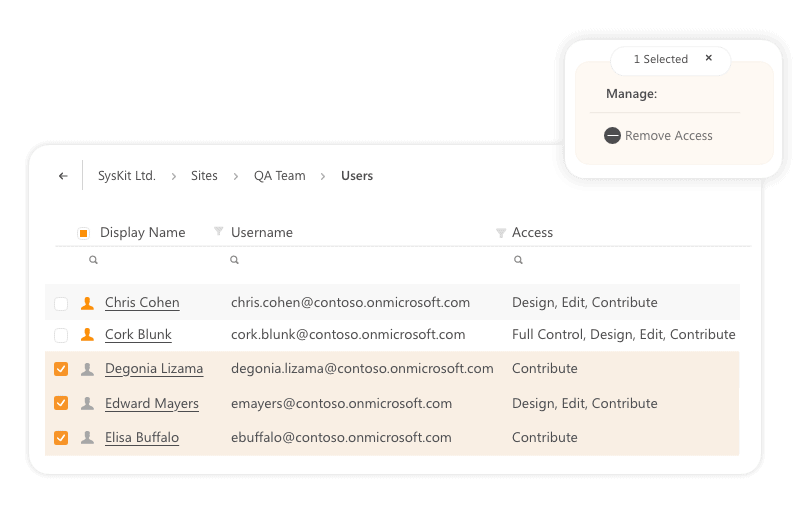
- Click on the Users in the Overview.
The report will give you a list of users and details of which kind of access they have and how they received access (directly on a specific file or through a membership).
If a user on the list is no longer collaborating with you, click on the checkbox and use the Remove Access action.
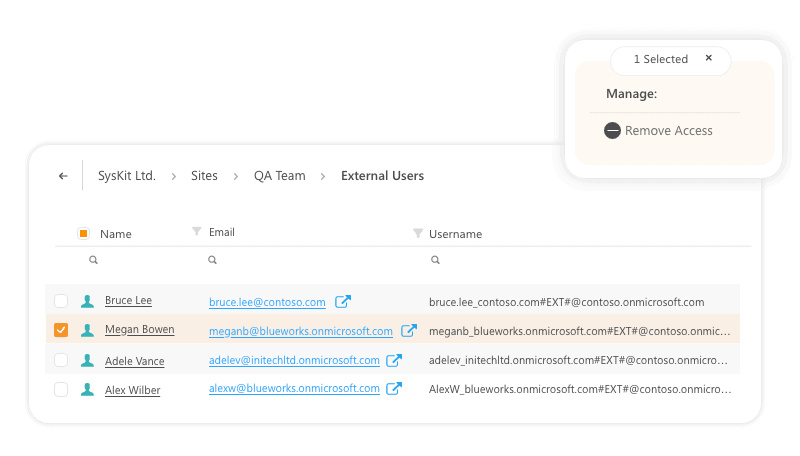
Check all external users with an external users overview
Syskit Point can help you check which external vendors have access to your content as well. These are people outside your company who require regular access recertifications.
- Navigate to Sites using global search or column search, find the specific workspace you are interested in.
- Click on the name of the workspace you wish to get this kind of report.
- Click on the External Users in the Overview.
The report will list external users, domains from which they are logging in, and details on who initially shared content with this person and when.
If a specific user is no longer collaborating with you, click on the checkbox next to its name and use the Remove Access action to stop the guest user from accessing this workspace.
Pro tip:
To review all external users on multiple teams and groups from a central place, navigate to Reports and select the External Users report. Here, you will see all external users from all the sites and teams you own.
Check all files shared externally with the externally shared content report
If you wish to explore the exact files the external users can access, use the External Sharing report.
To generate such a report:
- Navigate to Sites.
- Select Externally Shared Sites from the left-hand side drop-down menu. This view will show you all the workspaces with external users.
- Select the checkbox next to the name of that team, group, or site. You will notice that additional options appear on the right.
- Select the Externally Shared Content report to explore this team’s access in detail.
Pro tip:
If you wish to report on multiple workspaces at once, select a checkbox next to all workspaces you wish to review and repeat the action.
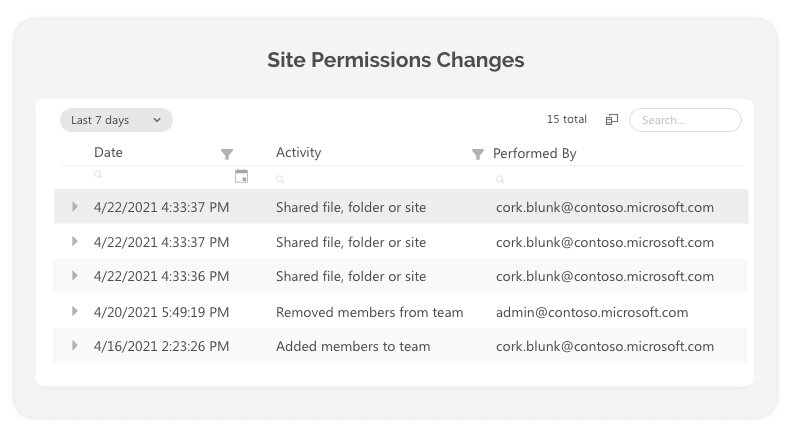
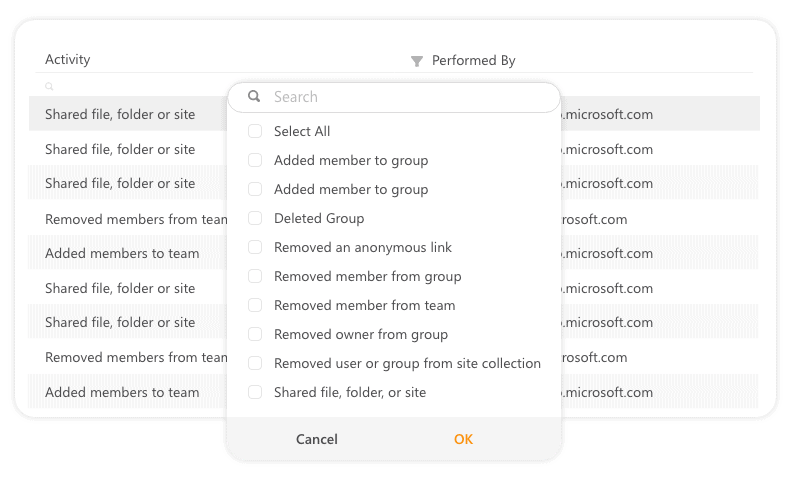
Detect who shared a specific file or removed access to your team members
If a user has access to a wrong site or team or another one complains that they lost their access, Syskit Point will give you the answer. You can quickly review all access modifications that people performed on your desired team with a Permission Changes report.
- Navigate to Sites using global or column search, find the specific workspace you want to explore.
- Click on the name of the workspace you wish to get this kind of report.
- Click on the Permission Changes in the right-hand side panel.
- Explore all sharing activities and changes in user access to troubleshoot and detect issues in minutes.
Additional options and reports are available. But this is quite enough to get you started on your quest for quality access reporting and management.
Let us know what you think!