How to create a company-wide email signature and disclaimer in Outlook
Table of contents
Want to keep your brand and messaging consistent and compliant – while also saving time? You need a company-wide email signature. Want to help make sure your signatures are compliant? You also need company-wide disclaimers.
Of course, nowadays, “company-wide” can be taken literally. Where employees increasingly work remotely across wide areas including the home, office, and on the move. That’s why it’s essential to centralize managing and updating signatures and disclaimers, and there is no need to ask every employee to configure their own.
Plus, you can make every employee’s emails include details of launches, limited offers, or other temporary campaigns. Simply by updating one signature and disclaimer.
It’s all possible in Microsoft 365. We explain how below.
How to set a company-wide signature and disclaimer in Outlook
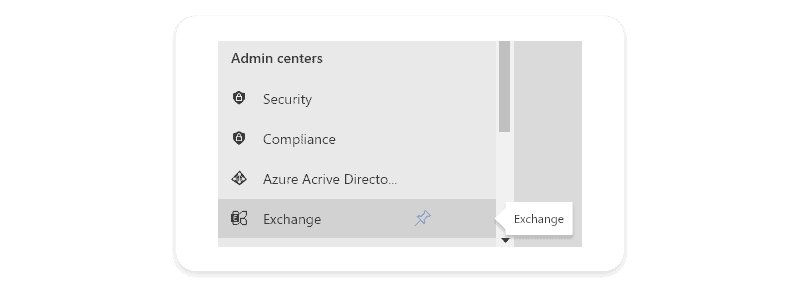
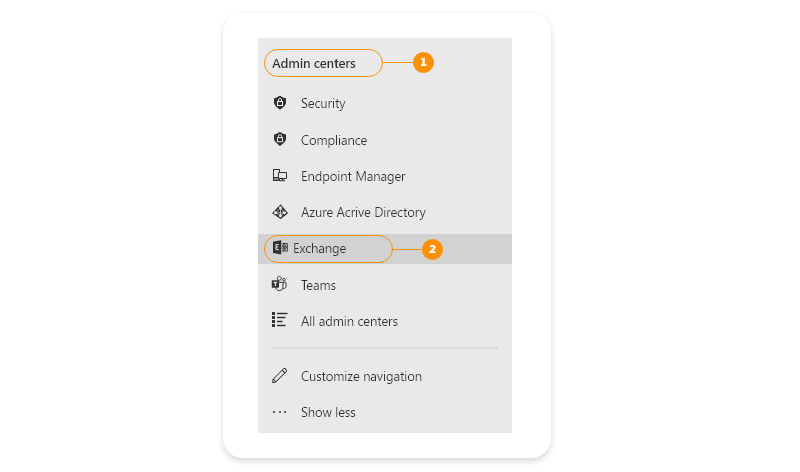
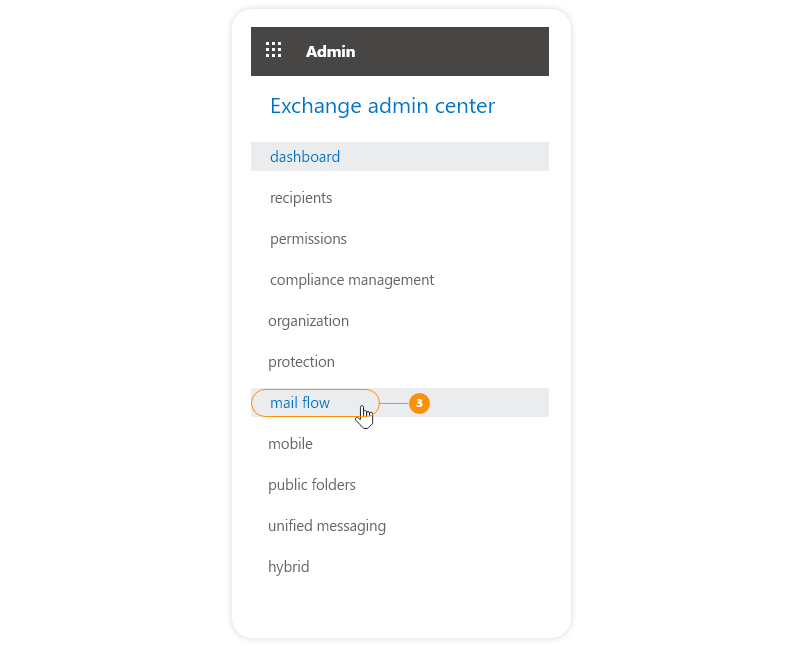
Within Microsoft 365, go to the Admin center and click Exchange:
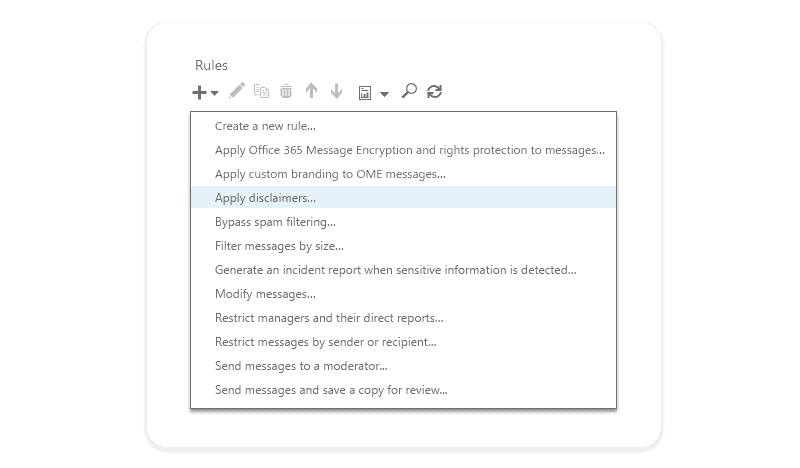
Click Mail flow > Rules:

Click + and then click Apply disclaimers:
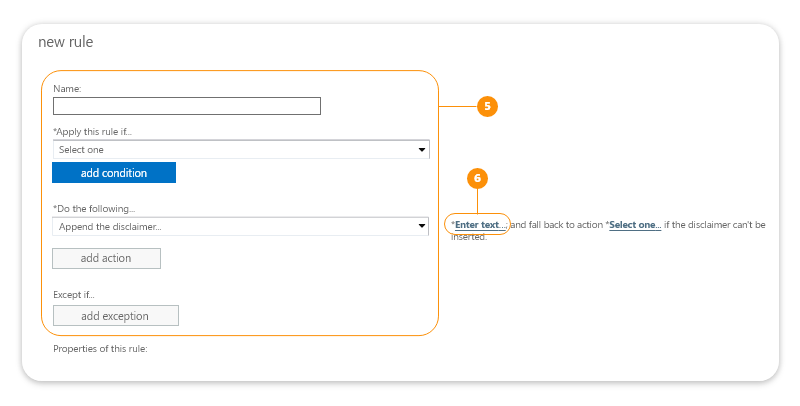
Add a name:

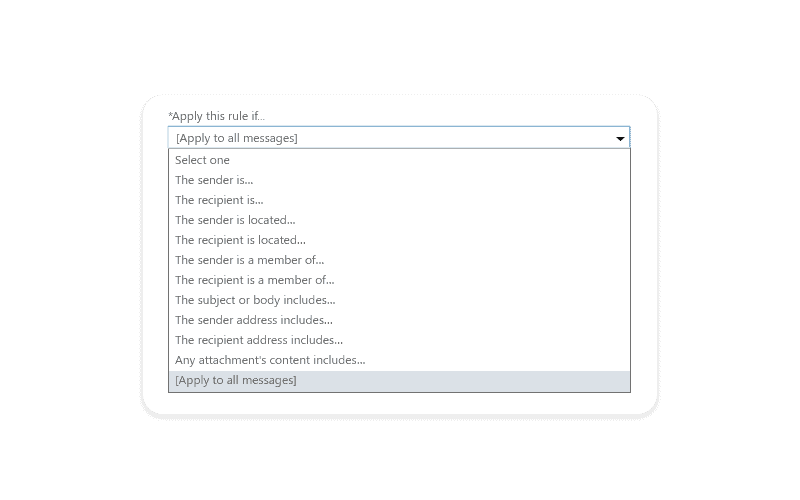
Click the “Apply this rule if” dropdown. Because this is company-wide, click Apply to all messages:
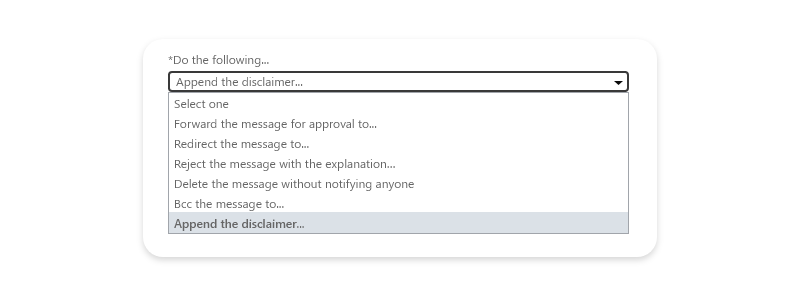
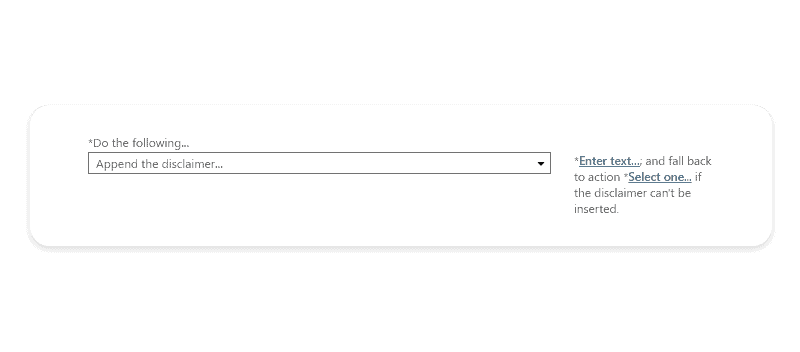
Click the “*Do the following” dropdown and click Append the disclaimer:
Now you’re ready to add the company-wide signature and disclaimer. Click Enter text, which opens a blank box:
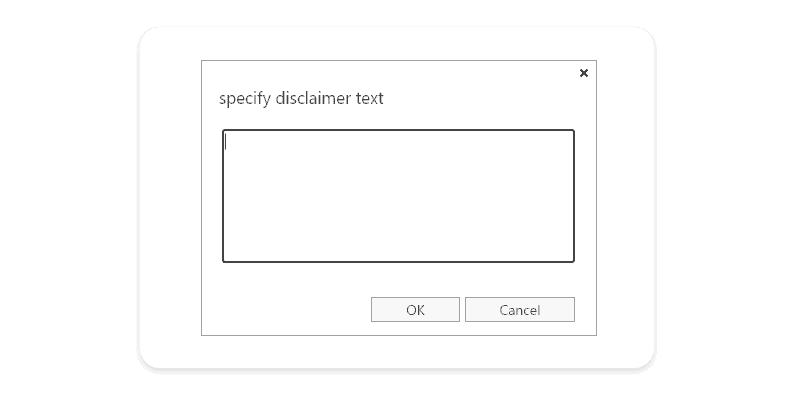
As you can see, there’s no editing toolbar. So if you want to format text, add images, or include hyperlinks, you’ll need to use html. Otherwise, everything you enter will appear as plain text.
How to automatically adapt email signatures and disclaimers for each user
Unless you’re an organization of one, you’ll probably want your emails to be personalized to each employee. With their name, contact details, or meeting link. This is done easily – it just relies on data you have in your Azure Active Directory. You insert tokens that change based on each employee’s data.
For example, imagine you have all employees’ business mobile numbers stored as tokens. Insert this token, such as %%MobileNumber%%, in the text. Make sure to use the %% syntax to enclose the attribute. This automatically displays the business mobile number belonging to each employee. These are Microsoft’s list of Active Directory attributes:
- City
- Company
- Country
- CustomAttribute1 – CustomAttribute15
- Department
- DisplayName
- FaxNumber
- FirstName
- HomePhoneNumber
- Initials
- LastName
- Manager
- MobileNumber
- Notes
- Office
- OtherFaxNumber
- OtherHomePhoneNumber
- OtherPhoneNumber
- PagerNumber
- PhoneNumber
- POBox
- State
- Street
- Title
- UserLogonName
- ZipCode
Fallback options if the company-wide email signature and disclaimer can’t be inserted
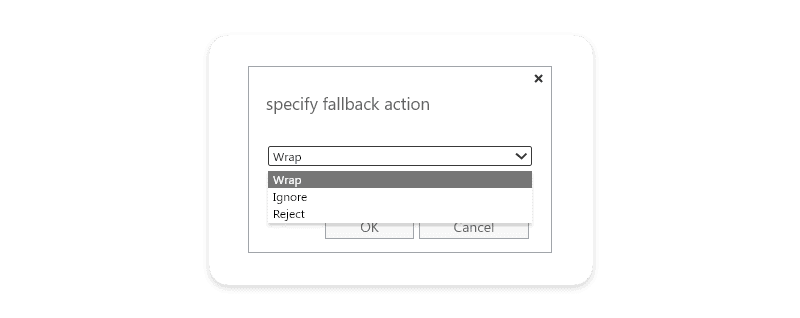
There may be times when the signature and disclaimer can’t be added to an email. Use the fallback option to tell Microsoft 365 what to do if this happens. Click Select one:
You’re given three options:
- Wrap
The email gets sent as an attachment, wrapped in a message envelope that contains the sender and recipient email addresses - Ignore
The email gets sent without the signature and disclaimer - Reject
The email doesn’t get sent

You’ve specified the conditions and rules for the email signature and disclaimer. It’s time to choose if it should appear in reports and message traces. You may need this for auditing or troubleshooting:
Choose Enforce to make the changes live:

Click Save, and that’s it!
Limitations when setting a company-wide email signature and disclaimer
Do you want to do any of these in Microsoft 365?
- Add signatures or disclaimers under the most recent email reply or email forward
- Show signatures or disclaimers in users’ Sent Items folders
- Embed images in email signatures
- Give users the freedom to choose their versions of signatures and disclaimers
- Assign signature and disclaimer editing to others within the organization
These functions aren’t possible out of the box with Microsoft 365. You’ll need a third-party service provider. Read on for a proven workaround.
How to solve Microsoft 365 limitations with company-wide signatures and disclaimers
When it comes to email signatures and disclaimers, control is crucial. Otherwise, you risk multiple governance-related risks, from including the right information to checking who’s sending out data via email.
With so many risks, organizations are increasingly choosing an all-in-one solution. Where governance, auditing, and analysis are done centrally, which you get with Syskit Point.
You gain a full overview of your Microsoft 365 environment. One interface shows you who has access to resources, helps you identify clutter, and builds a culture of always-on governance among team members. With so many use cases, Syskit Point can and is used by compliance managers, auditors, business users and Microsoft 365 admins.
With advanced analytics and reporting features, Syskit Point also functions as a BI tool. Discover Syskit’s features with a free 30-minute exploration.
Many businesses prefer a standardized signature that you can set through an administrator account. To create a company-wide email signature, follow the next steps:
Log in to the Office 365 portal with an administrator account.
1. Go to Admin Center.
2. Select Exchange.
3. Click Mail Flow.
4. Select the Plus icon and click on Apply Disclaimers.
5. In the New Rule window, name your rule and configure settings.
6. Select Enter Text to enter the text and HTML code.
7. Choose the preferred fallback action in case of problems with inserting the signature.
After adjusting settings to your company’s needs, select Save.