We talked a lot about what oversharing is, why it’s a security risk for your organization, and how it happens, but now let’s focus on the most important part: how you can fix it. Since oversharing is a complex problem, fixing it is also complicated. But don’t worry; our handbook has two sections focusing solely on helping you stop oversharing in Microsoft 365. Let’s start with how to stop new instances of oversharing from happening in your Microsoft 365 tenant.
Configuring sharing defaults
One of the easiest ways to stop oversharing in your organization is to configure Sharing Defaults. Sharing defaults basically means: If a user just clicks Copy Link, what type of sharing link will they create?
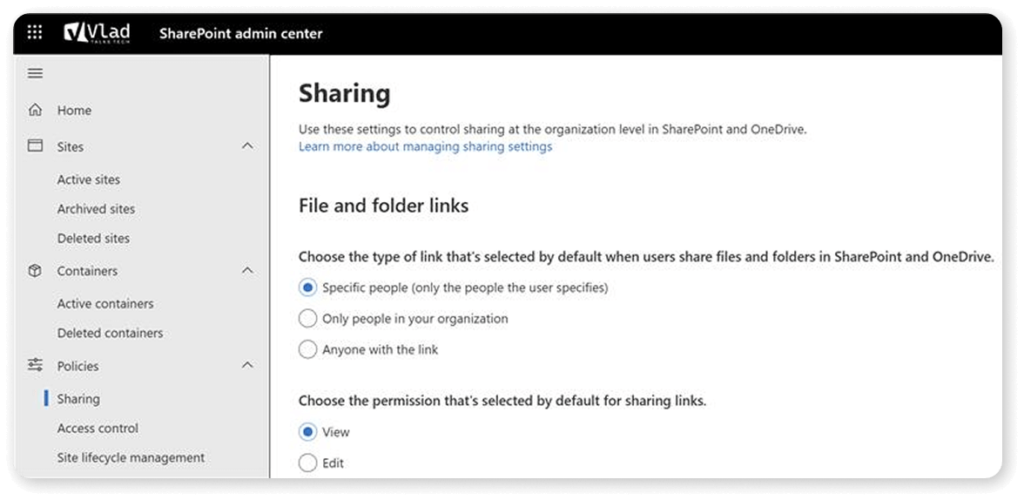
The first location we can configure this at is in the SharePoint Online admin center. Under Policies > Sharing you can Choose the type of link that’s selected by default when users share files and folders in SharePoint and OneDrive as well as Choose the permission that’s selected by default for sharing links.
We recommend setting those to the most restrictive option possible, which in this case would be:
- Specific People and Groups
- View Permissions
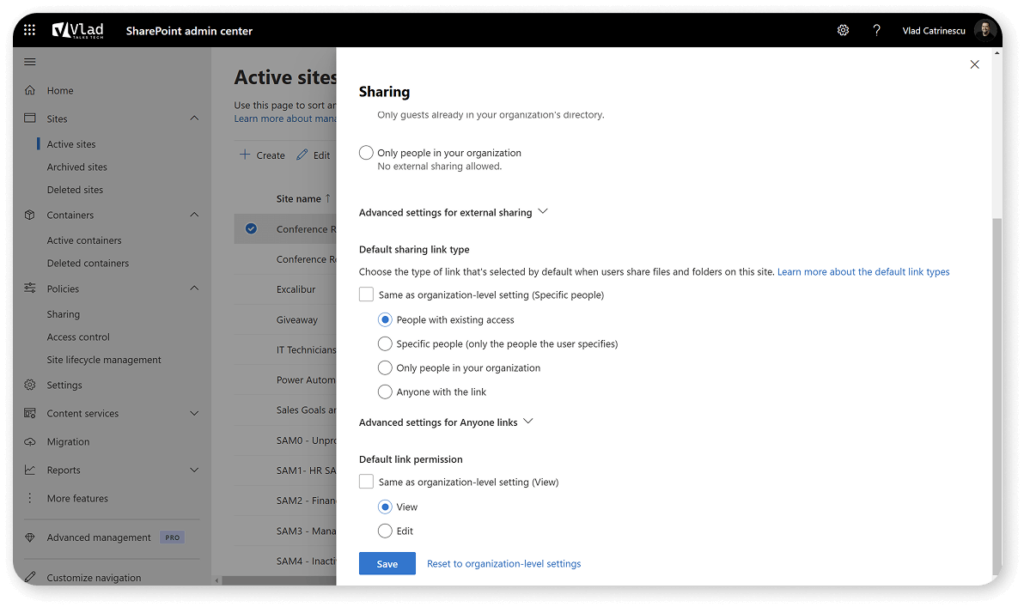
We can also configure this at the Site level by selecting a site, and then going to the sharing options. The default is the same as the organization-level setting, but here we have one new option which is exciting for the default link type:
- People with existing access
This means that, by default, creating a sharing link will not break permissions; it will simply copy the link for people who already have access to that piece of content.
It would be great if we had the option to set it to “People with existing” access at the organization level, but since we can’t, below is a PowerShell script that will loop through all the sites in your organization and set it to that. If you’re looking for more useful PowerShell scripts please take a look at our 5 useful PowerShell scripts blog post.
$sites = Get-SPOSite -Limit ALL | Where {$_.Template -ne "REDIRECTSITE#0" -and $_.Template -ne "SPSMSITEHOST#0" -and $_.Template -ne "POINTPUBLISHINGPERSONAL#0" -and $_.Template -ne "POINTPUBLISHINGHUB#0"}


foreach ($site in $sites) {


Write-Host -NoNewline "Changing settings for " $site.url


Try {


Set-SPOSite -Identity $site -DefaultLinkToExistingAccess $true -ErrorAction SilentlyContinue


Write-Host -ForegroundColor Green "  Settings Changed Successfully"


}


Catch {


Write-Host  -ForegroundColor Red " Failed to get info from " $site.url ". This can be because the site is locked or is using a template that does not support it"


}


}
Configuring external sharing allowed domains
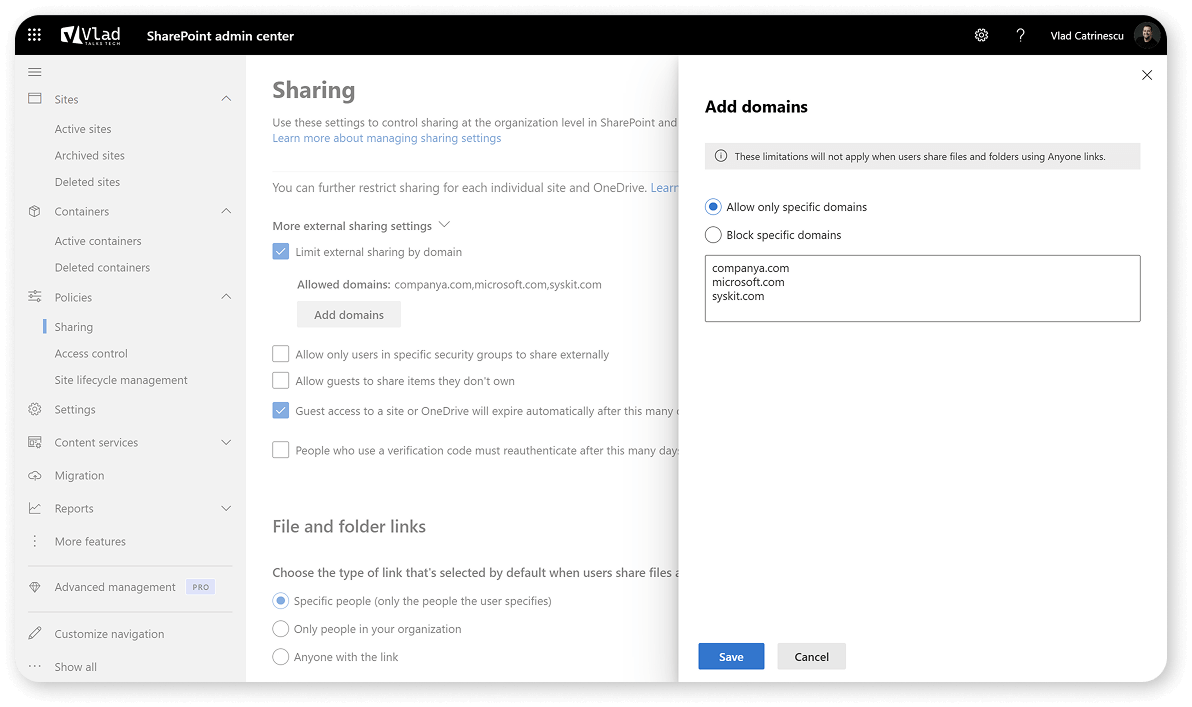
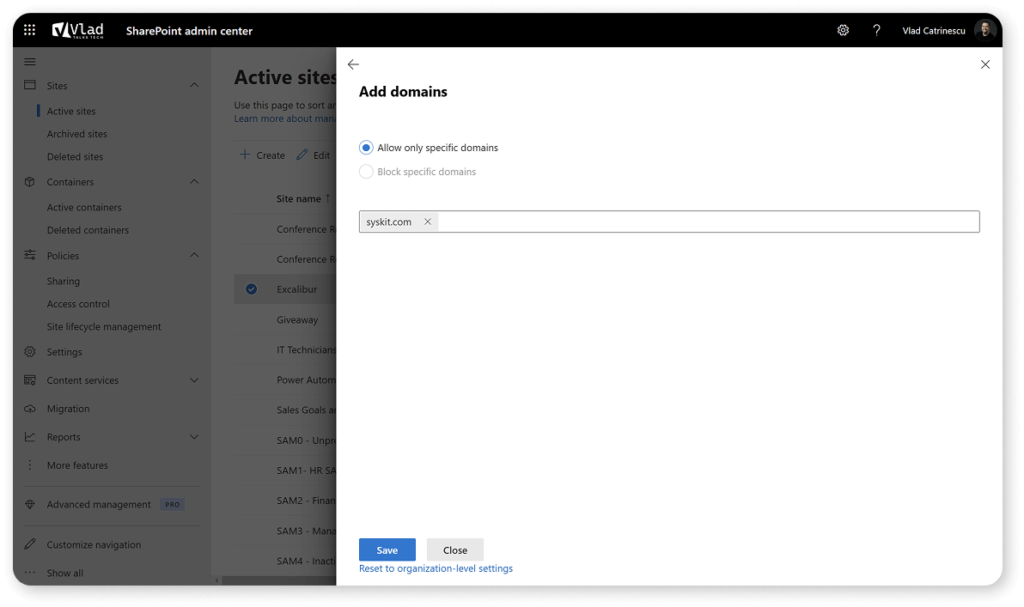
We don’t believe that Microsoft 365 admins should completely block external sharing. Instead, they should set up proper guardrails to ensure it’s done right. One way to do this is to configure the allowed domains for external sharing. Imagine this: whenever you work with a new company, the NDA or contracts are signed, and their domain is added to the allowed list in SharePoint.
Under Policies > Sharing > More External Sharing settings > Limit External Sharing by domain, you can configure either an Allow list or a Block list of domains. We suggest using the Allow list option and setting all the domains for the different organizations your company works with. This is also a great way of stopping your users from sharing with personal email addresses such as @hotmail.com or @gmail.com accounts.
After you configure allowed domains at the organization level, you can go to each site and then configure the allowed domains on that specific site. So, if a certain site should only have external accounts from one single client, you can set that site to only allow that. If you configure sites at the organization level, the site level may only have a subset of the organizational allowed sites.
As you configure your list of allowed domains, we highly recommend that you work with your Entra ID admin and your Teams administrator to ensure that your domain allow list is in sync between Entra ID, Teams, and SharePoint.
Configuring who can share externally
In addition to the domain allow list we discussed before, you could add restrictions on who can share externally inside your tenant. Let’s look at the technical part of the setting first, and then we’ll show you how to implement it.
In the SharePoint Online Admin Center, under Policies > Sharing > Allow only users in specific security groups to share externally, you can add security groups, and only the users inside can share with:
- Authenticated Users Only
- Anonymous users
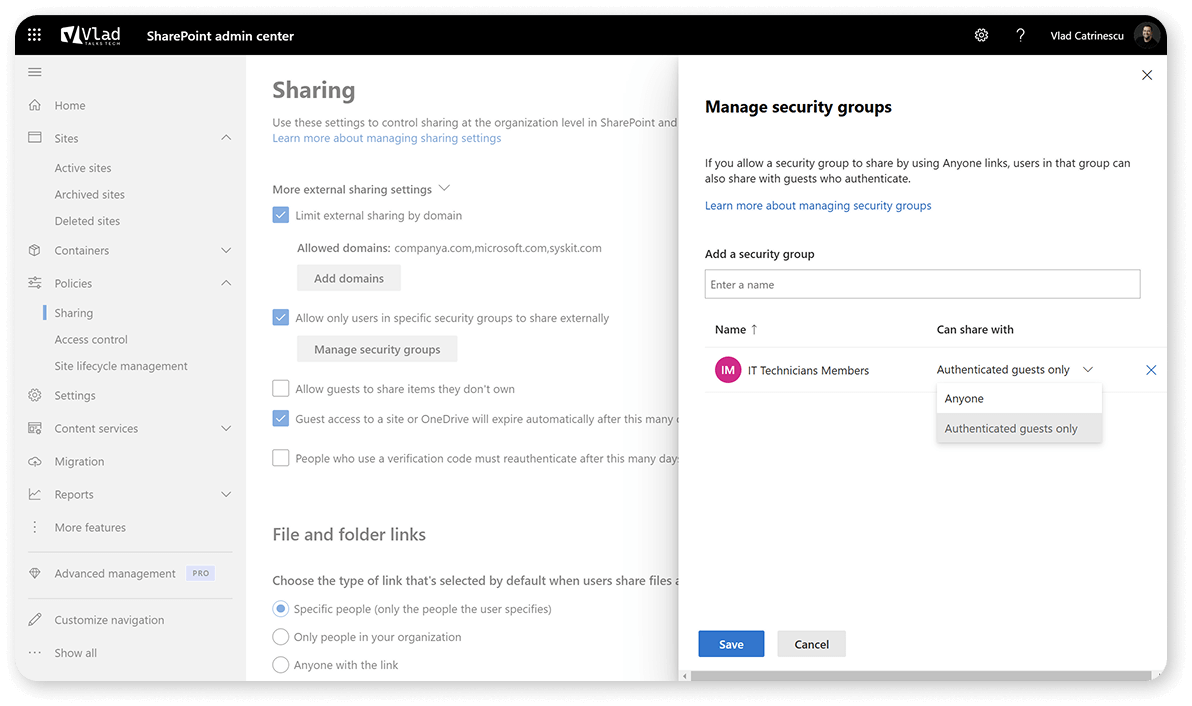
Now imagine that you implement a new policy where users can only share with Authenticated Users once they pass your IT Security level 1 training, and after they pass the IT Security level 2 training, they are also allowed to share with authenticated users. Or maybe you don’t want users in the R&D department to share externally but want to allow marketing to share anonymous links. This setting makes it possible.
Configuring container sensitivity labels
Sensitivity labels are slowly but surely being increasingly used inside every organization, and users are starting to understand the importance of using them for sensitive documents. What if, any time you create a new collaboration workspace (site, group, team), the user would have to select a sensitivity label.
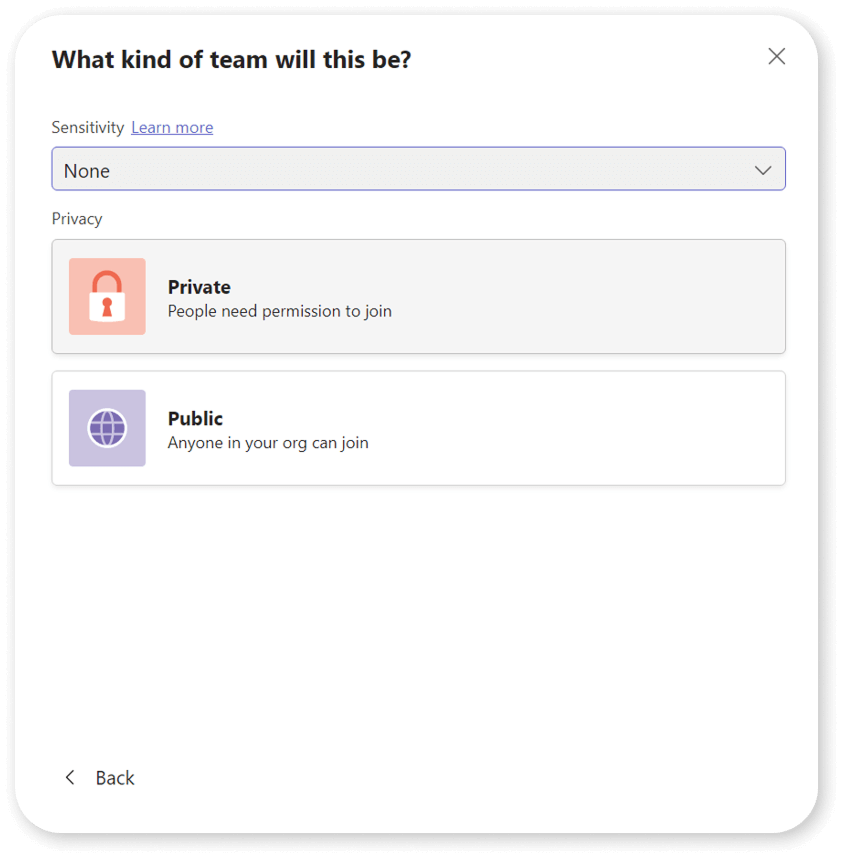
Depending on the site’s sensitivity, we could block the creation of public workspaces by default. This would reduce the number of public access groups, teams, and sites in our tenant and ensure that permissions are set manually to only the right people instead of containers being public.
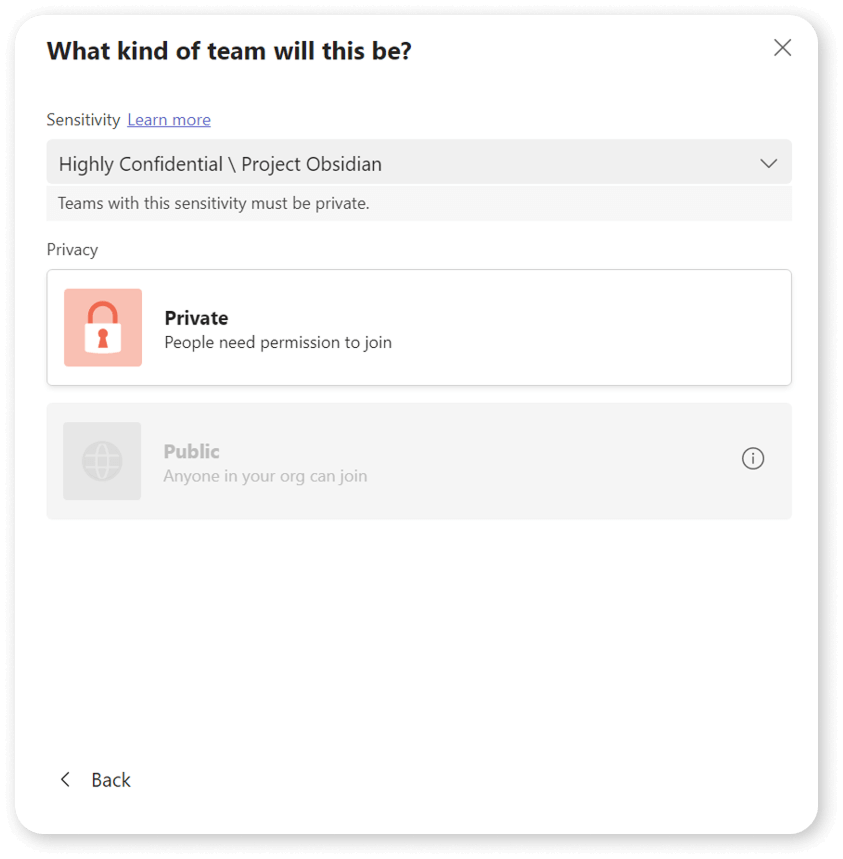
To enable this, you need to make a few settings. First, follow this guide from Microsoft on how to enable container labels inside your tenant. Next (you might need to wait 24 hours), when you create sensitivity labels, you will be able to define settings at the Groups and Sites level, as seen below.
.webp)
How to stop oversharing checklist
We have covered multiple configurations you can do in your tenant today to reduce oversharing in the future. We looked at settings as simple as changing the default link-sharing type so users do not create a link that’s too permissive for no reason, all the way to advanced settings like choosing who can share externally and configuring container sensitivity labels.
Here is the checklist on what you need to implement to stop new oversharing in your tenant.
- Configure Sharing Defaults at the tenant level to be as restrictive as possible.
- (Optional) Use PowerShell to apply the “People with Existing access” default at the site level.
- Configure allowed external domains at the tenant level.
- Configure allowed external domains at the site level.
- Configure container-level sensitivity labels.
- Apply container level sensitivity levels to existing ones.
In the next section of our handbook, we will learn how to deal with the existing overshared items in your tenant.