
Complete guide for Microsoft 365 file sharing
Table of contents
Sharing (and collaborating) on files is a ‘must-have’ for today’s users. Whether that’s customers, suppliers, or colleagues. Naturally, this is only possible when you can share files easily and quickly. That’s why there are plenty of different ways to perform Microsoft 365 file sharing. Business users, casual users, new users – below, we explore some of the options open to you.
How to share files in Outlook
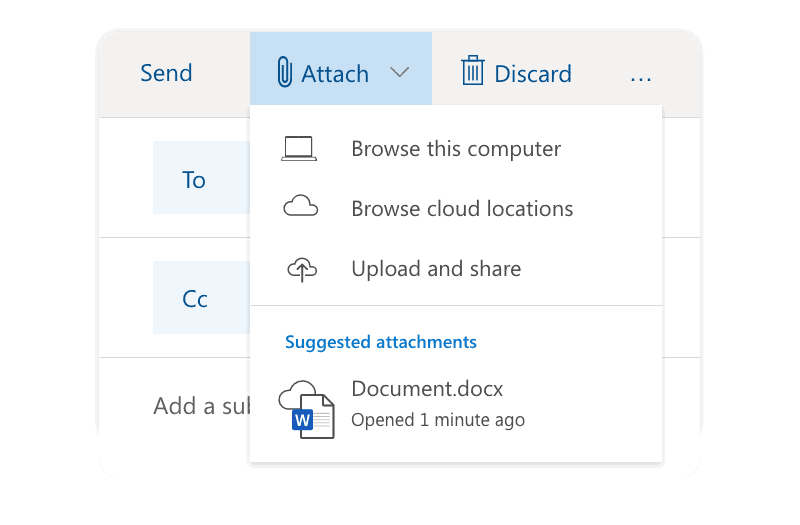
Create your email, as usual, click Attach, and you have the options to:
- Browse this computer
Shows files saved to your local machine. - Browse cloud locations
Shows files from online locations you’ve been using, such as SharePoint or OneDrive. - Upload and share
Enables you to upload a file to a folder in your OneDrive account before sharing. - Suggested attachments
Microsoft 365 shows a list of files you’ve recently been working on or have saved.
Outlook file sharing considerations
In the days before Microsoft 365, SharePoint or OneDrive, attaching a file to an email was a common way to share a file.
The problem was that once you sent a file to multiple people, they all had their own version of the file. Everyone would end up making their own edits to the file, without being able to see what edits other people were making. People would soon lose track of which version was the most up-to-date. The result: A messy reply-to-all free-for-all.
If you want to prevent that from happening, choose either ‘Browse cloud locations’ (if you’ve already uploaded your files to OneDrive or SharePoint). Or choose ‘Upload and share’ (if you haven’t yet uploaded your file to OneDrive or SharePoint). Sharing files this way also means you can access and share from multiple connected devices.
By the way, there’s another thing to consider when sharing via email. You always have to use your inbox to send. So, if you’re working in another app, you’ll have to exit and go into your email. If you don’t want to spend time doing that, try sharing files using a link (see below to find out how).
Microsoft 365 file sharing with a link
This method doesn’t involve opening your email inbox. Instead, you can generate a link for a file you want to share. You can paste this link into any external app you’re using.
How ‘shareable’ do you want your file to be?
Before sharing, let’s look at some different Microsoft 365 file sharing settings. Depending on how your admin has configured your Microsoft 365 account, you may see different default settings. Usually, these include being able to share files with:
- Anyone with the link
The simplest way to share files. Best for non-sensitive items where it doesn’t matter who sees them. - People in your organization
Limit file-sharing to other people inside your organization. Consider whether there is any information you wouldn’t want a colleague to see before choosing this option. - People with existing access
This keeps permission levels the same as when you received the link. - Specific people
You choose the people with who you want to share files. The link you share will only work for these people, and they may have to verify their identities to open the file.
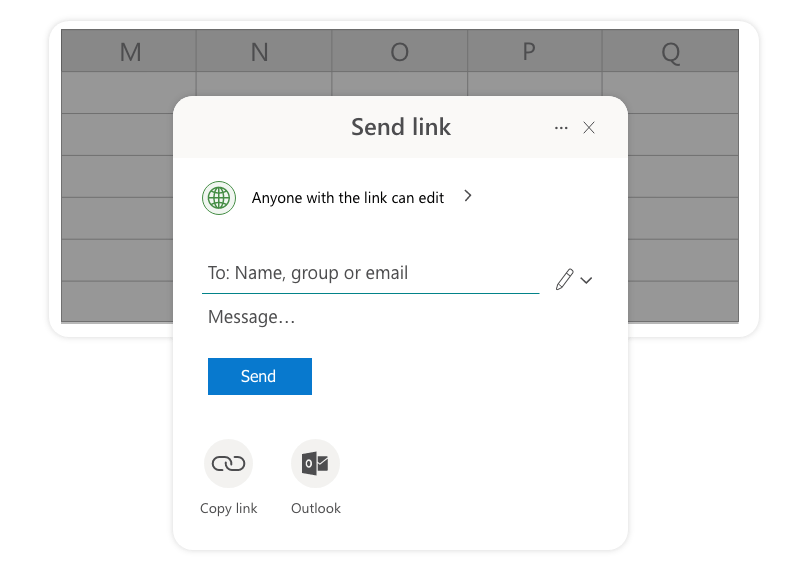
How to share files in Microsoft 365 by using a link
This is a great way to share your files with specific people via unique links.
To do this:
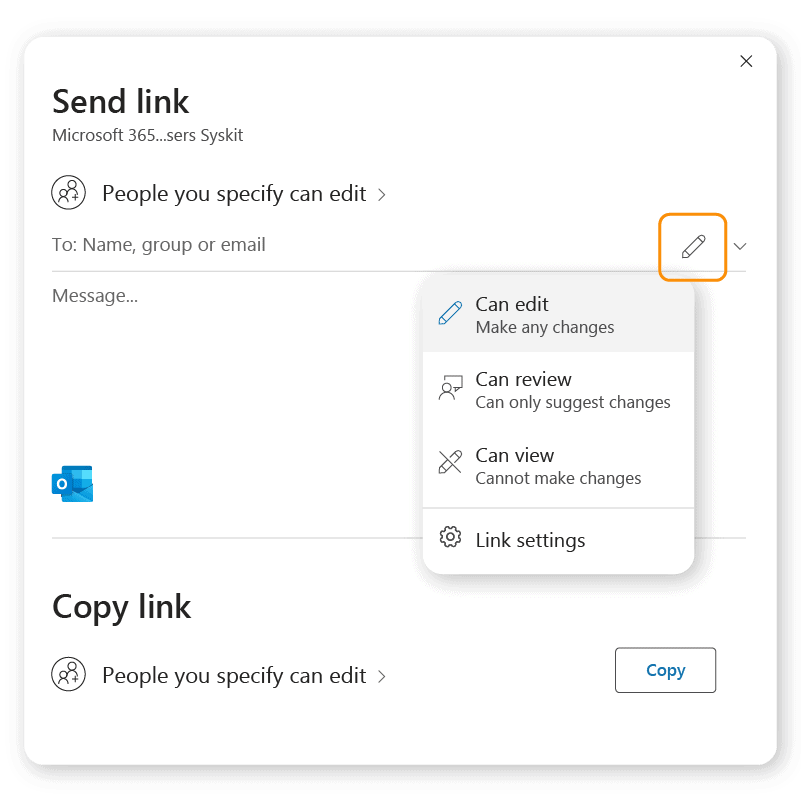
- Open the file you want to share.
- Click File>Share>Share with people.
- Choose who you want to share the file with by typing their name.
- Choose what permissions you want to give those users for this file by clicking the pen icon.
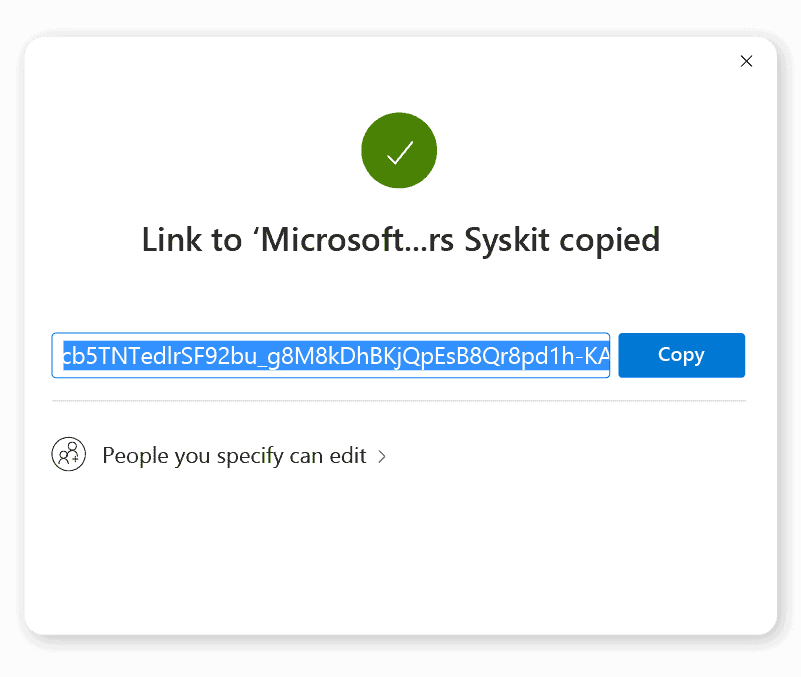
5. Under copy link, click “Copy”.
How to reduce the risks from external Microsoft 365 file sharing
External sharing means making files available to recipients outside your organization. Naturally, leaving the safety of your firewall carries risks. In particular, there needs to be some control over the level needed to access the documents.
External guest users can access the file the same way a team member can. Below are some ways you (or your admin) can mitigate the risks:
- Use shareable links that expire
The more links to your files are out there, the more chances you have of eventually having data compromised. Set a shared file to expire on a specific date, and you reduce these risks. You also make it less likely that people will find, use, or share out-of-date files. - Add a password
When you share a file, send your recipient/s a password – ideally via a different form of communication rather than sending it with the file. - Create folders
Put your shared files into folders based on your sharing permissions. For example, a folder titled “Anyone with the link” and another titled “Specific people.” That way, you’ll always know the permission levels of each file just by looking in which folder it’s stored. - Limit the device access
Ask your Microsoft 365 admin to enable Azure AD conditional access policies to block or limit access to your files from unmanaged devices. - Enable two-factor or multi-factor authentication
Your admin can do this through Azure AD, adding a conditional access policy that can be applied to SharePoint.
Sharing files by embedding
This is a great way to share files directly onto your website without uploading them to a Content Management System.
- Open the file you want to embed.
- Click File>Share>Embed.
- You can now change the file dimensions and level of interactions before embedding:
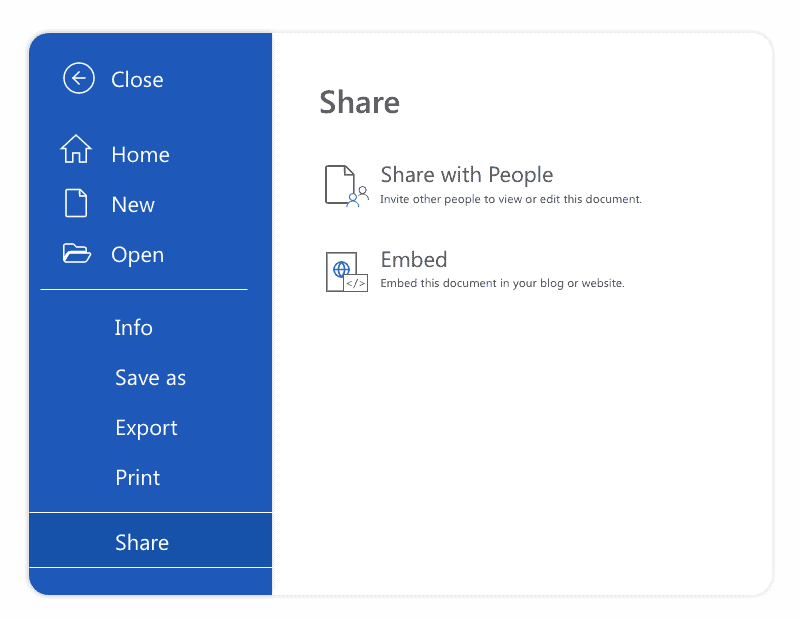

- Copy the embedded code and paste it onto a webpage to share the file.
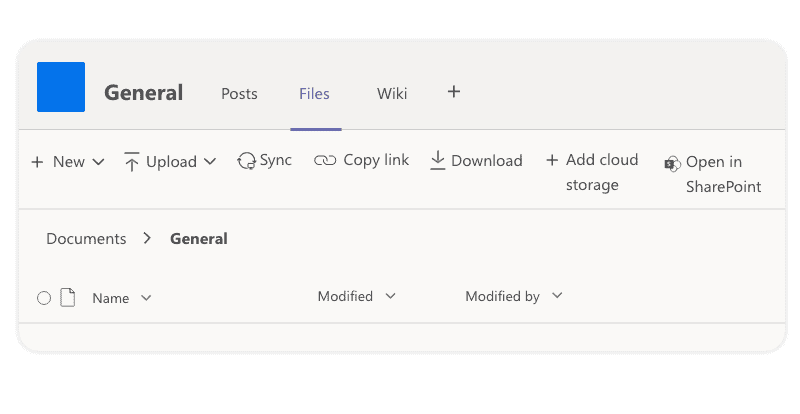
SharePoint file sharing
This method is ideal for when you want to share files with your team. These could include documents created in apps such as Word or Excel, document libraries, and intranet stories.
Head to your team site in SharePoint. You’ll see different options to share files.
For example, under Activity, you can share files uploaded to OneDrive:
- Click Upload a document:
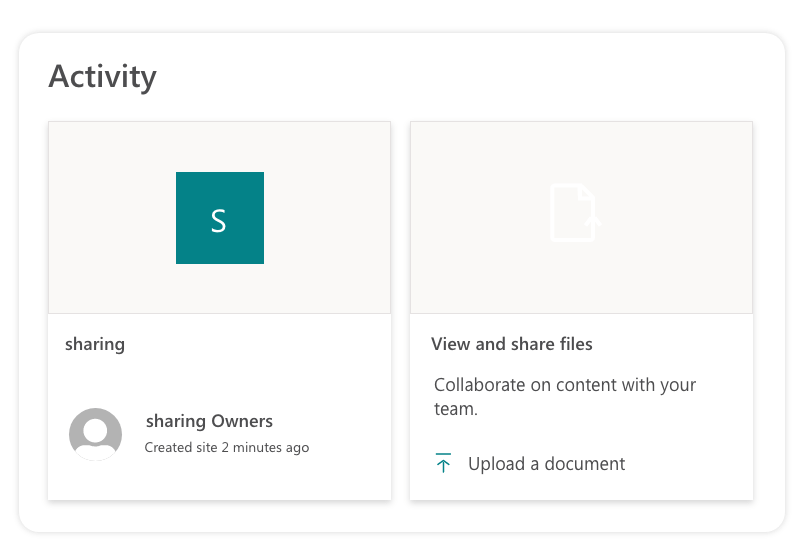
- This takes you to where you can upload files from OneDrive:
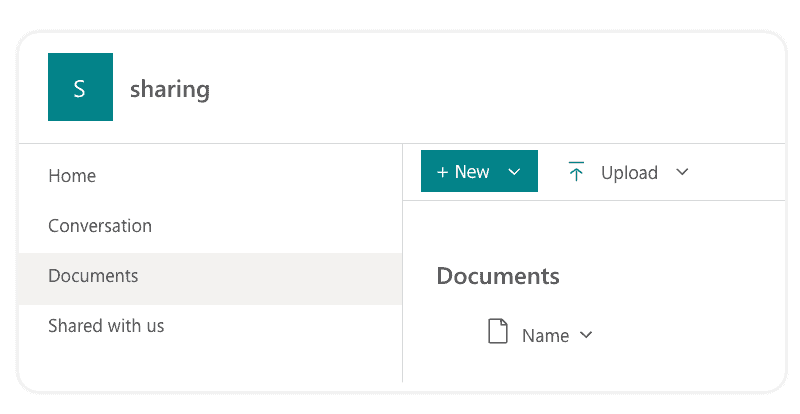
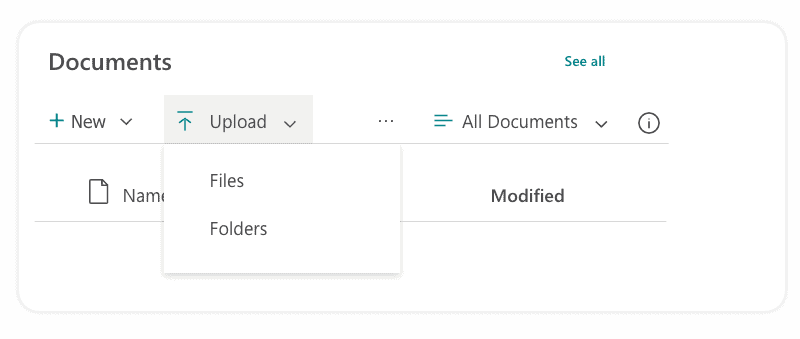
Alternatively, under Documents, you can upload files from your computer.
Either click the down arrow next to Upload…
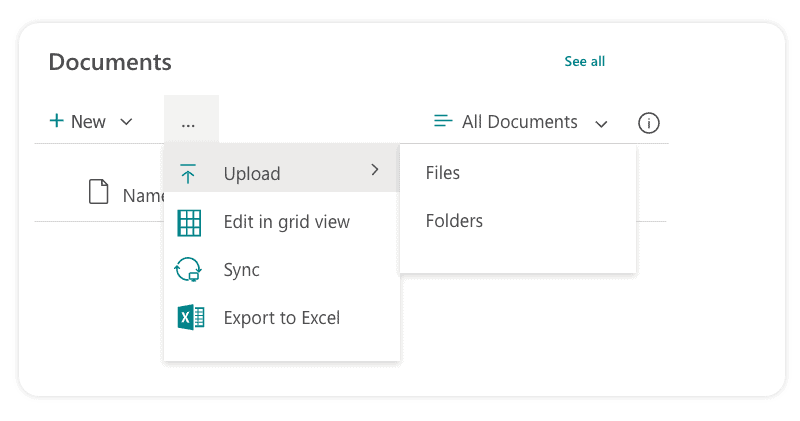
…or click the three dots next to Upload:
Copy the embedded code and paste it onto a webpage to share the file.
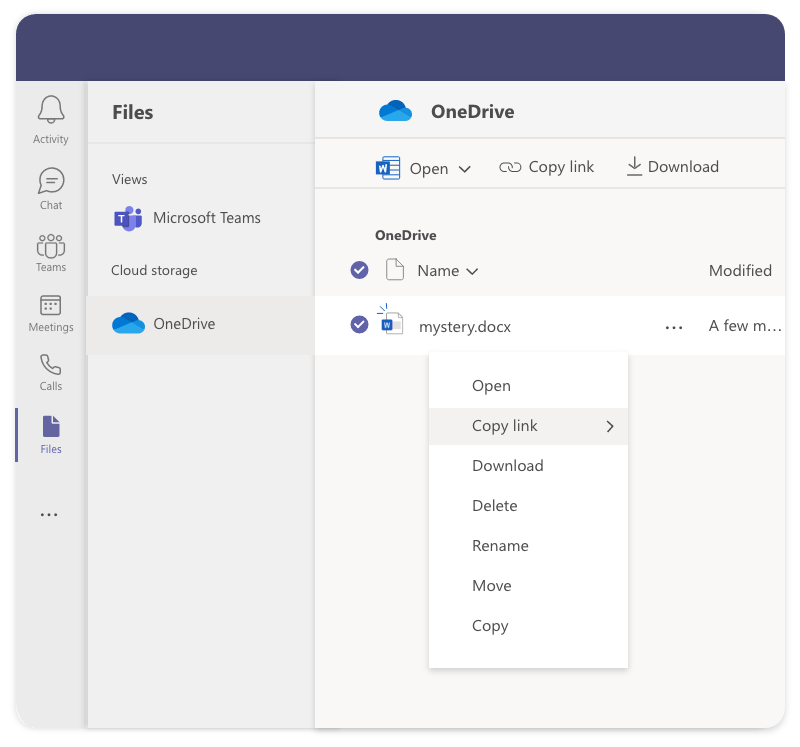
OneDrive file sharing
Files stored in your OneDrive aren’t shareable by default. However, maybe you may want to share a file occasionally without spending time uploading it to SharePoint first.
If the file is already open, click File>Share>Share with People.
Otherwise:
- Open OneDrive.
- Find the file you want to share.
- You can either right-click on it and click Share or click the Share button at the top to open this box:
- Click on Anyone with the link can edit, and you will see different options for sharing, which include Other settings:
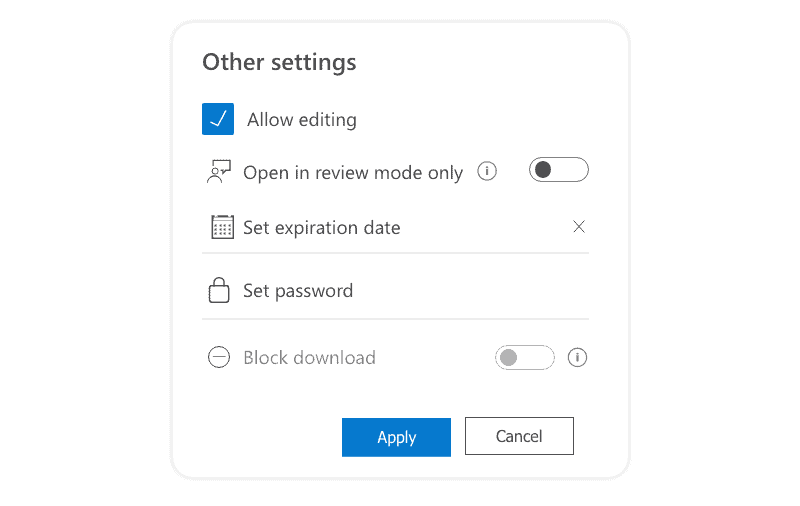
- To block downloads or prevent people from making edits to the file, untick Allow editing.
- To allow users to be able to comment on (not edit) your shared file, toggle to Open in review mode only.
How to share a file in a Microsoft App
Here’s a quick way to send your file to people – without exiting your app.
With your file open:
- Click File>Share or click the Share button.
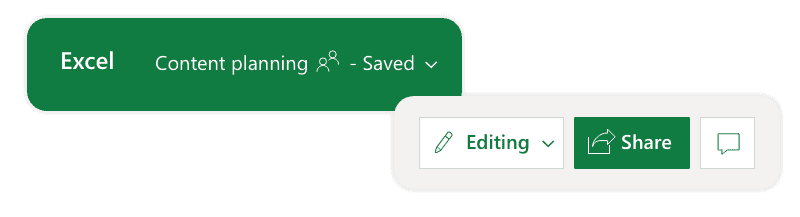
- You now have the option to send the file. Either copy the link to be pasted, or click Outlook to be taken to Outlook automatically and have an email created:
- Choose the level of access – for example, if you want to collaborate on the file.
How to share files in Microsoft Teams
There are two ways to share files in Microsoft Teams – by team or by file. To share via a team:
- Click the Teams icon on the left-hand side:
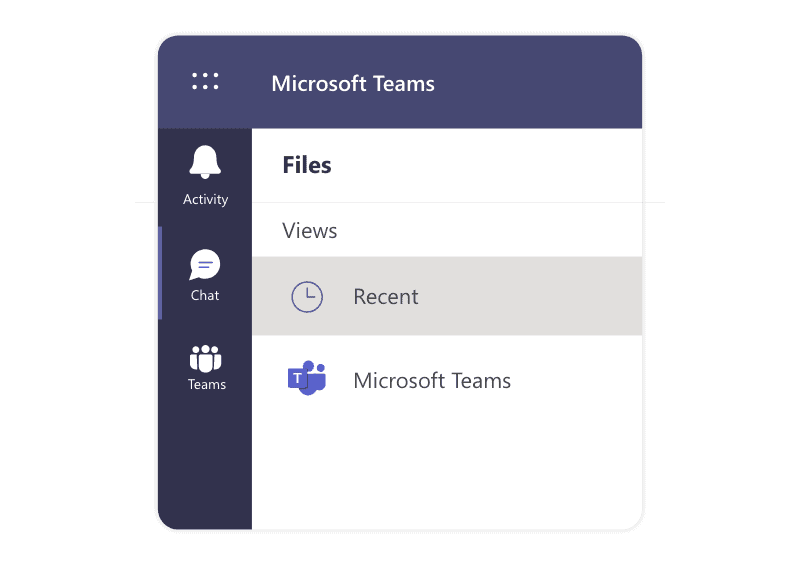
- You can now share the file with your team. Either by creating a new file, uploading an existing file, or copying the link to a file:
The second method is to find the file first and then share its link:
- Open Microsoft Teams.
- Click the Files icon on the left-hand side:

- Find the file you would like to share.
- Right-click and choose Copy link:
- This generates a URL that you can share.
After you’ve shared the file
Ok, you’ve shared the file – now maybe you want to know what happens to the file afterward. Perhaps you’re collaborating, and you don’t want to spend time constantly checking the file to see if it’s been updated. No problem – simply enable notifications. There are three ways to do it:
- In-app
Get a notification while you have the shared file open on your device. This is ideal for live collaboration when you want to comment and edit in real time. - Notification Center
Viewing the Notification Center, see everything that’s happening inside your shared file. To check your settings, press Windows logo key+A. - Email
Receive notifications via email whenever someone makes a change or adds a comment to your shared file.
As you can see, Microsoft 365 file sharing is easy – there are plenty of options to share your files quickly, securely, and in just a few clicks. Moreover, the ability to collaborate on live documents in real time is a game-changer, particularly in today’s world of online-first working.
How to manage Microsoft 365 file sharing?
However, with many options to share files in Microsoft 365 come many challenges. Making sure each team has the correct permissions. Checking individuals understand when to limit sharing of documents and know when to share in OneDrive rather than SharePoint.
To always have the correct answers to these challenges, check out Syskit Point. This role-based governance platform is for all Microsoft 365 admins, site owners, auditors, and compliance officers. It allows you to manage access and permissions, manage and report, and much more.


