How to create a basic provisioning system
If you are reading this section, it’s probably because the out-of-the-box functionality in Teams templates and SharePoint templates we covered in the previous section does not fit your needs. And almost everyone we talk to wants more control and customization options. This is where a custom provisioning system comes in.
As most Microsoft 365 professionals are aware, there is no one-size-fits-all approach to anything in Microsoft 365. Given that a provisioning system can take hours to weeks to build, depending on the controls you want to have inside, we will break this section into two pieces that build on top of each other. This first section will focus on a more basic provisioning system, while the next section will take it to the next level and see what you could build in an enterprise.
The pieces of a provisioning system
Although provisioning systems differ, they ultimately rely on the same building blocks, just on different technologies.
A request form
The provisioning process starts with a request form, where users submit a request for a new workspace and explain why they need it. Microsoft offers many choices when it comes to collecting data from our users. You could use a SharePoint List, a SharePoint List Form, Microsoft Forms, or even a Power Apps app that stores data in SharePoint or a database of your choice.
Automation tools
After the request is put in, we need to add automation, so we do not handle all those requests manually. There are two options in the Microsoft ecosystem for this: Power Automate and Logic Apps.
While both Power Automate and Azure Logic Apps have the same back-end, the best choice will depend on the actions you call, how many workspaces you provision, and your existing licensing. Some Power Automate functionality requires Premium licenses at $20$ per month, while Azure Logic Apps only pay per run, so there is definitely a calculation to be made for optimization.
Database and reporting
One of the advantages of a provisioning system is a database that stores information about each workspace you have. This doesn’t only include the basics, such as who requested it and the name, you could also include things such as:
- Project Code
- Cost Center
- How long do we need this workspace for
- External sharing and security settings
- And more
Templates
Our last component, which we will discuss in the next section, is templates. You will need to work with your stakeholders and plan according to your needs and get answers to questions such as what is a Project Workspace? What is an Onboarding Workspace? What components do we need for each one? We don’t want to create a Planner plan if our company is using a 3rd party tool, and what channels do we want in Teams, lists in SharePoint and so on.
Creating a basic provisioning system
We covered the components, but how do we put them together? In this guide, we will cover a simple provisioning system in which you, as an IT Professional, get control over what gets provisioned in your tenant. We will focus on templates and more in the next section, but this is the foundation of any provisioning system you will build.
The first thing you will do is turn off self-service site creation in SharePoint and self-service Microsoft 365 Group creation in Entra ID. This way, users will have to follow your new process.
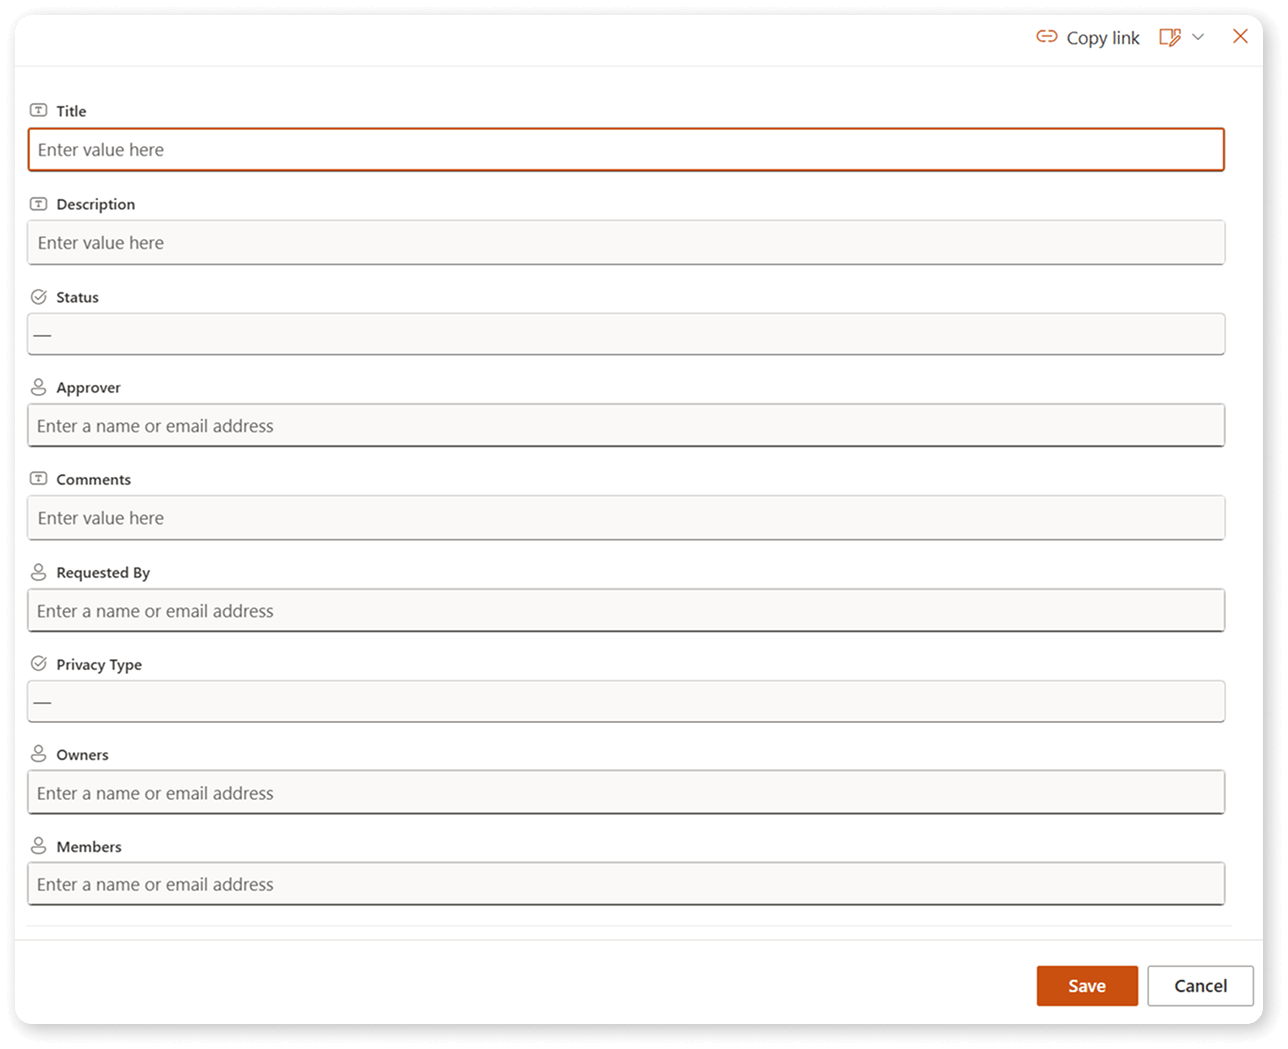
Then, we’ll need a SharePoint list with the following columns. Of course, you can adapt it to your needs, but for this basic provisioning system, here is what we will use.
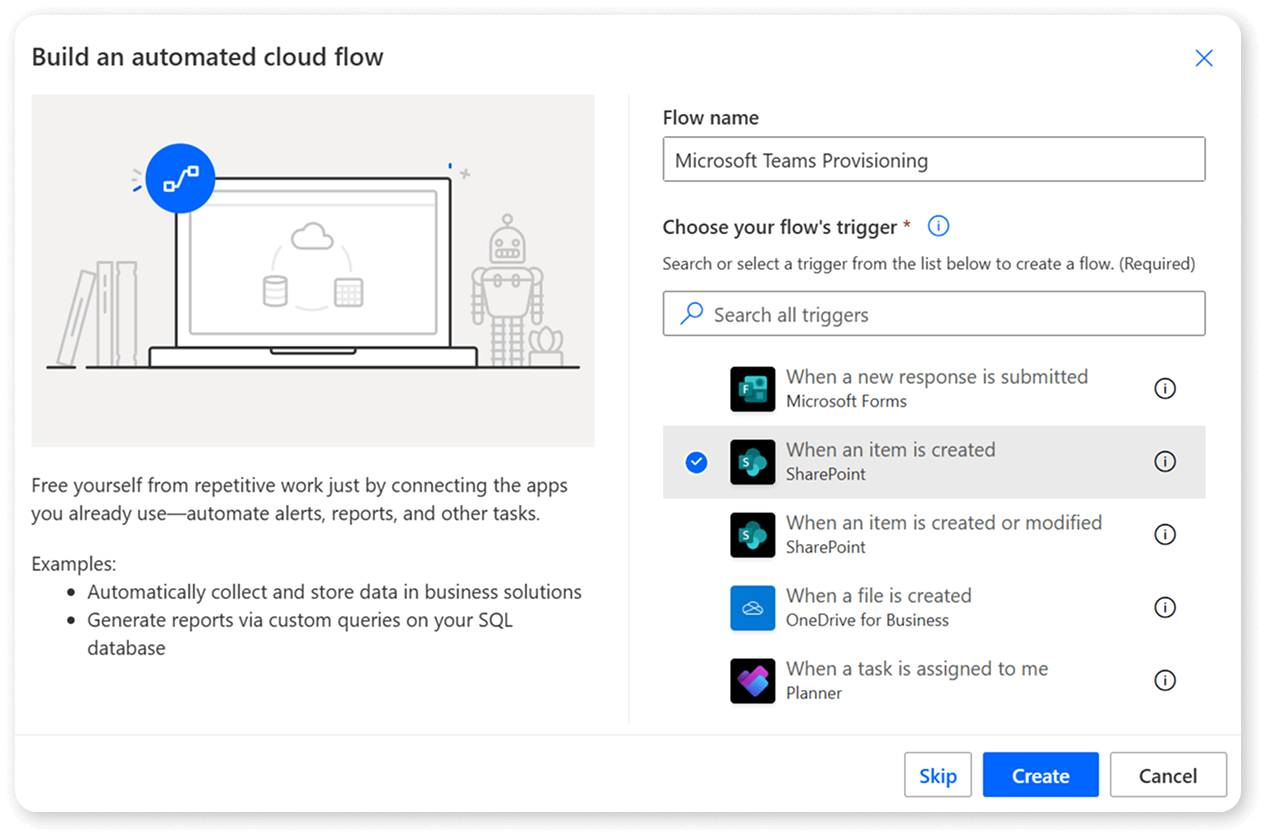
We will then go over to Power Automate and start a new automated cloud flow when a new item gets added to a SharePoint list.
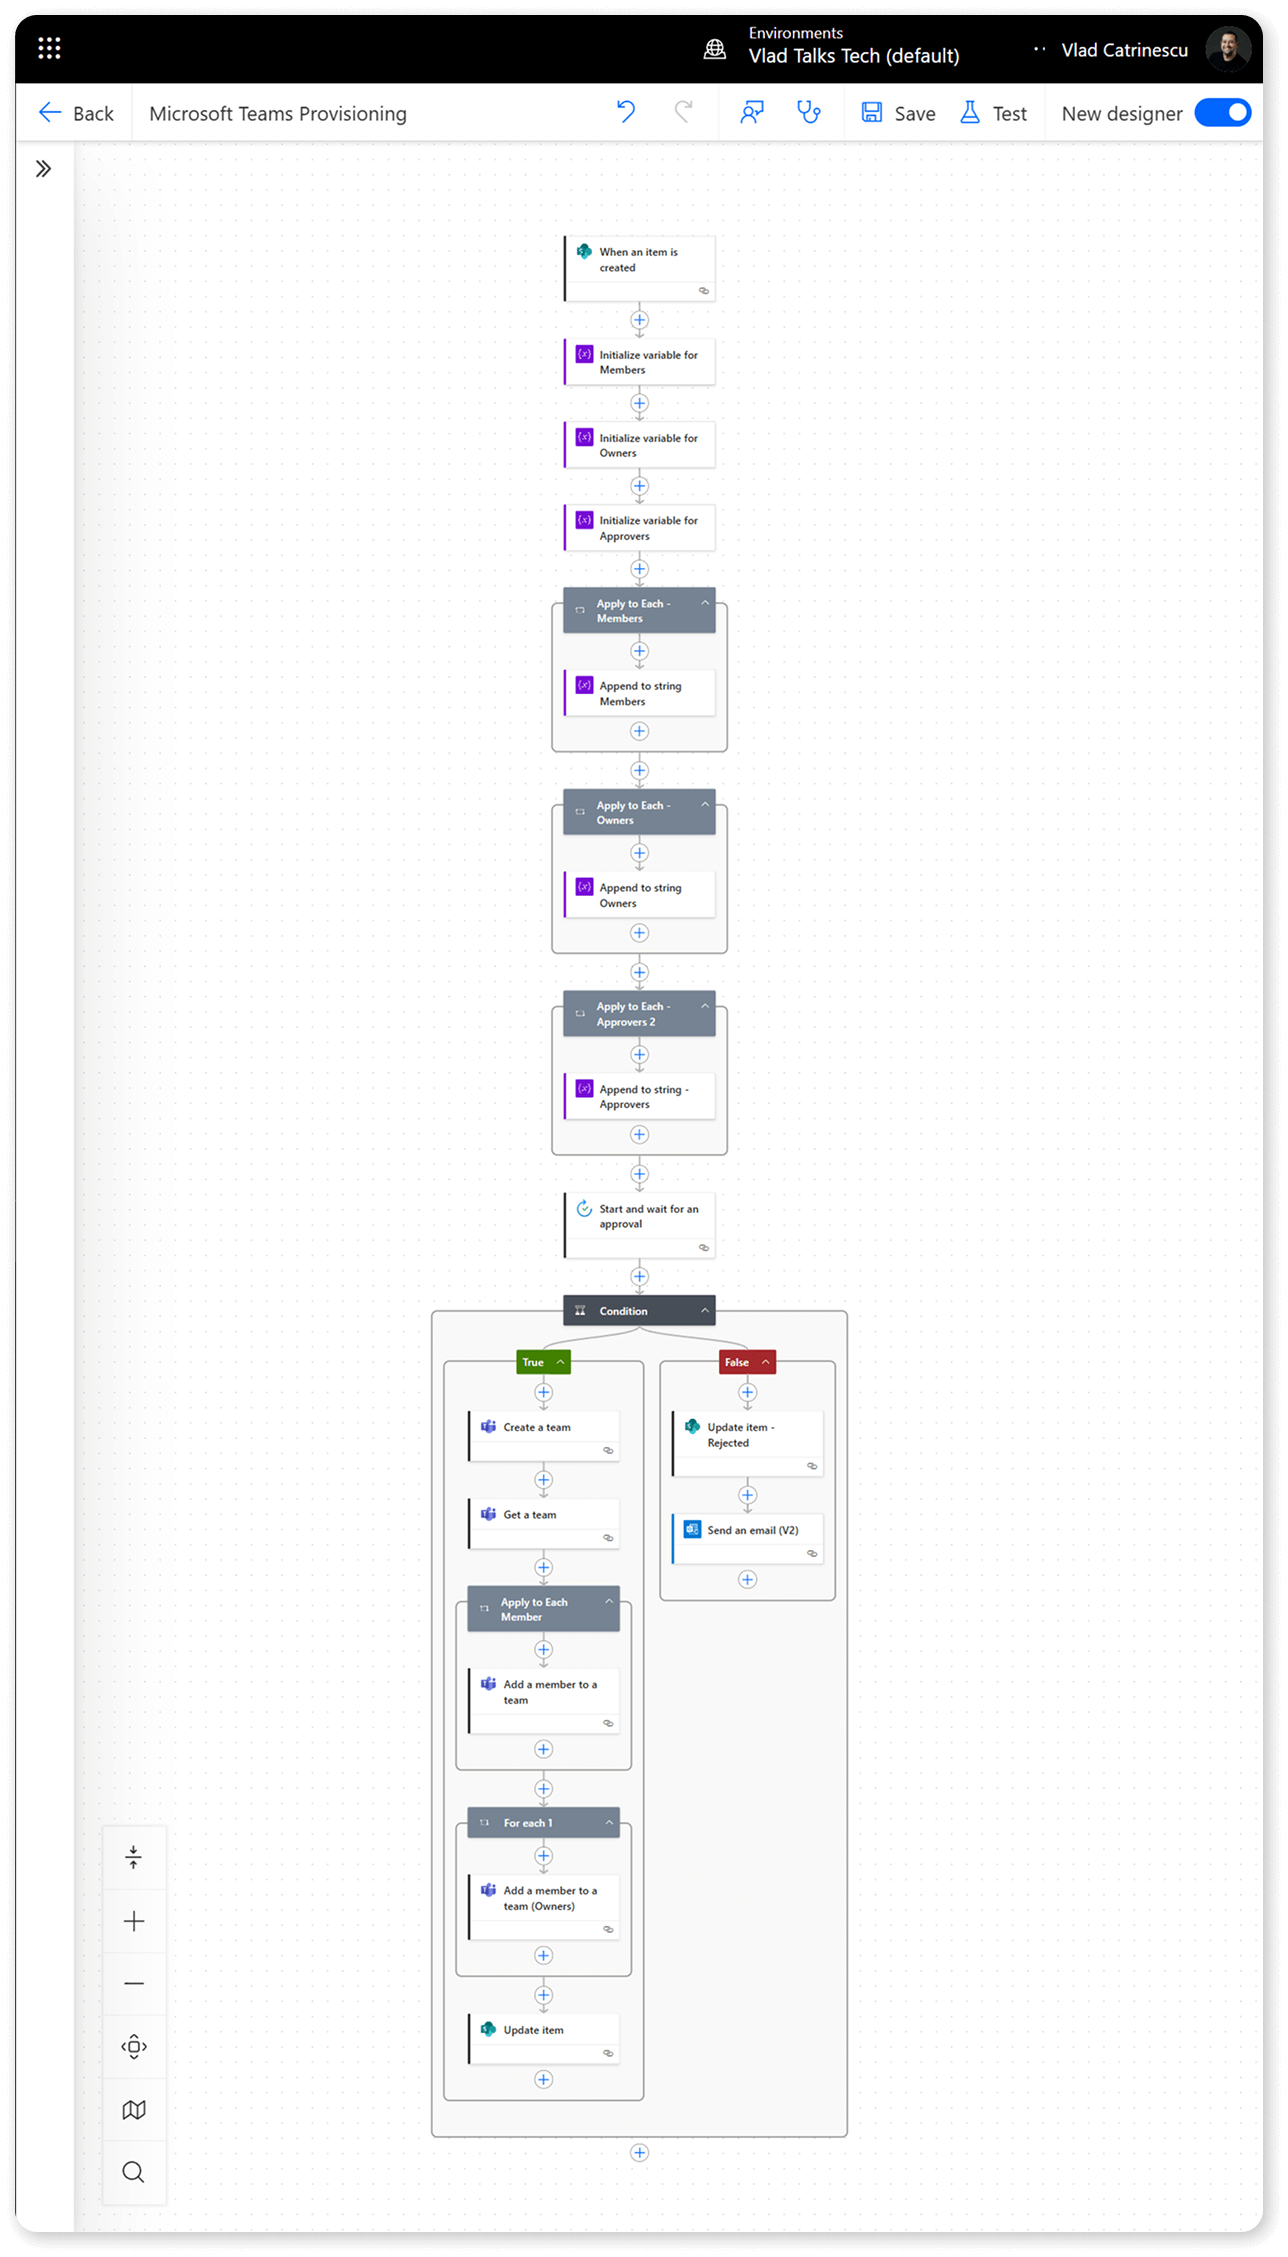
At a high level here is what the flow will do:
- Triggers when a new item gets added to our SharePoint List.
- Sends an approval to IT before the workspace is created.
- If the workspace is approved, it will create the workspace.
- It will add the owners and members specified in the request form.
- It will update the request form with the information about the workspace.
This is what the flow looks like at a high level:
If you want to see the steps in detail including what to put in every Power Automate action, check out the Microsoft Teams provisioning guide we created which gives you a step by step on how to build a simple provisioning process.
What’s next?
In this section we have looked at the basics of what’s inside a provisioning process and what you need to think about as you create yours. In the next section, we will truly take it to the next level and look at different technologies, such as PnP PowerShell, that allow you to create complicated templates that take into account your productivity and security requirements.