How to build a fully automated provisioning engine in Microsoft 365
In the previous sections of the handbook, we learned why we need a provisioning engine, what’s available out of the box, and how we can build a simple provisioning system.
While all of those are important to build a strong foundation, most enterprises usually want something with more options, more control, and more governance options.
In this section of our provisioning handbook, we will learn how to build an enterprise-ready provisioning system with all the features you might need.
Creating your workspace templates
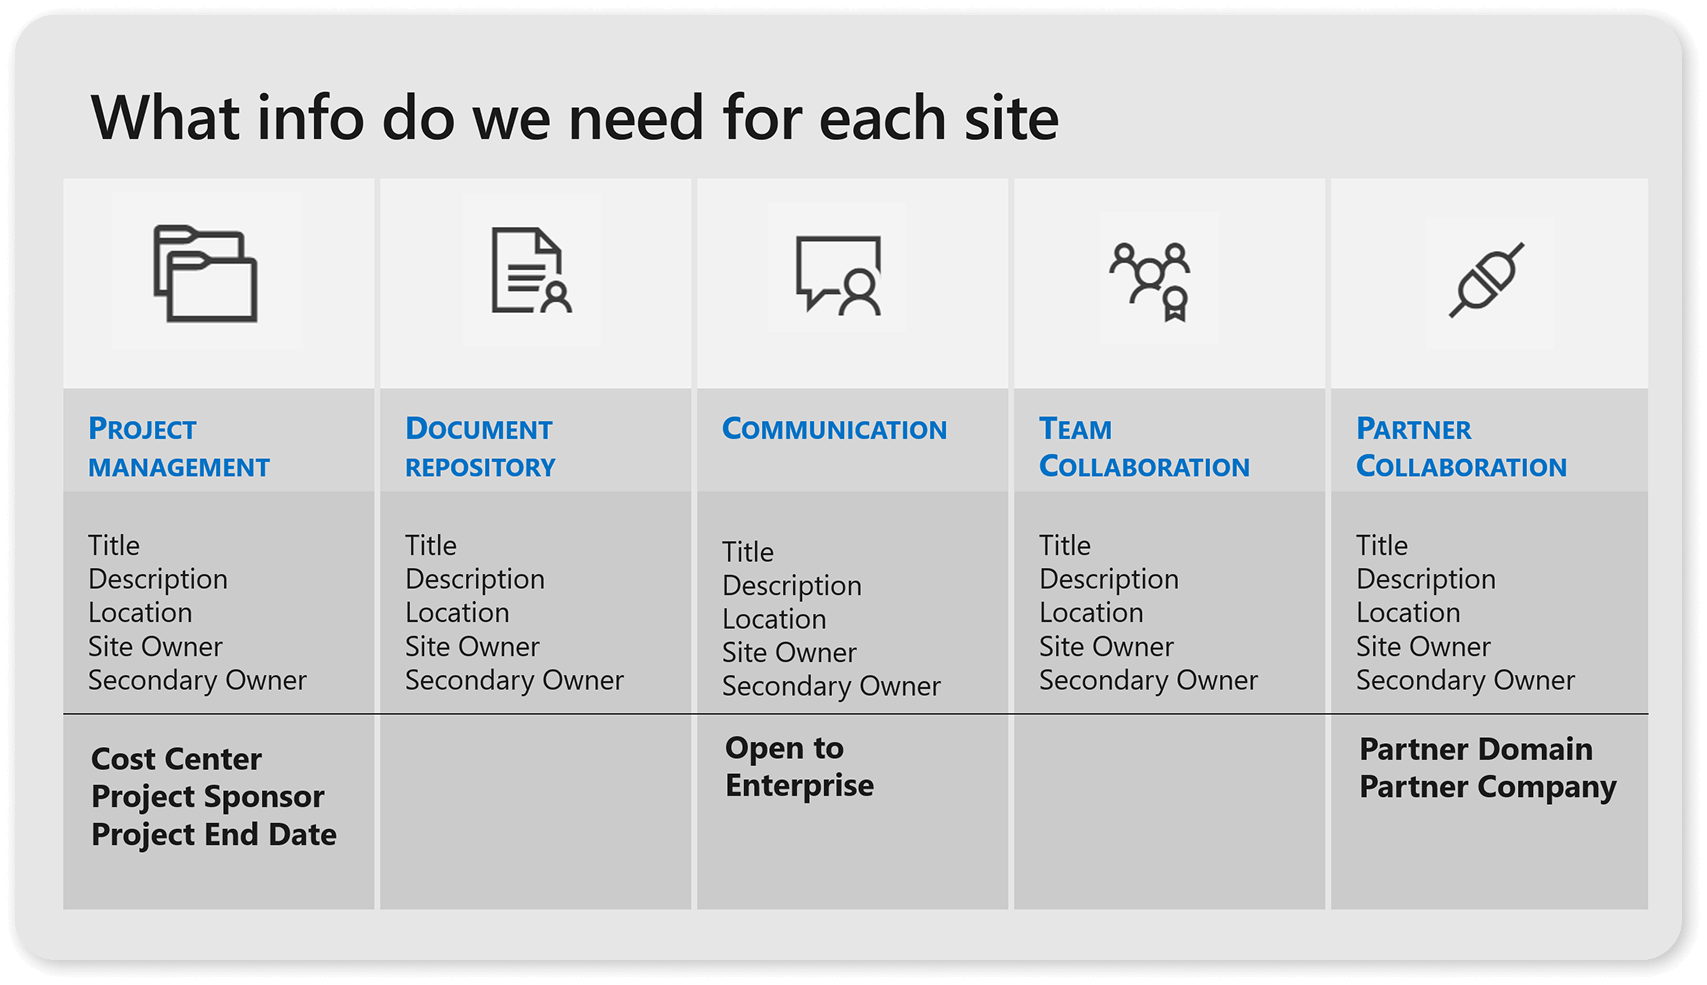
Your first step to having a provisioning process is to create your templates. We need to take a step back and figure out what end users need and what IT needs. This way, you can achieve balance and make everyone happy, with the process. Here are some examples:
Project management
- Project management
- Creates Microsoft 365 Group
- Creates a set of list and webparts standard on each project
- Approval by Project Sponsor
Document repository
- Creates modern site without O365 Group
- Requires accessible content types
- No Approval needed before creation
Communication
- Creates a modern Communication Site
- Requires approval only if site is open to all company
Team collaboration
- Creates Microsoft 365 Group
- Provisions Microsoft Teams
- Approval needed by IT Team
Partner collaboration
- Creates Microsoft 365 Group
- Requires external sharing
- External sharing is only open to the domain of the partner
We now need to talk about technology. In the second article of this handbook, we covered out-of-the-box templates in Teams and SharePoint and learned why none of them are truly the solution most enterprises need.
The only solution right now that offers flexibility and gives you:
- SharePoint templates (lists, libraries, pages, even content)
- Teams templates (Including Standard, Private, and Shared Cannels as well as apps)
- Planner customization options (including adding plans, buckets, etc.)
That solution is PnP PowerShell and the PnP Provisioning Engine! The Microsoft 365 Patterns and Practices (PnP) initiative is an effort by the community and Microsoft to create amazing tools and samples, and PnP PowerShell is one of them.
PnP PowerShell offers us multiple ways to create templates and to provision our assets. Some things you should look at are:
PnP also offers you the choice of creating everything as a PnP template or manually provisioning things. So, for example, you can have a PNP Template file that hardcodes everything, let’s say, Teams channels, or you can use the Add-PnPTeamsChannel command and build them in PowerShell—the flexibility is up to you.
Creating your input form
Our next task is to create the input form. Depending on the template, you will need to create a list of the minimum data required for each site and what additional information might be needed.
For example, for a Project Site, you might want the Cost Center and Project Sponsor, which makes no sense for a Team Collaboration site.
Then, we’ll need a SharePoint list with the following columns. Of course, you can adapt it to your needs, but for this basic provisioning system, here is what we will use.
Your form should be optimized for the best user experience, so for example, not ask a user for Cost Center if they want a Document Repository. It should adapt to the request and keep the effort the user needs to a minimum.
An app in Power Apps usually gives you the flexibility you need to build this form because it allows you to add logic, save to a number of data sources, and also be deployed everywhere from Teams, to a SharePoint site, or directly on the device.
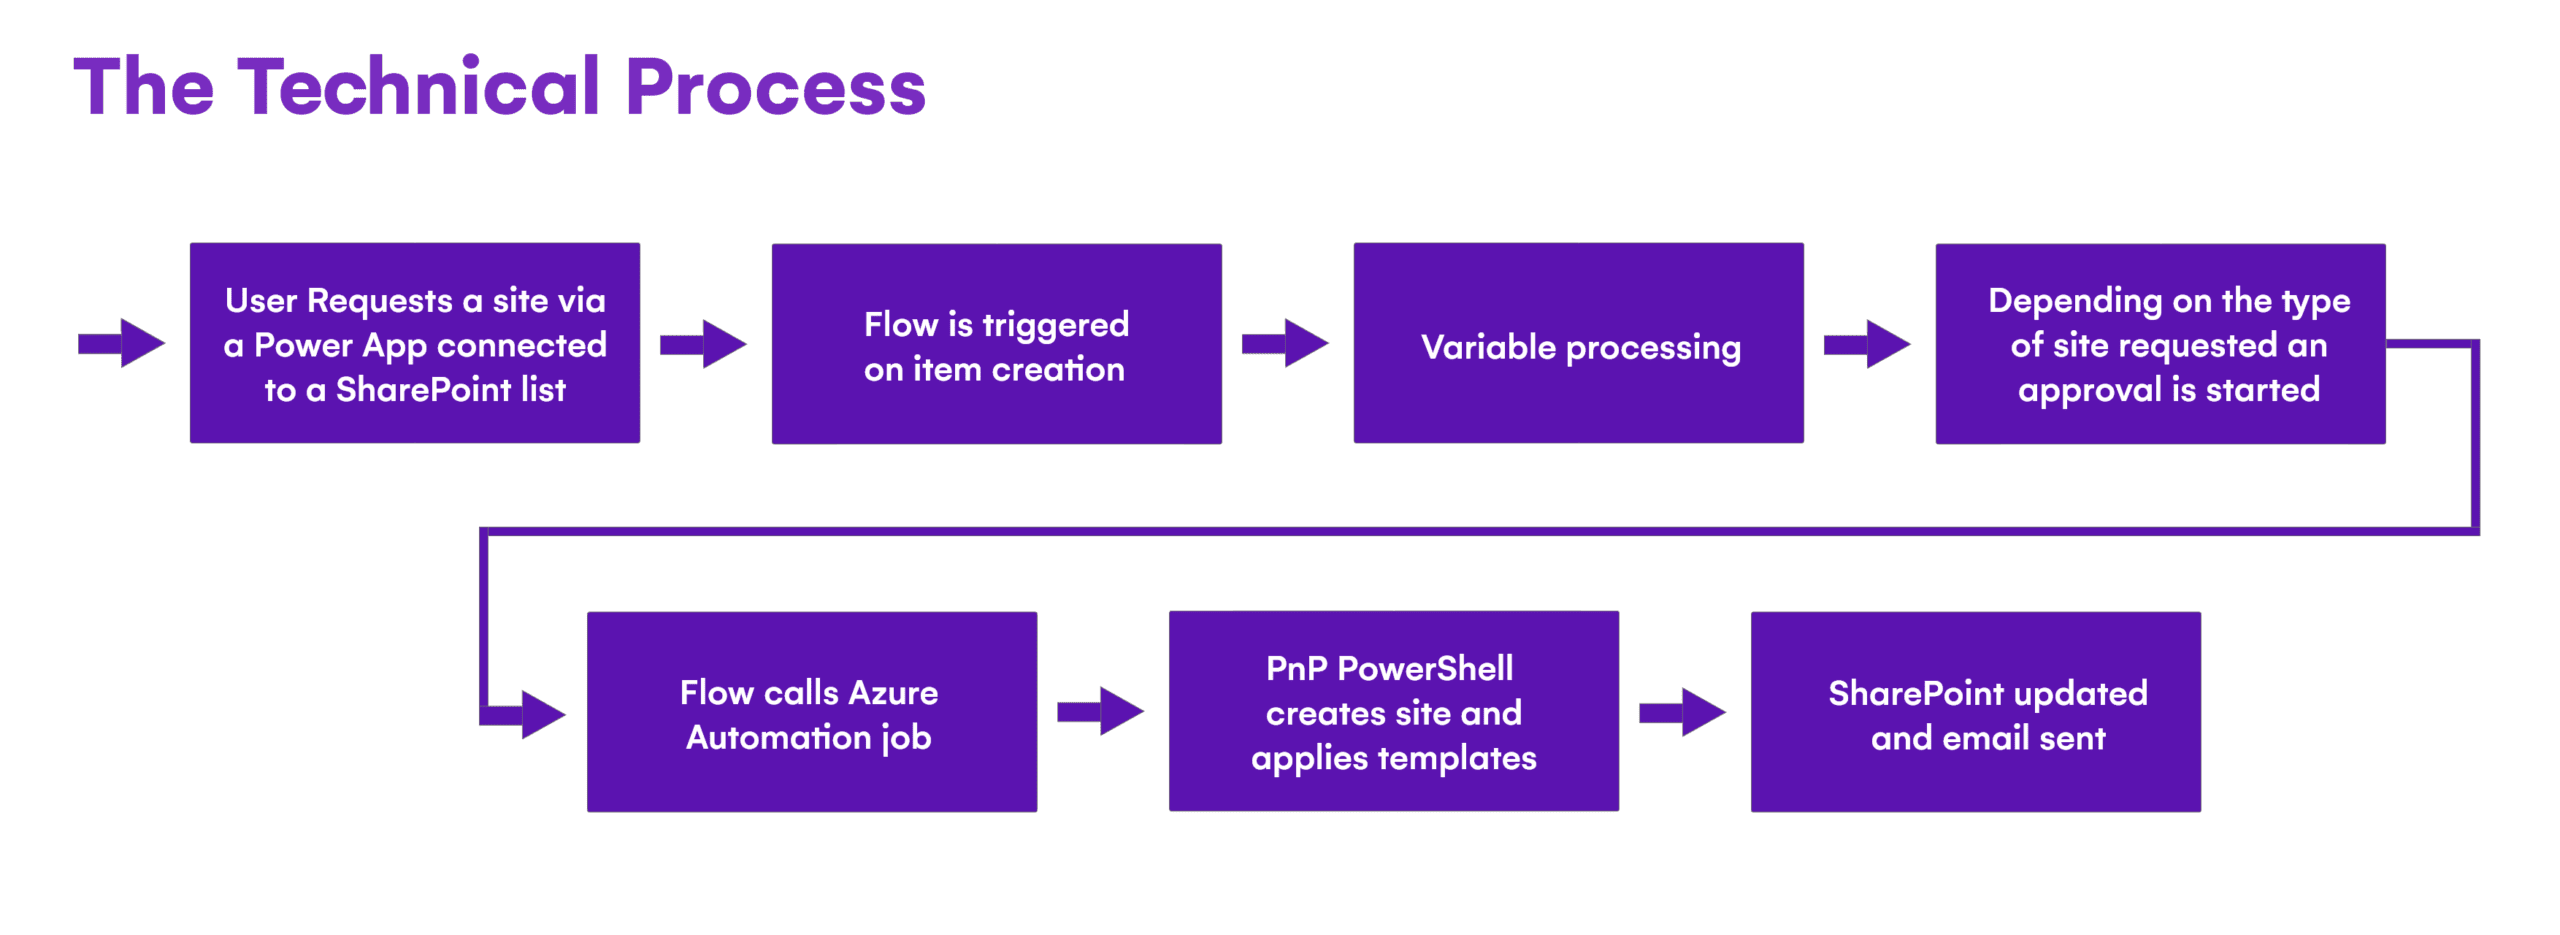
Automating everything
We have our form, but now we need the process to make all of this work. The tools will differ depending on the technological choices we make, but the easiest ones to get this done are Microsoft Power Automate and Azure Automation.
Here are some of their benefits:
Power Automate
- Built in approvals
- Integration with many data sources
- Logical branching
- Easy connectors
- Azure
Azure automation
- Integrated PnP PS module
- Scheduled or triggered
- Credential management
- Azure Storage integration (to store your template files)
This is what the process would look like:
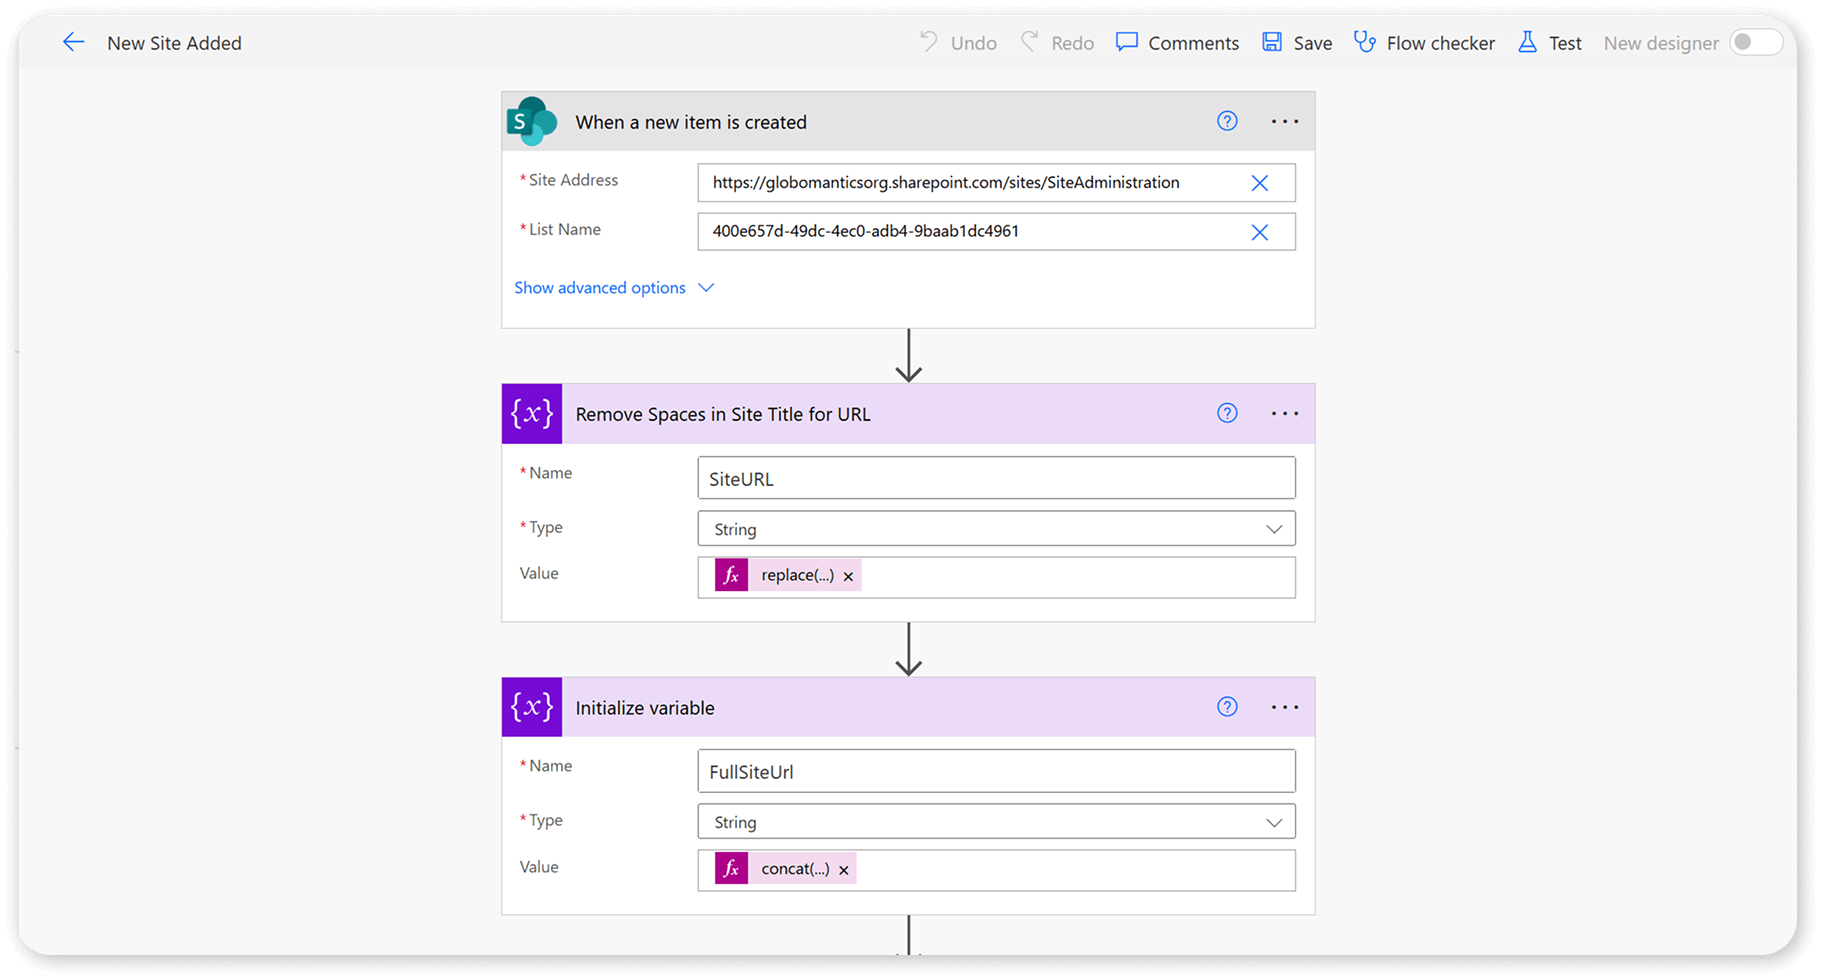
Something worth focusing on is the approval process. Try to find the balance between user productivity and governance, and create intelligent rules for approvals. For example, someone from the PMO team creating a project workspace doesn’t need an approval (which would go to the PMO office anyway) while someone from HR creating a project workspace would. Here are a few screenshots of what your flow could look like.
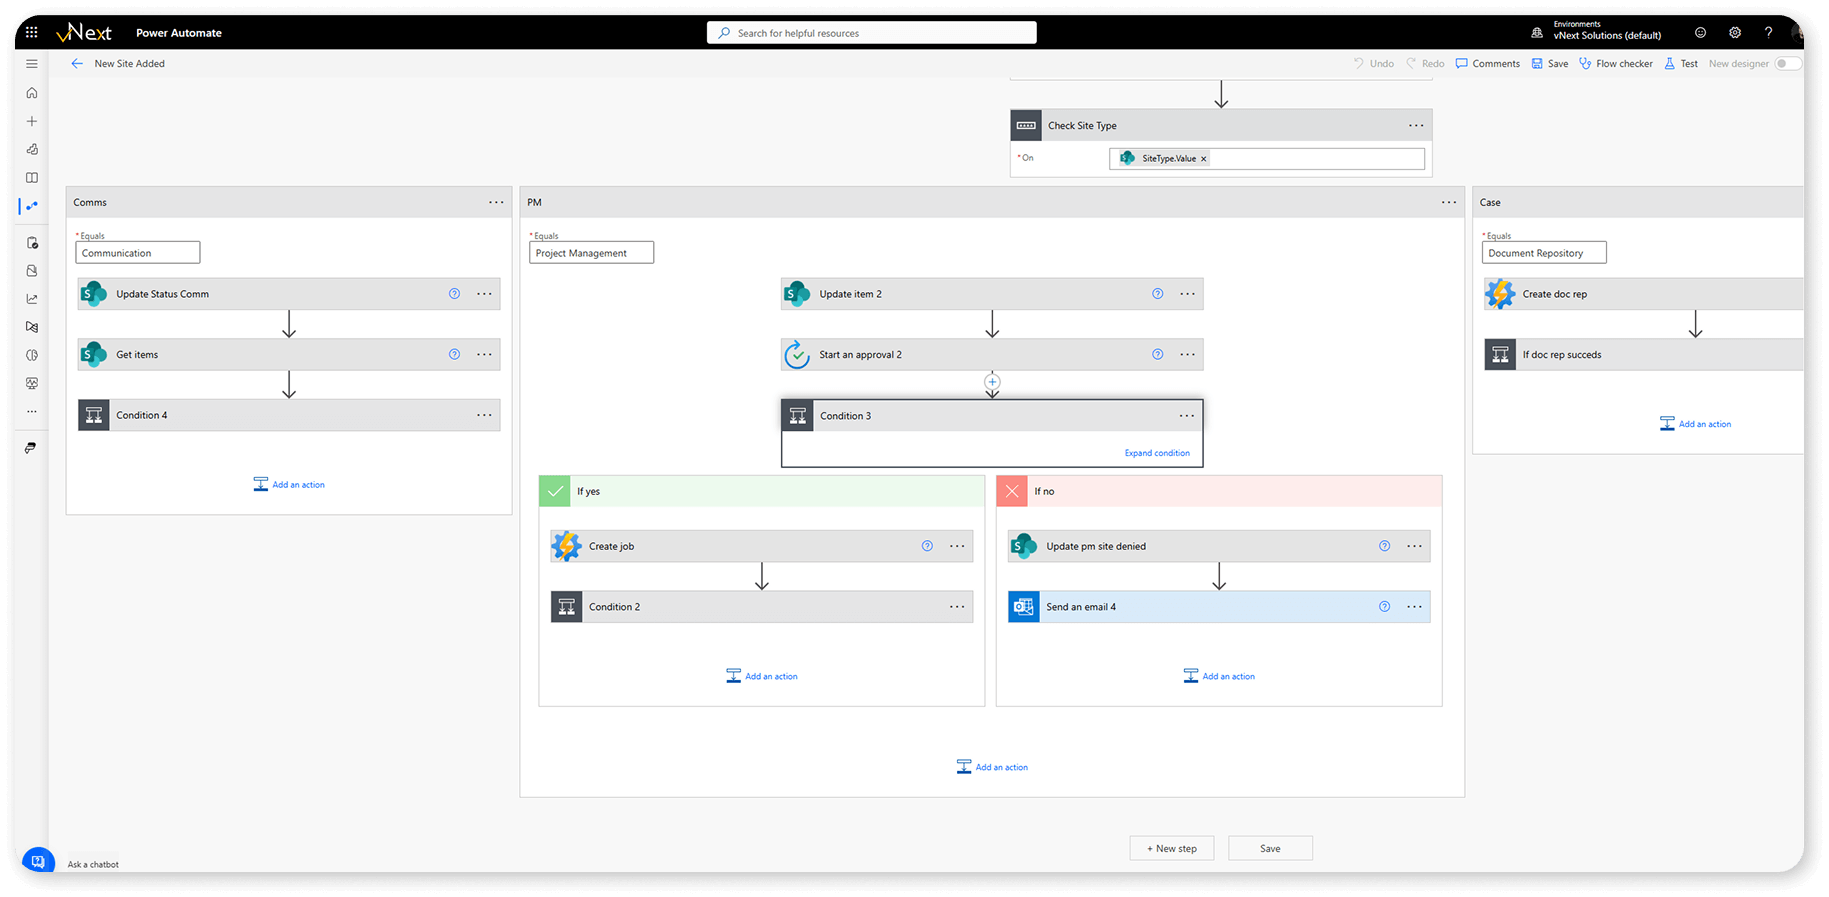
Depending on the template, we have different logic for approval using a Switch Statement, and you can take it to the next level depending on your organization. You could also add additional rules for the naming convention or whatever will make it easy for you and your governance policies.
Reporting and governance
With the automation part done, next up is reporting and governance. Since you have all the data inside a database of some sort, you can then build reports on that data covering your owners, most popular templates, and even departments if you want to do departmental billing. You can use Power BI, which is super easy to use, and you can publish those reports anywhere afterward.
Consider lifecycle management
Something to not forget is to find a way to get rid of those sites in the future! Whether you connect it to your projects, you ask users for an expiration date on creation, or simply use the SharePoint Advanced Management or M365 Expiration policies, make sure you also automate or semi-automate the process of getting rid of those workspaces when they are no longer needed.
What’s next?
In this section we have looked at the basics of what’s inside a provisioning process and what you need to think about as you create yours. In the next section, we will truly take it to the next level and look at different technologies, such as PnP PowerShell, that allow you to create complicated templates that take into account your productivity and security requirements.