How to set up Microsoft Teams Live Events
Table of contents
While preparing for our All Things Microsoft Teams online event a few months ago, we decided to produce the whole thing using Microsoft Teams Live Events. Using Microsoft Teams to broadcast our event about Microsoft Teams seemed like the logical fit. After reading every piece of documentation and video we could find, and running a few events on the platform, here is our overview of Microsoft Teams Live Events and how to set up and produce your first Teams Live Event.
Live Events overview
Let’s start off with the basics. Teams Live Events can broadcast video and audio content to a very large audience of up to 10,000 people. They are designed for a presentation style of one-to-many. Live Events are for when you want an audience to sit and listen to your presentation and maybe ask the occasional question via the Q&A chat function.
This platform is perfect for your standard webinar or online event and we’ve already seen some organizations use its functionality quite well to produce some stellar live events. For example, our friends at the European Collaboration Summit recently produced The Galactic Collab Summit that had multiple simultaneous streams. To learn a bit about how they ran their event we recommend this blog post.
Teams Live Events production options
Let’s look at some of the production options you have with Teams Live Events. There are two different ways to produce your event. One way is to produce the event via the Teams app. Essentially, you can use your webcam, microphone, and other content on your computer to present to your audience. You can invite other presenters and they can also share their content and hold a presentation. This is the simplest and easiest way to produce an event and is the method we will focus on in this blog.
Another way to produce the event is by using an external app and equipment (cameras and microphones) and connecting them to Microsoft Stream. This is for more serious productions and for people with the media technical know-how. This is great for streaming live events from a conference or auditorium. We won’t focus on this production method in this blog but you can learn more about it here.
Live Events permissions
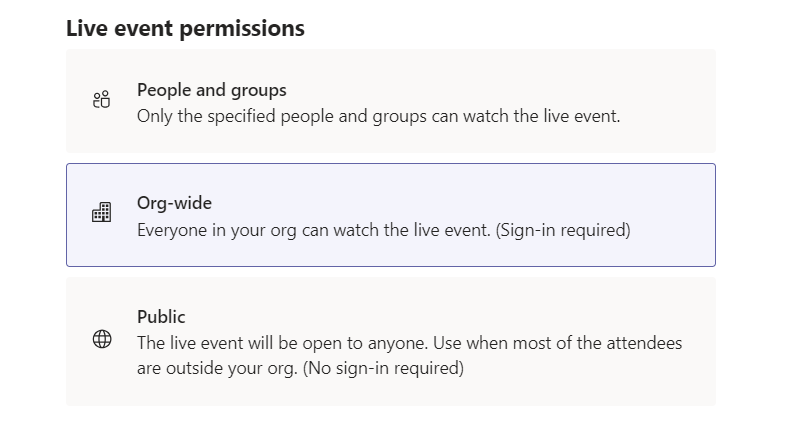
There are a few options for who can attend your online event. The People and groups or Org-wide events options will require attendees to sign in. For example, this is great for an internal presentation in a company where you want employees to just listen, have restricted access to who can attend, and you can know who logged into the event.
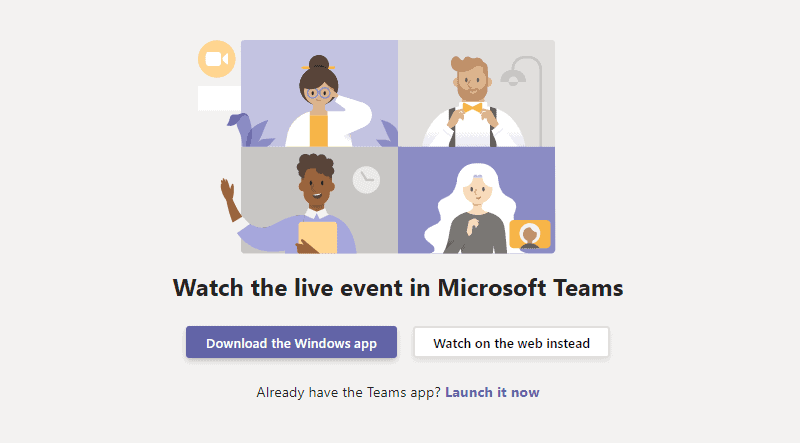
Public events allow anyone with the attendee link to watch the event. They can sign in with their Microsoft Office 365 account and watch on Teams, a web browser, and can even watch it on their mobile phone. Public events can also be viewed anonymously via a web browser. To watch via a web browser, you must have third-party cookies enabled.
Public live events are perfect for any B2C type events where you can just post the attendee link on social media or in an email and have as many people join. For B2B events it is still ok, but if you want to know who exactly is interested in your event or get their contact info, it requires additional steps and technology that is not integrated with Teams Live Events.
Roles in Microsoft Teams Live Events
Before you go and set up your live event, let’s look at the different roles you have available to you.
Organizer
The person who creates the event has the highest access level and is given the organizer role. They can invite other people to the event and set up permissions as well as the event settings. The organizer can also select the method of production, manage reports, invite attendees, and moderate the Q&A. A great resource for organizers is this organizer checklist. The organizer can either have the privileges of a producer or presenter. The producer role is set as a default for the organizer.
Producer
The producer role is for the person or persons managing the live event and what the attendees will see and hear. Producers manage the content (video) from shared cameras and screens, as well as select different layouts. The producers can also moderate the Q&A and have the power to start and stop the event. Be careful with this power because once you start the event there’s no going back. Also, when you stop the event it cannot be restarted.
Presenter
The presenter role allows people to share their video, audio, and screen. You can have multiple presenters speaking at once, but only one presenter can share their screen at a time. The producer decides which camera will be displayed to the audience. Only one shared content item can be displayed, and it is from the last person to share their screen. If anyone decides to share their screen it overrides the previous person sharing their content. Presenters can only share content when the event is produced in Teams and they can also moderate the Q&A just like the producer role.
Attendee
The attendee role has the most limited functionality. They can watch the live event from a wide variety of devices and can even pause and start from whenever they want, even while the event is streaming live. Depending on the type of event, attendees can watch anonymously or will have to log in. If the Q&A function is enabled, attendees can ask questions (moderated by the presenters and producers) that are answered either privately or publicly. If the setting is enabled, attendees can have access to the recording of the event if they miss the live stream or if they want to watch it again.
Preparing and configuring your organization for Microsoft Teams Live Events
Before you can even schedule your first live event, you should make sure your company has the proper settings and infrastructure in place. Make sure your organization’s network is set up and optimized for Microsoft Teams. This article with network requirements and optimizations can help you and your IT team get started.
The next step is to ensure you have the correct licenses to be able to create the event. You will need a Microsoft Teams license that is included in the Microsoft or Office 365 Enterprise E1, E3, or E5 license or the Office 365 Education A3 or A5 license.
After you’ve checked your licenses you will need to create or edit your live events policy in the Microsoft Teams admin center under Meetings > Live events policies. Here you can configure settings to schedule live events, to allow transcripts for attendees, who can join scheduled live events, and the recording settings. For more detailed info about live event policies check out this article.
How to schedule a Microsoft Teams Live Event
1. Create a new Live Event
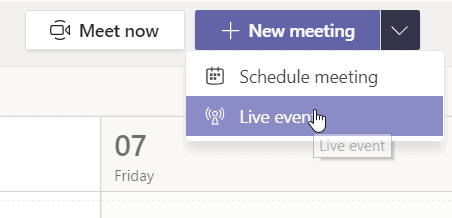
To schedule a live event is very simple and similar to creating a standard Teams Meeting. Open your Microsoft Teams App and click on the Calendar Tab on the left of the screen. On the top-right of the window, click New meeting > Live event
2. Add Live Event details
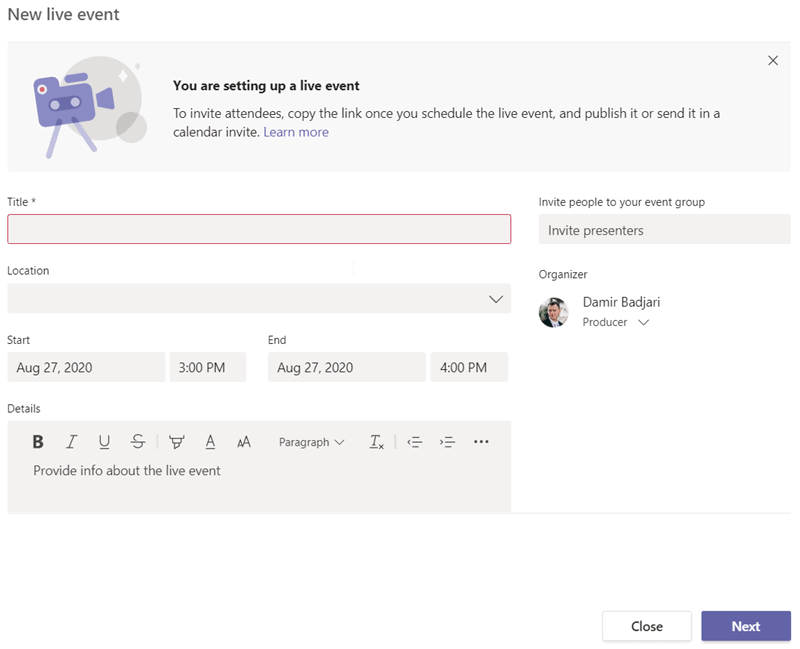
In the next window you can enter the title of your live event, as well the date and time the event will start and stop. Microsoft currently has a four-hour broadcast limit but these restrictions are always subject to change.
You can add the location of the event, even though it’s not required. There is also a field to add details of the live event. This information is important for those who receive an invitation to the event, so they know what the event is about, what to expect, and if there are any important things they need to do to prepare.
In this window, you can also invite other people who you want to participate in the live event. These people can be either inside or outside your organization. You can assign them to either the producer or the presenter role. To schedule the event you have to assign one person to the producer role.
Once you’ve filled in all the info, click Next to go on to the next step. You can always go back and edit this info if you need to. Later you can invite more people, change user’s roles, or the details of the live event.
3. Select Live Event permissions
In the next step, you can select the Live Event Permissions. There are three options to choose from. If you choose People and groups, this is where you can invite specific attendees (up to 150 emails). The Org-wide setting allows your whole organization to watch the live event, and you can also include guests. If you choose Public, then anyone with the attendee link can watch the event.
4. Production options and additional settings
The last few settings help you decide how to produce your live event. As we’re only focusing on live events produced in the Teams app, we will only look at these settings. If you want your presenters and attendees to be able to view a recording of the live event after it’s finished, select this option here. If you want to give your attendees a polished and edited version of the recording, it’s better to deactivate immediate access to the recording.
Additional settings such as Captions, Attendee engagement report, and Q&A can either be turned on or off for the live event. Some functionality may not be available if your IT department hasn’t configured your company-wide Microsoft Teams settings and policies to your liking. For example, in the image below, Captions are not enabled by IT and Q&A is turned off for this live event.
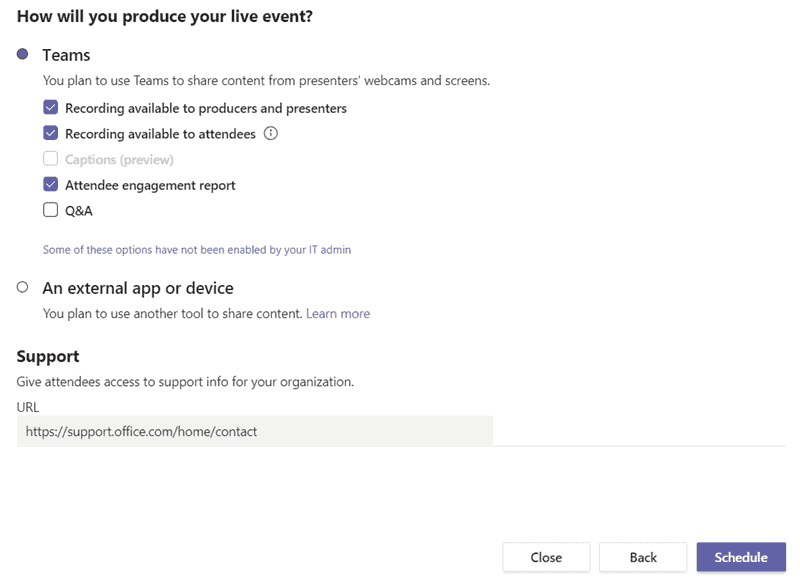
Microsoft’s Office Support page is the default URL for support if users have trouble. You can edit this URL so that attendees can contact your support team who can be ready to answer any surge of questions before or during the live event.
5. Schedule your Live Event
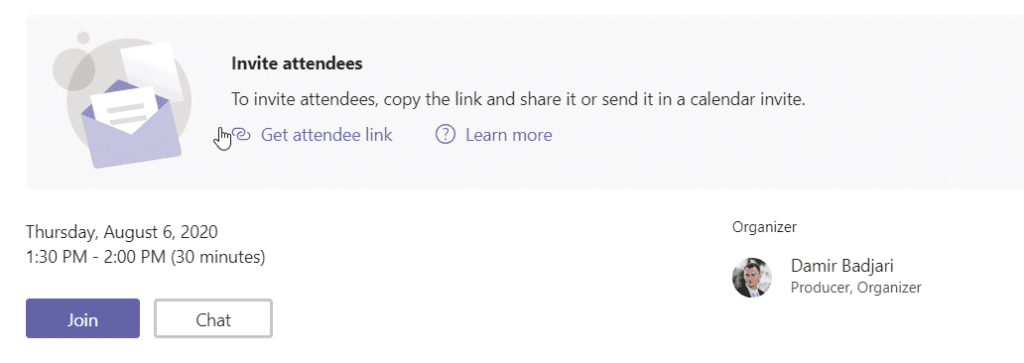
Once you’re ready and checked your settings, click Schedule and your Live Event is ready to go. You should be able to see the event in your Teams and Outlook calendar. All presenters and producers will receive an invitation to the live event, just like a regular Teams meeting.
Attendees get direct access to the live event with the attendee link. The difference is they will not get a calendar invite like the presenters and producers and will only be able to watch the live event and use the Q&A function if it’s turned on.
You’re all set and you can always go back and make edits to the live events settings and details. Just be sure not to accidentally cancel or start the live event by accident, especially if you’ve already sent out the attendee link.
Producing your Teams Live Event
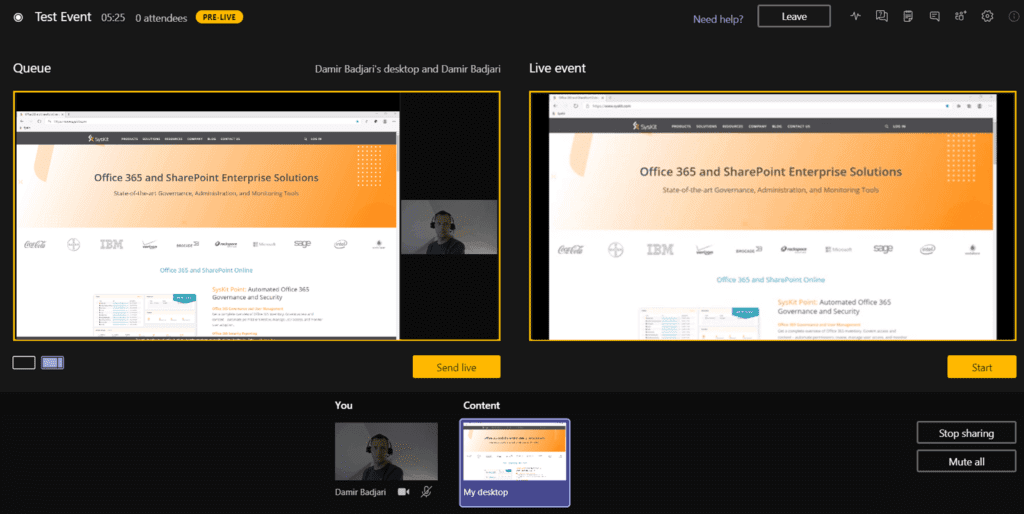
Let’s look at the live event from the producer’s perspective. When you join the live event as a producer you will see a screen similar to the image below. The Queue window is where you prepare video, content, and layouts before you send it to live. This always shows the next piece of content you want to share with the audience. When you click Send live, the content from The Queue moves to the Live event window. The Live event window displays what the audience is seeing.
1. Pre-live mode
As a default when you join a live event as a producer, the event is in a Pre-live mode. This is a mode while producers and presenters are still joining before the live event broadcast. Here you can test everyone’s microphones, cameras, and screen sharing before the start of the live event. All producers and presenters can chat with each other with their microphones just like in a regular call.
2. Live mode
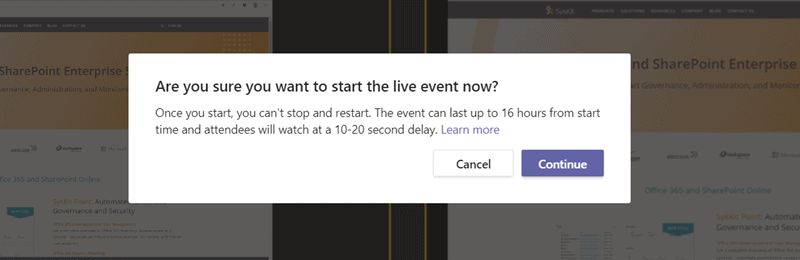
Once you’re ready to go live to your audience, click the Start button on the bottom right. You will be asked if you are sure you want to start the event. Once you start the live event, you can’t stop and restart it again. Click Continue and your event is now live to all attendees.
Make sure you mute all microphones that aren’t supposed to be on because all producer and presenter mics can be heard by your audience. Producers have the ability to mute presenters but cannot unmute them.
You’re now live and streaming your event to the masses. During the event, you can switch cameras and sharing content. You also have the option of two video layouts. One layout is just one piece of content and the other layout can include content and the presenter’s camera at the same time.
3. End mode
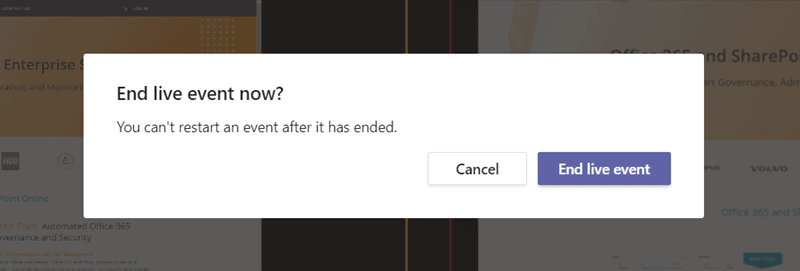
When you’re ready to end your event, click the End button on the bottom right. To make sure you want to end the event, you will be asked again. Once you end the event, it cannot be restarted. Click End live event and the live event is now over. Attendees can no longer see a live stream.
Now the event is in an Ended mode and the broadcast is over. Presenters and producers can still talk to each other.
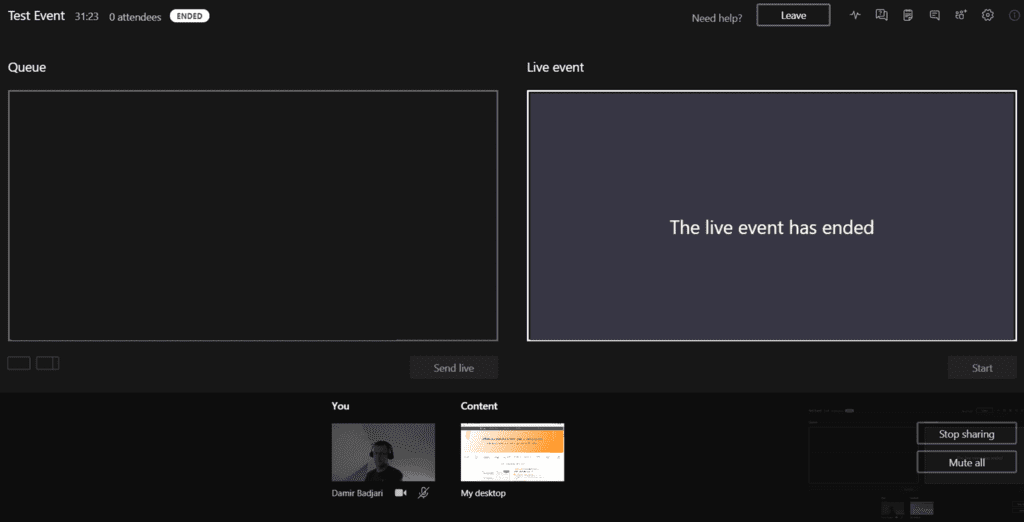
If you enabled a recording for presenters and producers, or for the attendees, they will be able to access it shortly after the live event is finished. It may take a few minutes to process. Also, an attendee report will be available to download as well as a Q&A report if this functionality has been turned on.
Conclusion
That’s a basic overview of Microsoft Teams Live Events and how to set up, schedule, and produce an event using the Microsoft Teams app. To dive a little deeper into some suggestions for your next live event, check out our blog Microsoft Teams Live Events Tips and Tricks.
To keep your Microsoft Teams tidy, check out our Office 365 Governance Tool, Syskit Point.