How to provision Microsoft Teams using Power Automate
Table of contents
Even though Microsoft Teams have reached a high level of popularity, Microsoft is still going above and beyond to make it even more accessible and understandable to end users. Companies want to drive adoption to increase productivity and collaboration, but at the same time, nobody wants to lose control of what is created and used in the company’s M365 environment.
In this post, you will learn how to set up Microsoft Teams provisioning and approval workflows with Power Automate. If, you’d like to learn more about the options when it comes to Microsoft Teams self-service, custom solutions, and when to choose which – read our “M365 Self-Service Provisioning – Yes or No?” blog.
Microsoft 365 workspace creation options
Out of the box, Microsoft gives you a couple of options on how to handle the creation of new workspaces:
- Open self-service creation for all company employees – the best option to boost adoption rapidly, without any rules or restrictions. End-users create what they want when they want it and are not burdened by any governance rules. This is also the fastest road to the uncontrolled growth of your Microsoft Teams.
- Creation availability for a particular security group – with this, you can select specific people who will create new workspaces. To utilize this possibility, you need to turn off self-service and acquire Azure AD Premium licenses for all the people in this security group. More information on how to configure this option can be found on Microsoft Docs.
- Creation disabled for the entire company – this is the least effective option since workspace creation relies solely on IT. None of your end-users will be able to create Planner, Teams, M365 Groups, Yammer, etc., on their own. To start a new project or task, they need to wait for IT to complete the process. One significant risk of this option is shadow IT, where end-users become creative and find more accessible solutions for their needs that often do not comply with its security policies. In addition, this option also requires Azure AD Premium licenses.

With all of that said, the ideal solution for workspace creation is leaving the creation open for end-users but implementing a provisioning and approval workflow to stay in control. With the proper provisioning and approval process you:
- prevent sprawl and uncontrollable growth
- save the time of your IT team and prevent excessive manual work
- drive controlled adoption
How to create Teams provisioning and approval workflow using Power Automate
In this article, we will show you how to create a provisioning workflow using Power Automate’s native capabilities without an additional cost on top of your M365 subscription. These are the things you will require:
SharePoint list
We will use this list as a database for saving a history of all requests and their approval statuses. This gives a good overview for all admins of what is going on in the M365 environment. Choose a suitable location for this list that is accessible to all who are responsible for Microsoft Teams administration – you can even add it to a specific team to be available directly from the Microsoft Teams tab.
Add the following columns to this list:
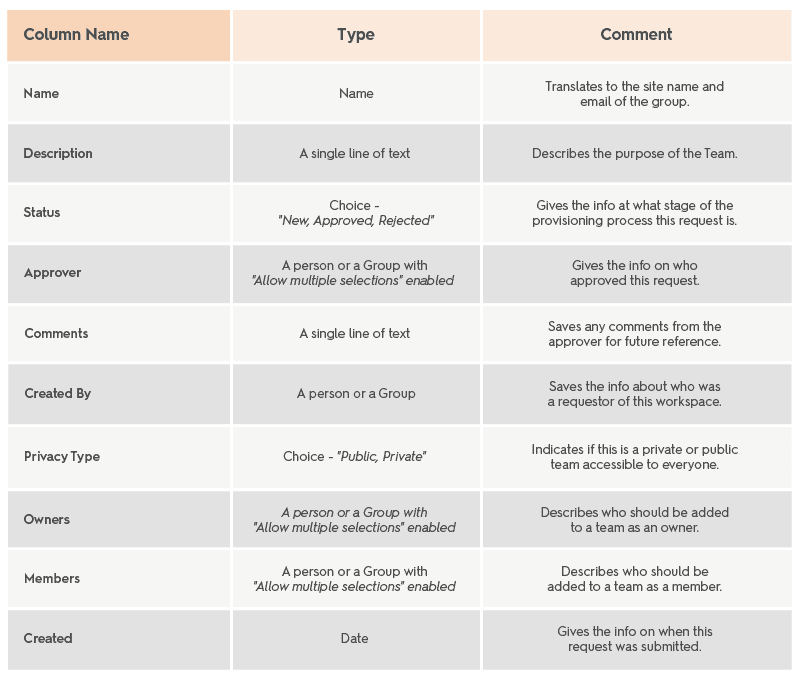
End-user request interface
Make sure to set up the correct permissions for your end-users to be able to request new teams via the SharePoint list. Your end-users will require at least membership in the SharePoint Visitors group that has Contribute permissions on this specific SharePoint list to add/modify current requests.
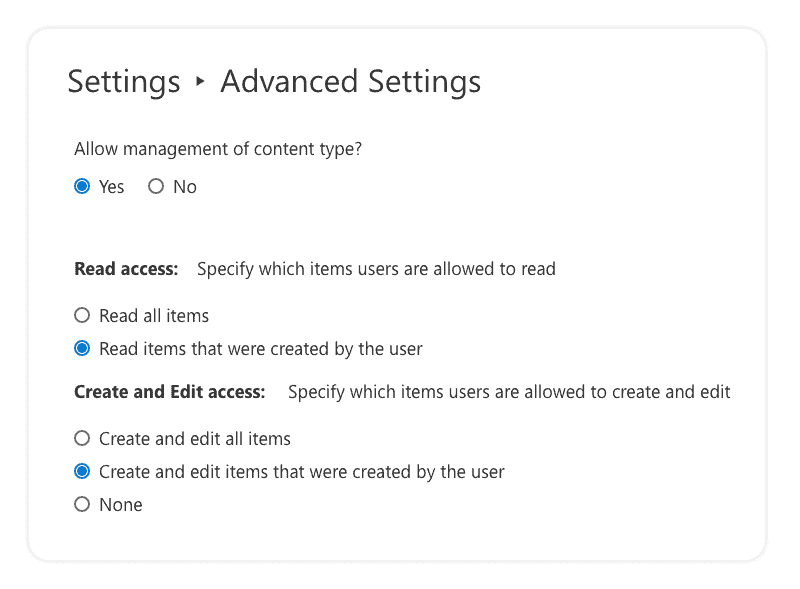
Also, make sure to configure the Item-level permissions so that all requestors can only see their requests and not all the requests.
To do so, navigate to the SharePoint list that you created for storing request info, navigate to the Settings – List Settings – Permissions for this list. Set item-level permissions like in the image below:
Pro Tip: If you want to create a more accessible interface for your end-users to request a team, you can use either Microsoft Forms or PowerApps, which may require a bit more effort from your side, depending on your current PowerApps knowledge. We will not be going into this part in this article.
Power Automate flow
Power Automate will help us automate all these activities, from requesting approval from the selected list of people to creating a team in case of a positive answer. It replaces the need for multiple emails and conversations between requestor and approver and speeds up the entire process.
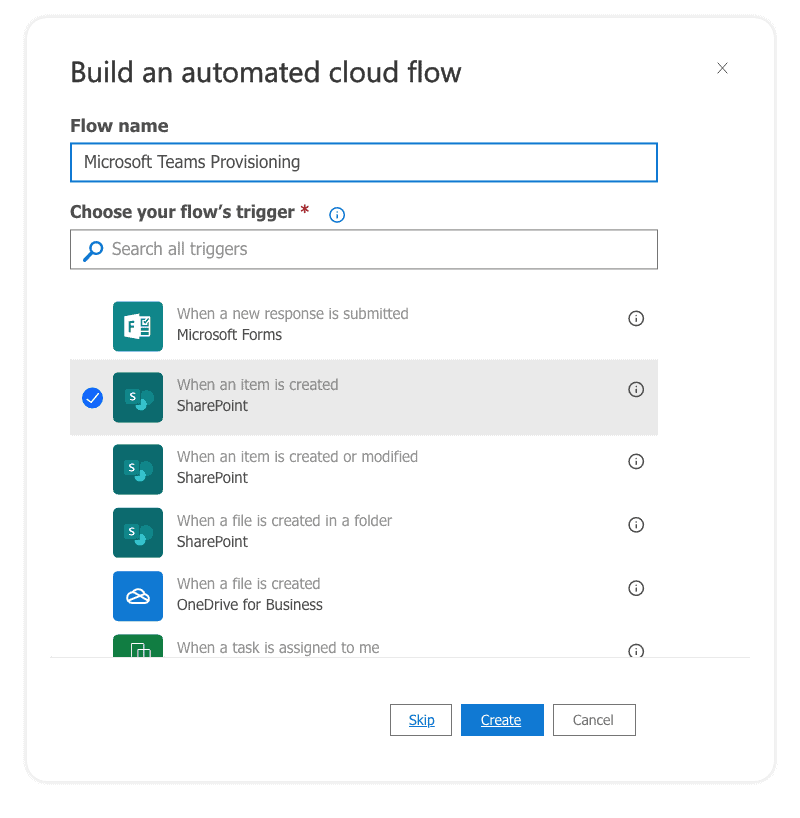
- Open Power Automate and start the new Flow creation by clicking on Create – Automated cloud flow.
Give your flow a name, find a trigger named “When an item is created,” and click Create.
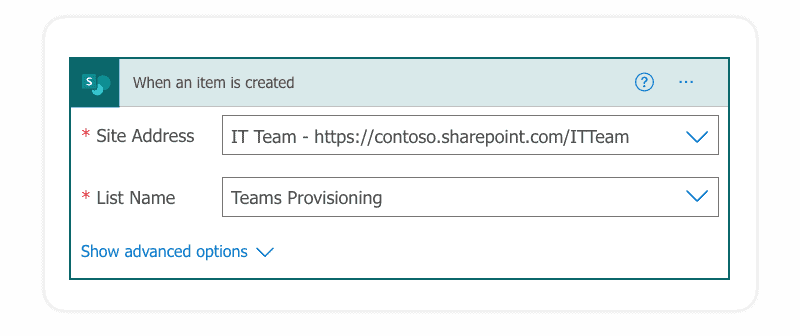
- Configure the site address and list name to the SharePoint list we created at the beginning.
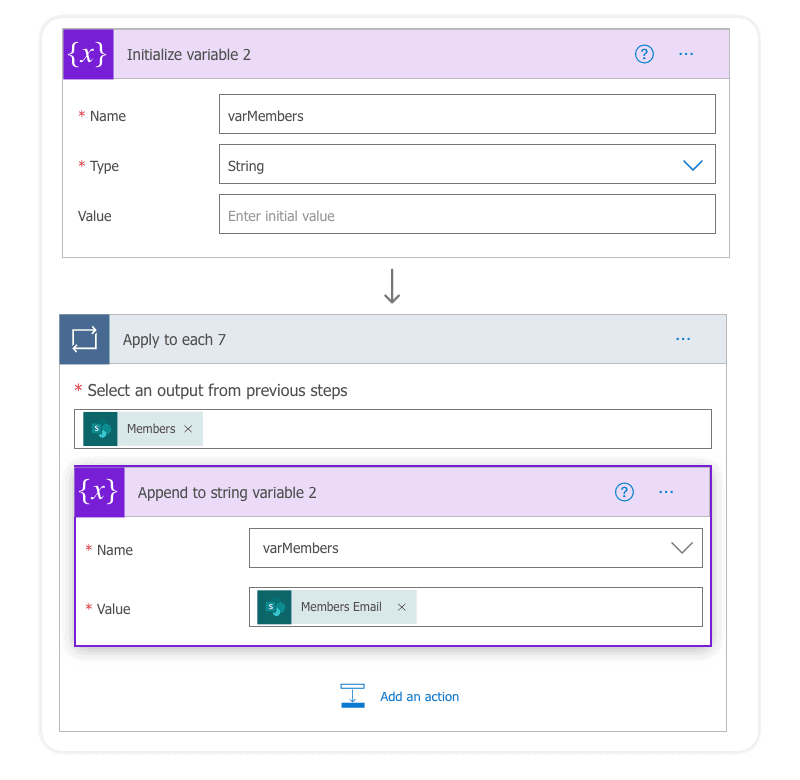
- To avoid issues when saving multiple entries for Owner and Member (we allowed multiple people and groups) values, initialize a string variable that will be much easier to work with along the way, especially when updating the item along the way. Repeat this process for the Owners and Approvers as well.
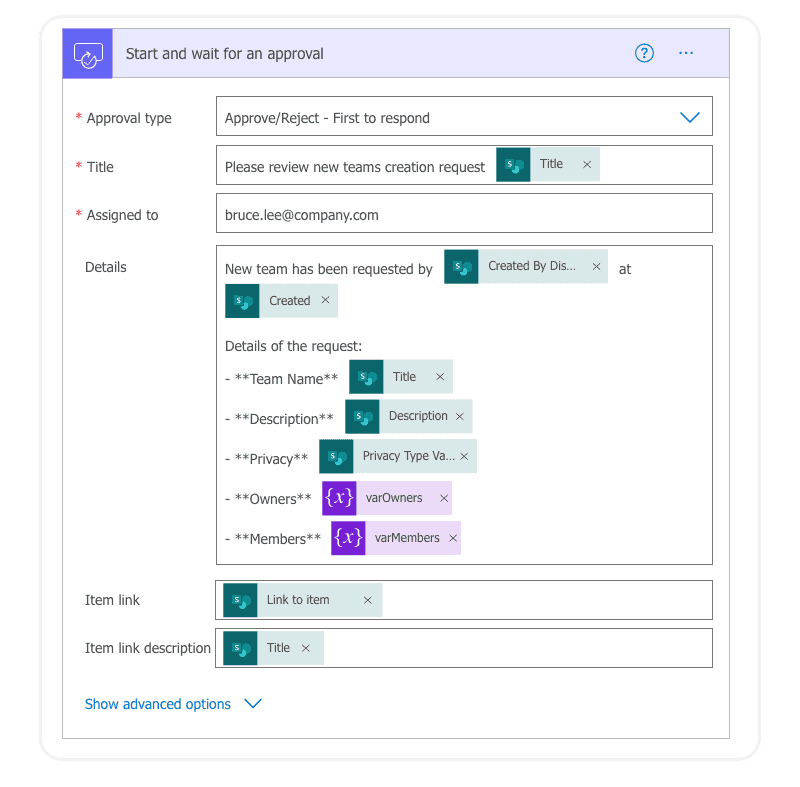
- Start the approval process by adding a new action using the connector: “Start and wait for an approval.” You can add all request details in this approval email, making it easier for your approvers to decide without going to a SharePoint list to see the details.
You can enter multiple approvers, separated by a semicolon. Also, you can choose from different approval types. In this case, the best option is “First to respond,” so you do not have to wait for a response from all the potential approvers. You just need the first one for the request to be approved.
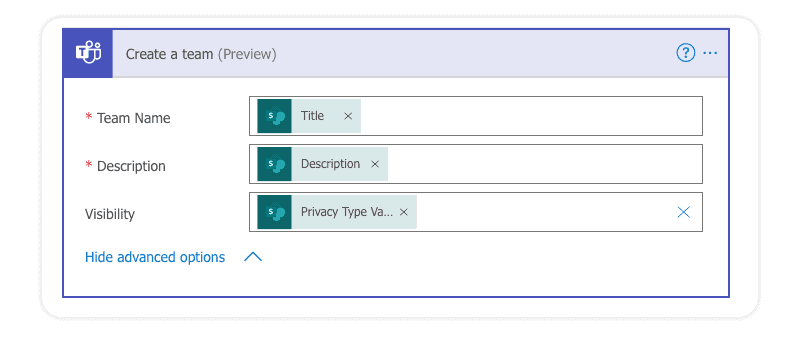
- If we get the approval, we continue with the Team’s creation. Insert the new step using the “Create a team (Preview)” Use the dynamic options to set the Title, Description, and Visibility fields. The visibility field tells the connector should it create a private or a public team.
- Insert the new action “Get a team (preview)” and use the New team ID property from the previous step.

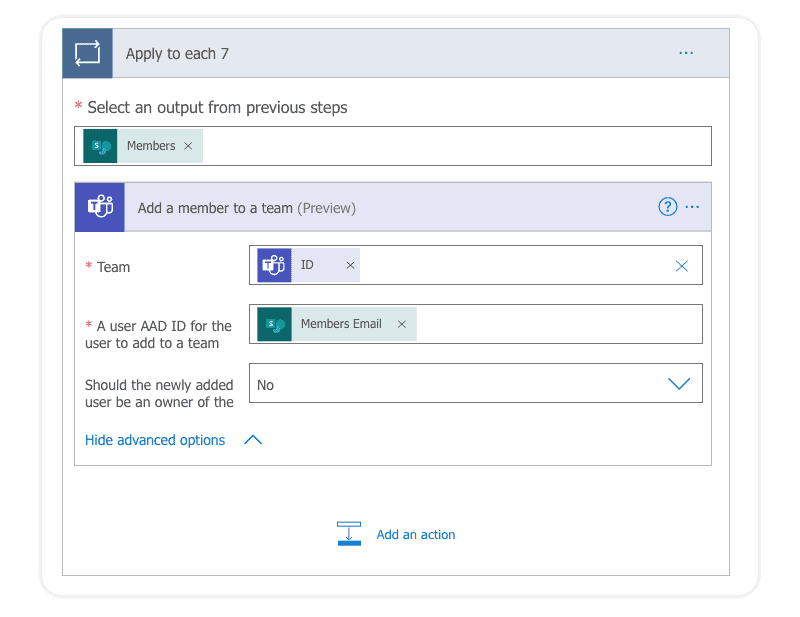
- Use the connector “Add a member to a team (Preview)” to add members that your requester provided. Repeat the same process for the owners, but make sure to set the value “Should the newly added user be an owner of the team” to Yes in that case.
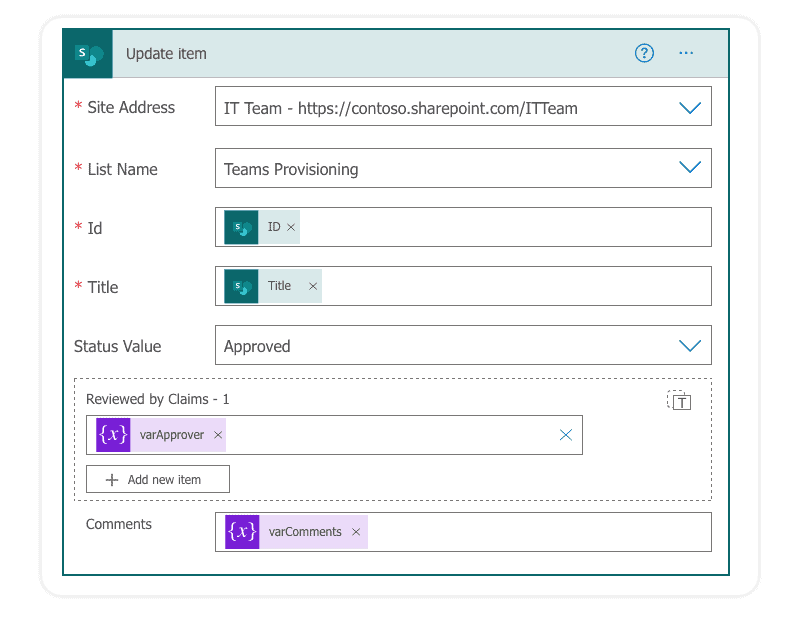
- In the end, make sure to also update the item with the approval status and comments from the approver using the “Update item”.
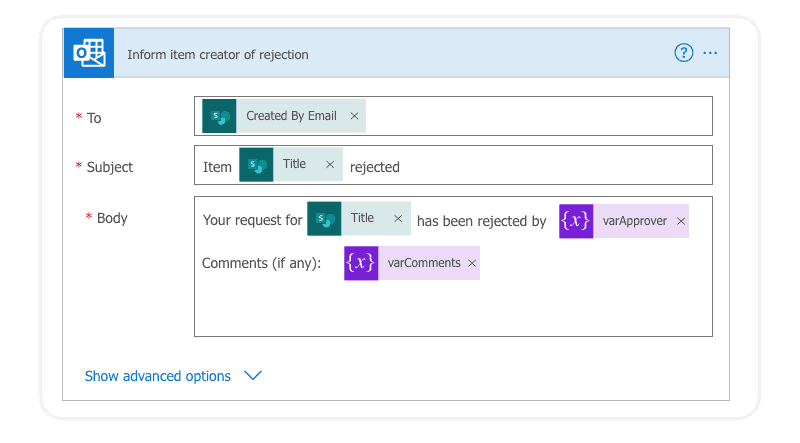
- If your request has been rejected, make sure to send a notification to the requester and update the item with the approval status set to reject.
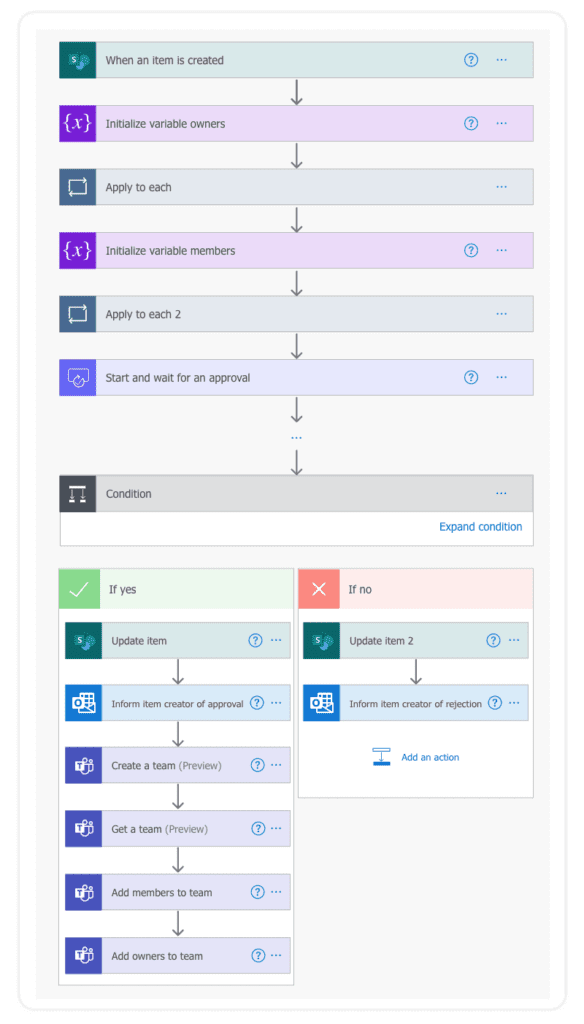
This is how the entire flow looks like:
Advanced Teams provisioning methods
If you require a more sophisticated provisioning process, make sure to check the Request-a-team app from Microsoft, which might be a good starting point for you. Of course, a lot more is possible with the PnP provisioning engine, but it will require a highly skilled technical person, time, and money to develop a custom solution.
There are also a lot of advanced guides already available on the internet, like this one from Paul Murphy.
Nevertheless, note that some advanced Power Automate flows will require you to start using Power Automate premium connectors, which will increase your M365 expenses and bring some more maintenance efforts in the long run.
Microsoft Teams provisioning with Syskit Point
If you need a more complex solution without custom development or in-house maintenance, a 3rd party solution might also be an effective way to go.
Our tool Syskit Point provides:
- A customizable solution without the need for premium connectors
- An easy-to-use admin interface and teams app for end-users to request new teams
- No in-house development and maintenance
Syskit Point helps you control Microsoft Teams creation and ensures that your M365 workspaces are adequately governed right from the beginning of their lifecycle.
You can easily pre-create multiple workspace templates with different governance rules for each workspace type, such as regular access reviews, ownership, and external collaboration, as well as a standardized set of apps, channels, and naming conventions.
The new Syskit Point Teams application empowers your end users to request new workspaces without leaving the familiar interface.
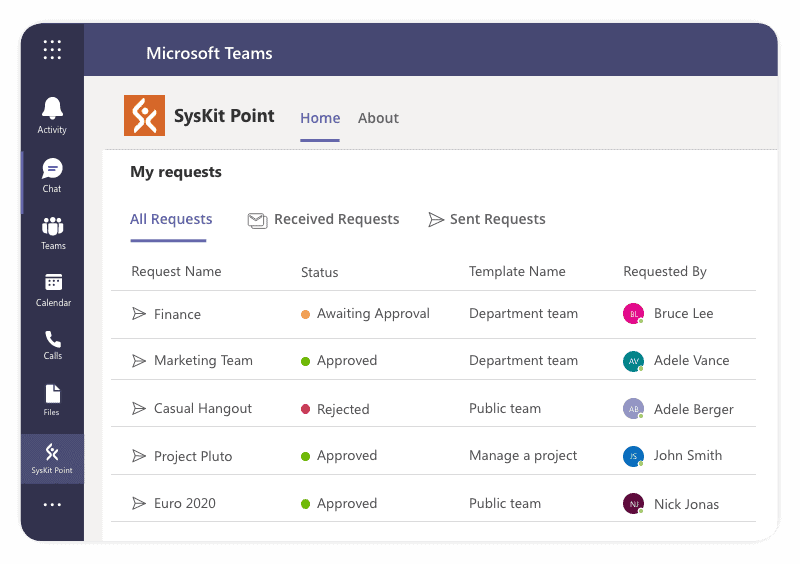
With the customizable approval processes, reduce IT’s workload without losing control and decentralize the workspace creation efforts. Each workspace request can quickly be approved by several types of roles, depending on the business requirements and security impact.