How to add a signature in outlook 365?
Table of contents
In this blog post, find out how to add and edit the Office 365 email signature in your Outlook account and which options are available in different Outlook versions. We’ve created a short how-to video and also outlined all the steps in the blog below.
Create a signature in Outlook Web
In the web version of Outlook, you can have only one signature per account. You can include your signature automatically on new messages and messages you forward or reply to. Learn how to add a signature in your Office 365 Outlook email by following the next steps:
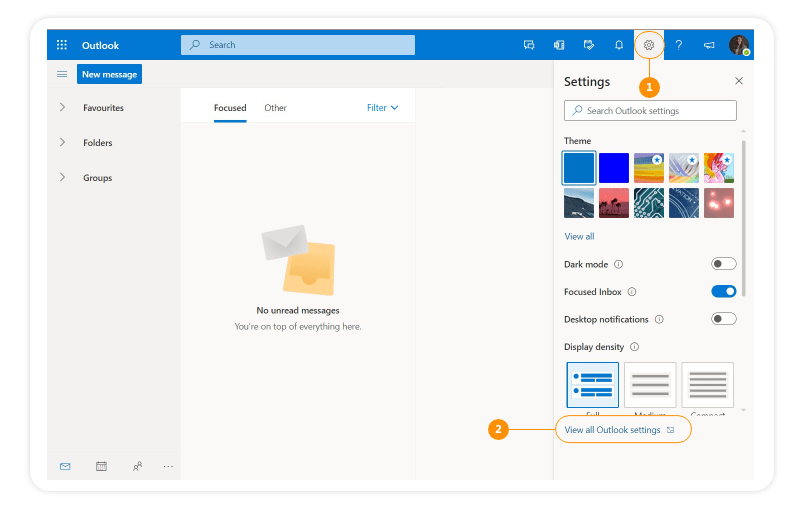
1. Go to Settings on the right side of the top bar.
2. Select View all Outlook settings.
Under Mail settings:
3. Select Compose and reply.
4. In the Email signature section, add your new signature and use the available formatting options.
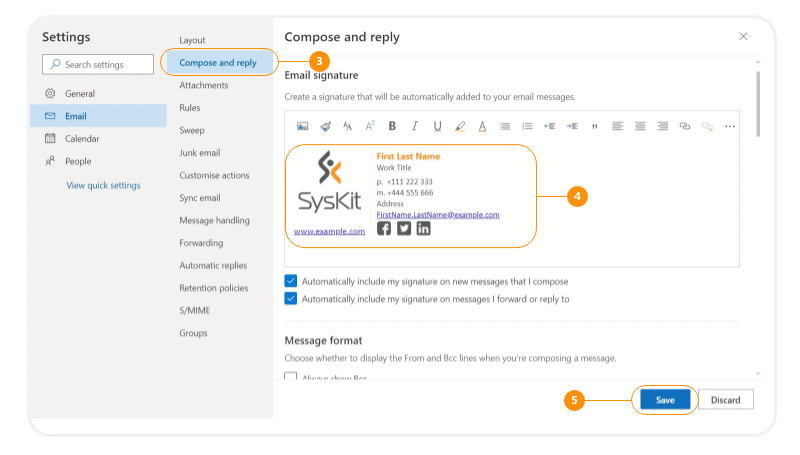
- If you want your signature to appear automatically at the bottom of every new email message, select the Automatically include my signature on new messages I compose check box.
- If you want your signature to appear on messages that you forward or reply to, select the Automatically include my signature on messages I forward or reply to check box.
5. Select Save when you’re done.
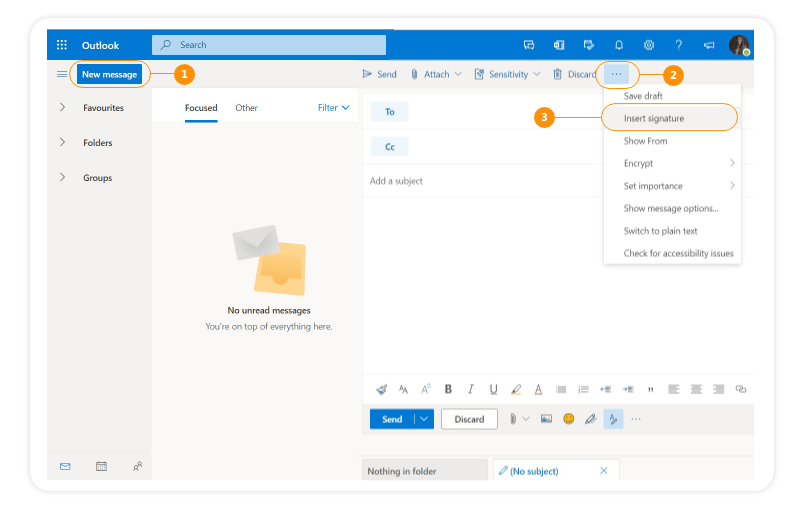
If you’ve created a signature but didn’t choose to add it to all outgoing messages automatically, you can add it later by following the next steps:
1. In your web mailbox, choose New message.
2. After typing your message, select the More options icon.
3. Click on Insert signature on the compose pane.
How to create, change, and edit signatures in the Outlook App
In the Outlook App, it is enabled to create multiple signatures and assign them to different email accounts. As in Outlook Web, you can automatically include your signature when sending a new message and replying or forwarding an email.
Learn how to add a signature in Outlook 365 by following the next steps:
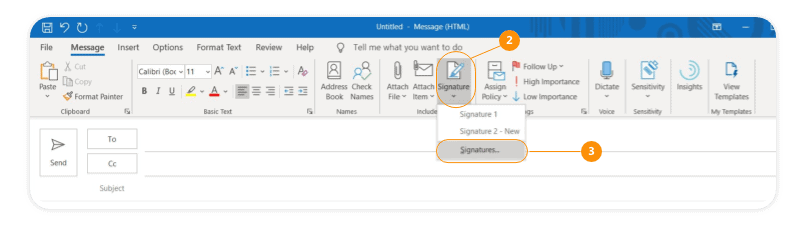
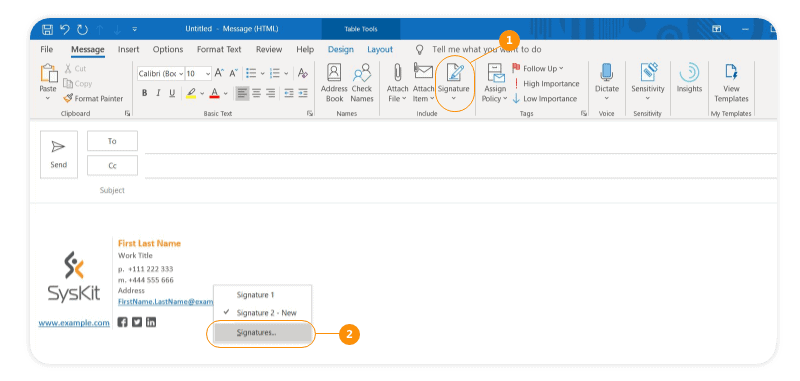
1. Create a New Email.
2. Select Signature in the toolbar.
3. In the dropdown menu, select Signatures…
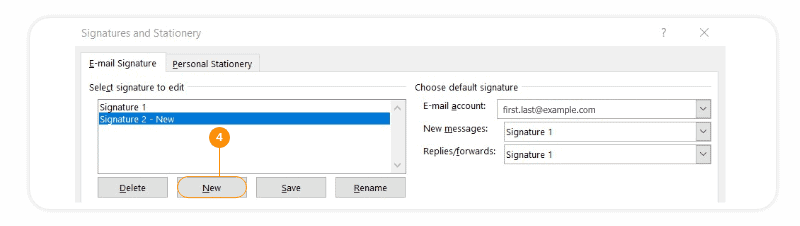
4. Click on the New button to add a new signature.
5. Give your signature a recognizable name so you can easily select the right one for your new email message.
6. Add your signature in the Edit Signature text area.
7. If you want to automatically apply the signature to your emails, select the email account you wish to use.
8. You can set different signatures for new messages and replies.
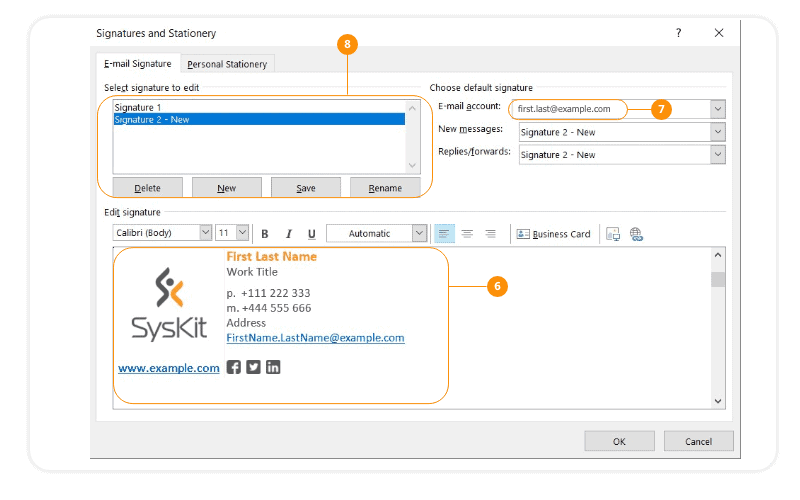
When you finish editing your new signature, click OK.
If you’ve created a signature but didn’t set it as a default one, you can add it later when you write an email message. To do so, open a New Email and click on Signature in the toolbar. Your signatures will appear in the dropdown menu. Select the signature you wish to apply to your email message.
In case you would like to change the email signature in the Outlook App, there are two options:
1. Right-click on the signature in the email body and select another signature.
2. Click Signature in the toolbar and choose another signature from the dropdown menu.
If the signature is right, but some of the information has changed, you can edit your signature as follows:
1. Right-click on your current signature.
2. Select Signatures…

Now, you can make the changes to your signature in the Signatures and Stationery pop-up window.
As business tools come and go, email always stays as one of the most important ones. An Office 365 email signature is a part of a brand image that is more than just your basic contact info. Start your free trial of Syskit Point and find out how this Office 365 documentation tool can help you gather all the information on your Exchange Online settings.