Knowledge Agent in SharePoint: What admins need to know
Table of contents
Microsoft recently released a range of agents across Teams, Viva, and SharePoint, and one of the most impactful—in a good way—for day‑to‑day content management is the SharePoint Knowledge Agent. While it’s packed with helpful AI, there are a few things SharePoint administrators should know to ensure a smooth rollout. In this blog, we’ll cover the top things admins need to know about the SharePoint knowledge agent.
Now, as a SharePoint or Microsoft 365 admin, especially if your organization has M365 Copilot licenses, you probably already have strong feelings about SharePoint copilot agents. The number one complaint I hear from admins is the default agent that comes built into every site. It just opens up, and we cannot turn it off or delete it. While the knowledge agent does not replace the default built-in agent, it does make the experience way better for end-users.
What is the Knowledge Agent?
Think of the knowledge agent in SharePoint as your entry point into improving your SharePoint site. It will appear at the bottom right of each site it’s activated on, and it will always have the teal SharePoint logo.

When you click on it, you will see different options depending if you are on a page or in the documents library. You will not see it when navigating to a SharePoint list, at least not yet as we know Copilot doesn’t work with SharePoint lists yet. Let’s talk about some of those tools.
First, the knowledge agent enables site owners to improve this site by retiring inactive pages, finding content gaps, and repairing broken links.
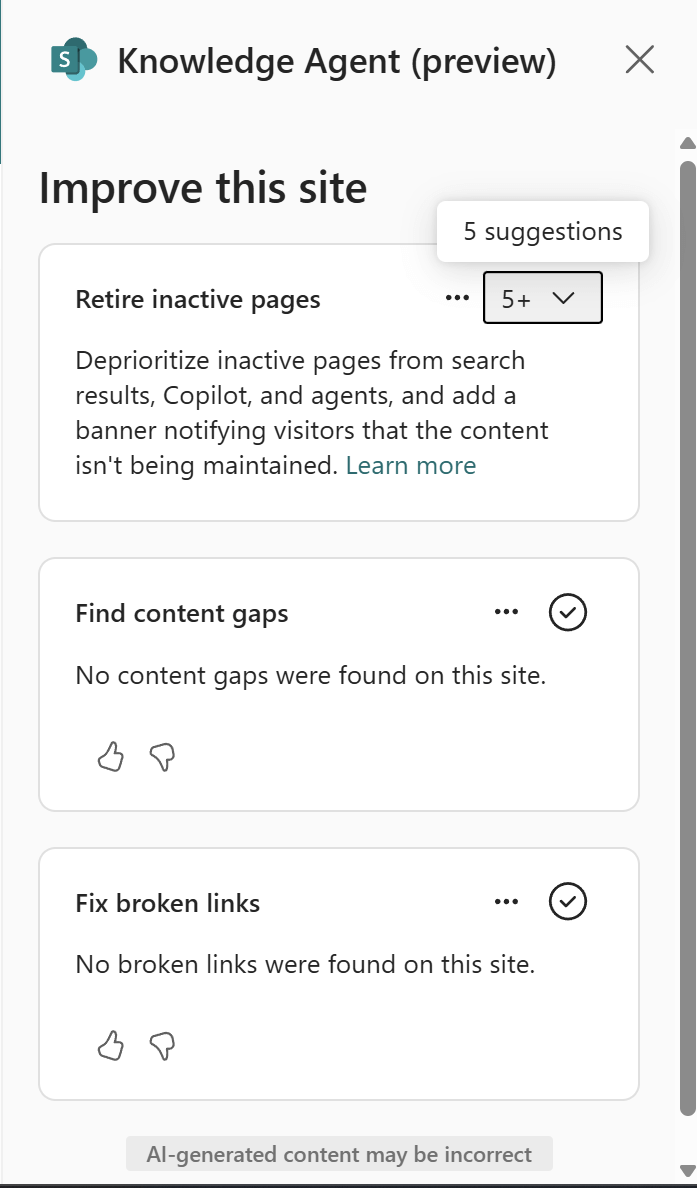
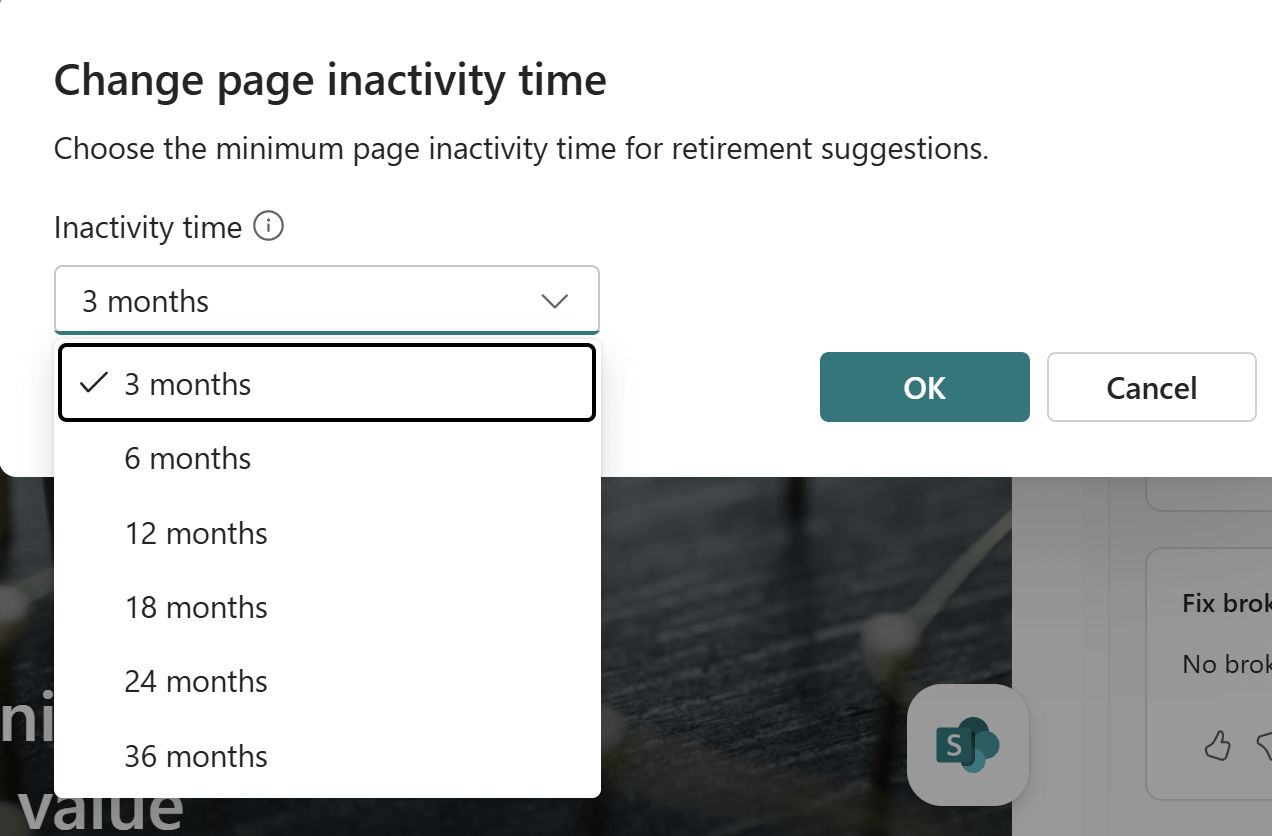
You can configure how long is “inactive” for your organization between the options below, but it’s not a tenant-level setting; each site owner can choose the inactivity time when they open up the tool.
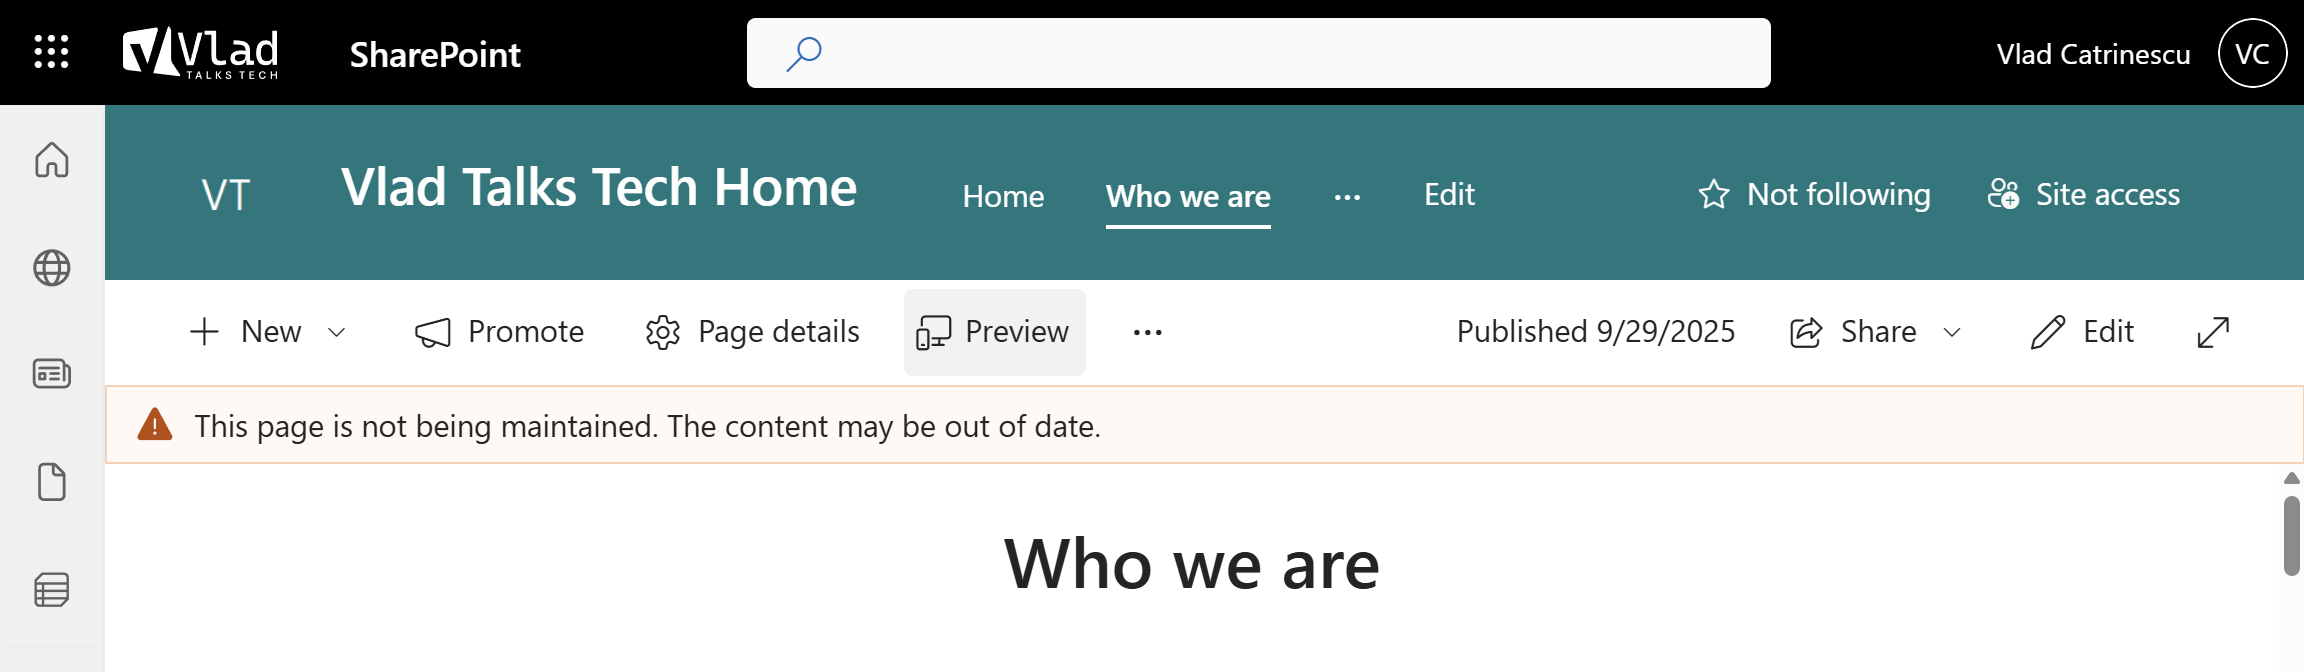
If you choose to retire a page, SharePoint will add a banner as seen in the image below, as well as deprioritize the page from Copilot and search results. Note this has nothing to do with the upcoming file level archiving that we should get in summer 2026.
Finding content gaps allows site owners to get ideas about content that users have been searching for but did not find. Finally, broken links shows you links on your site that point towards pages that do not exist anymore (404 errors).
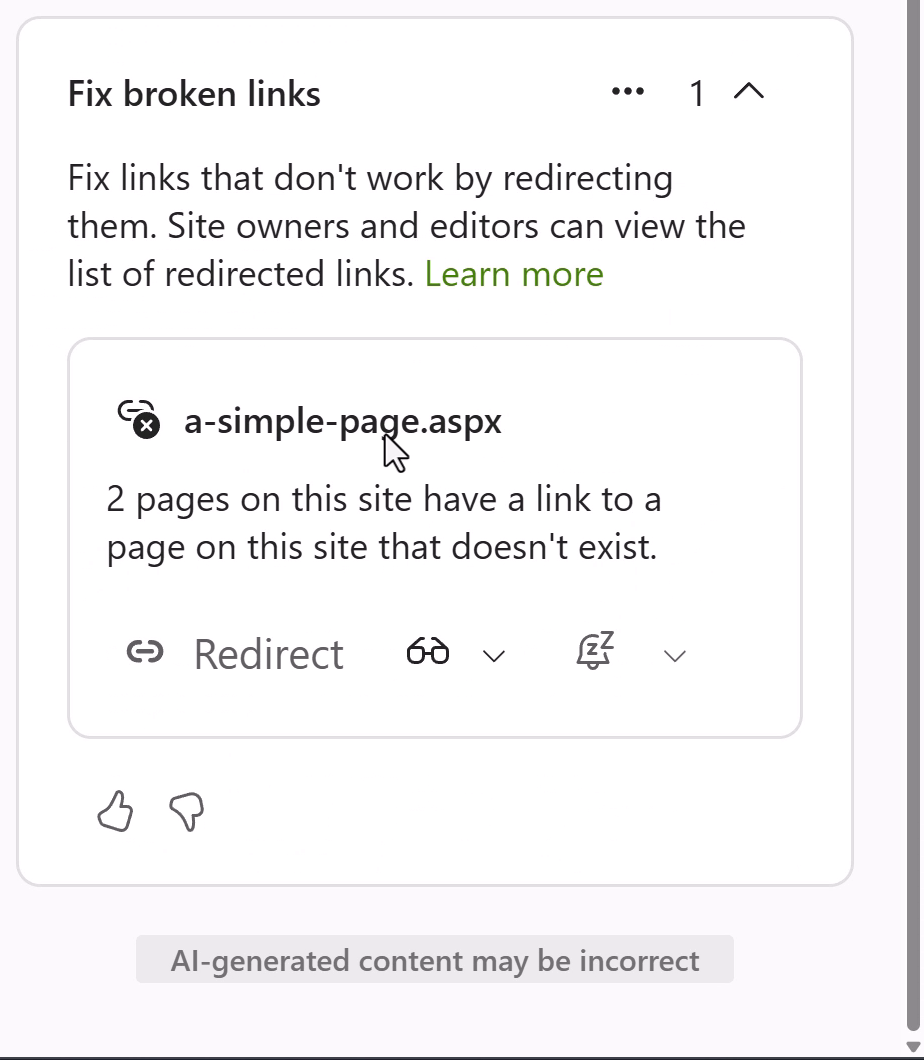
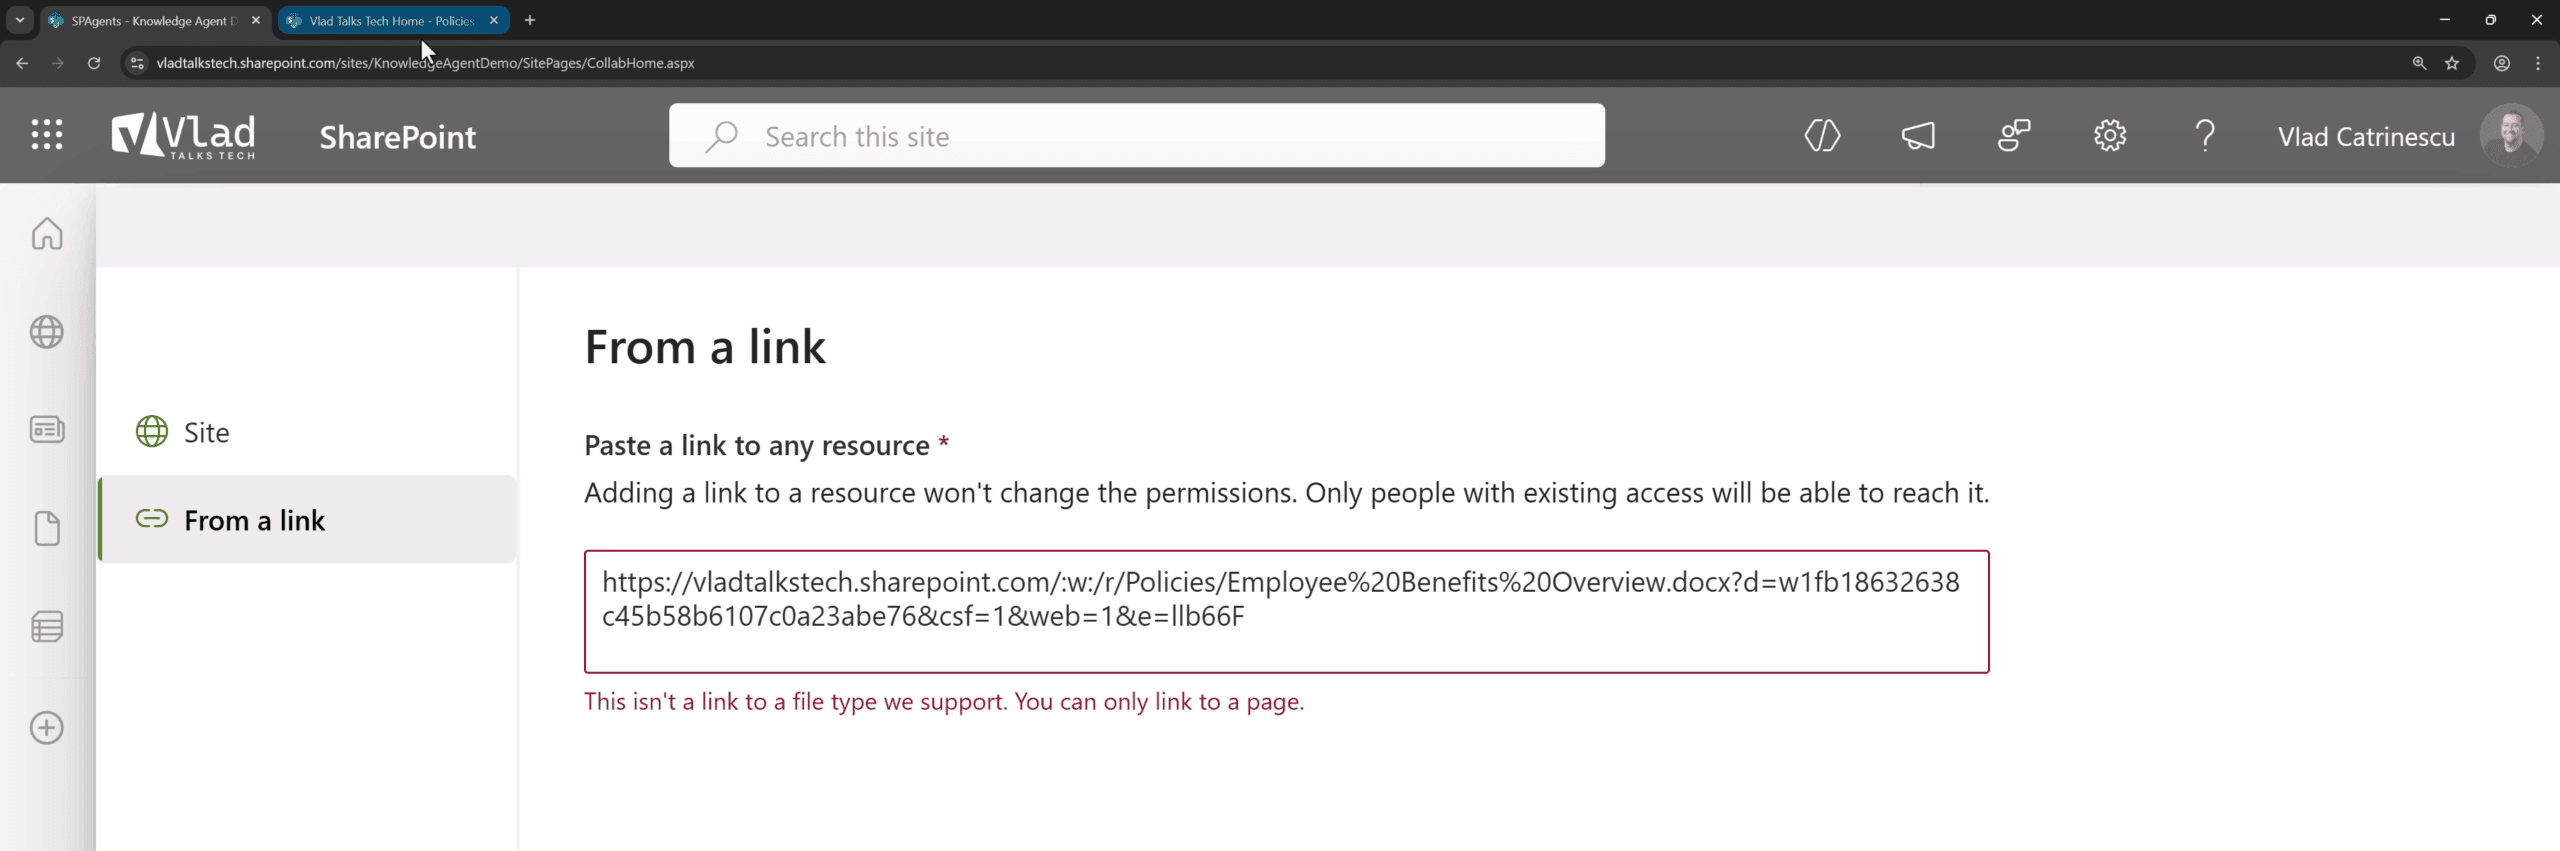
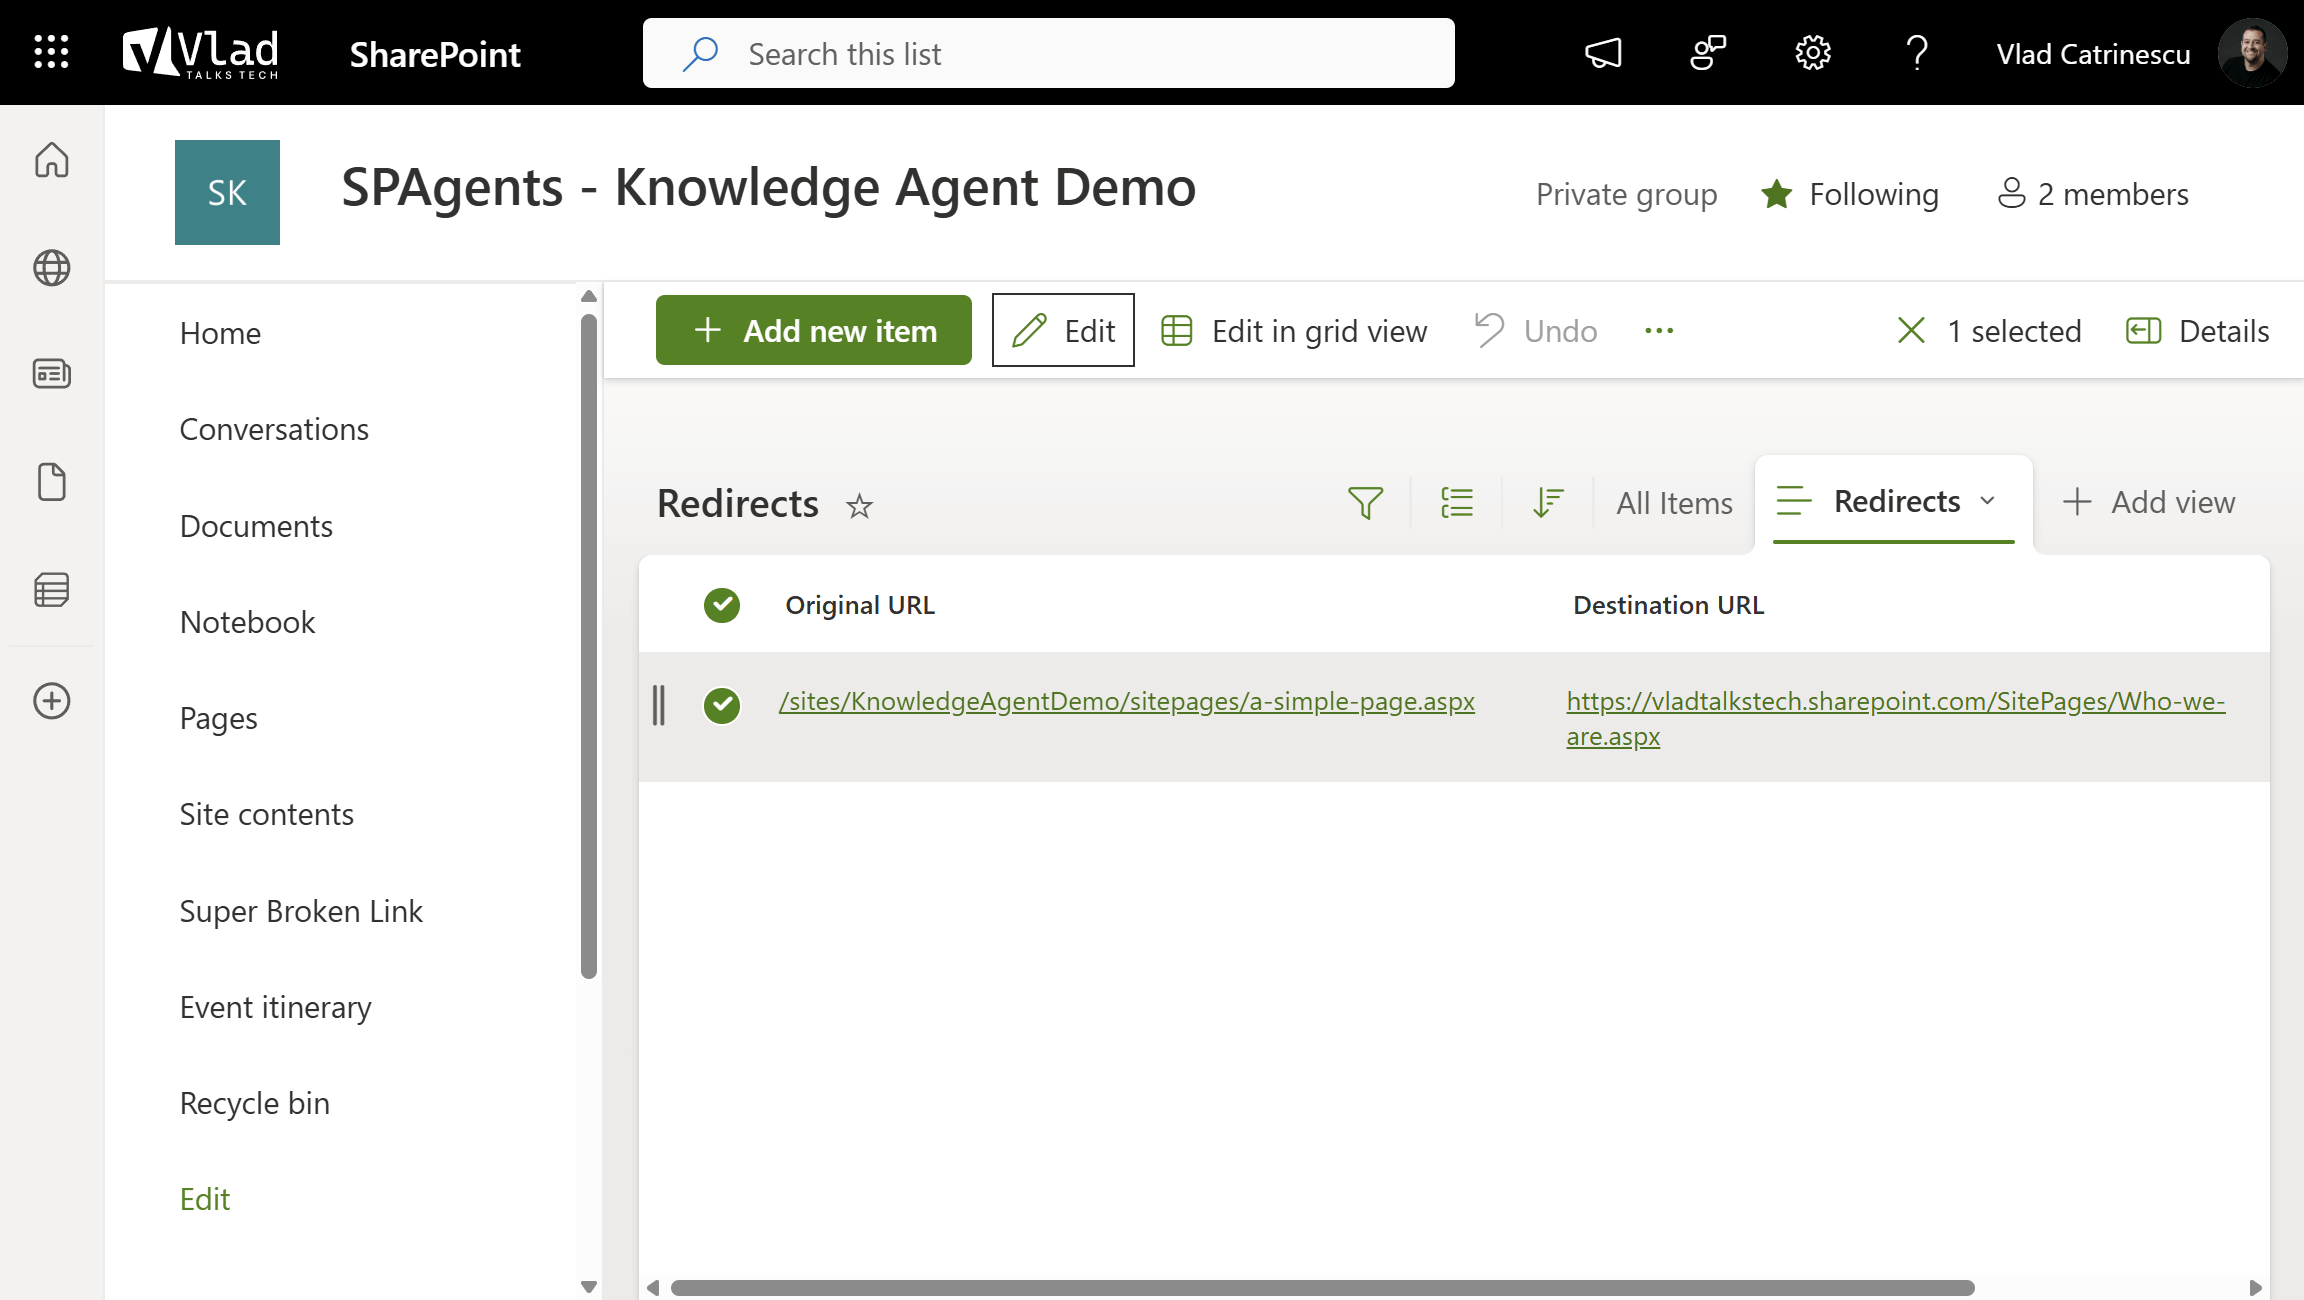
I tried it on a site with known broken links, and it managed to find one of the three broken links I had. So, while not perfect, it’s still a step forward to help site owners fix some of those links before their users open up tickets about them! A cool feature I love is that you can also configure redirects for those broken links, but you are limited to another page in your own tenant. You cannot redirect to external links or even documents.
Those redirects are then saved in a SharePoint list at:
<SiteUrl>/Lists/sp_redirecturls/Redirects.aspx
Next up, let’s navigate to a library where we have some files and as you can see below, the options are different.
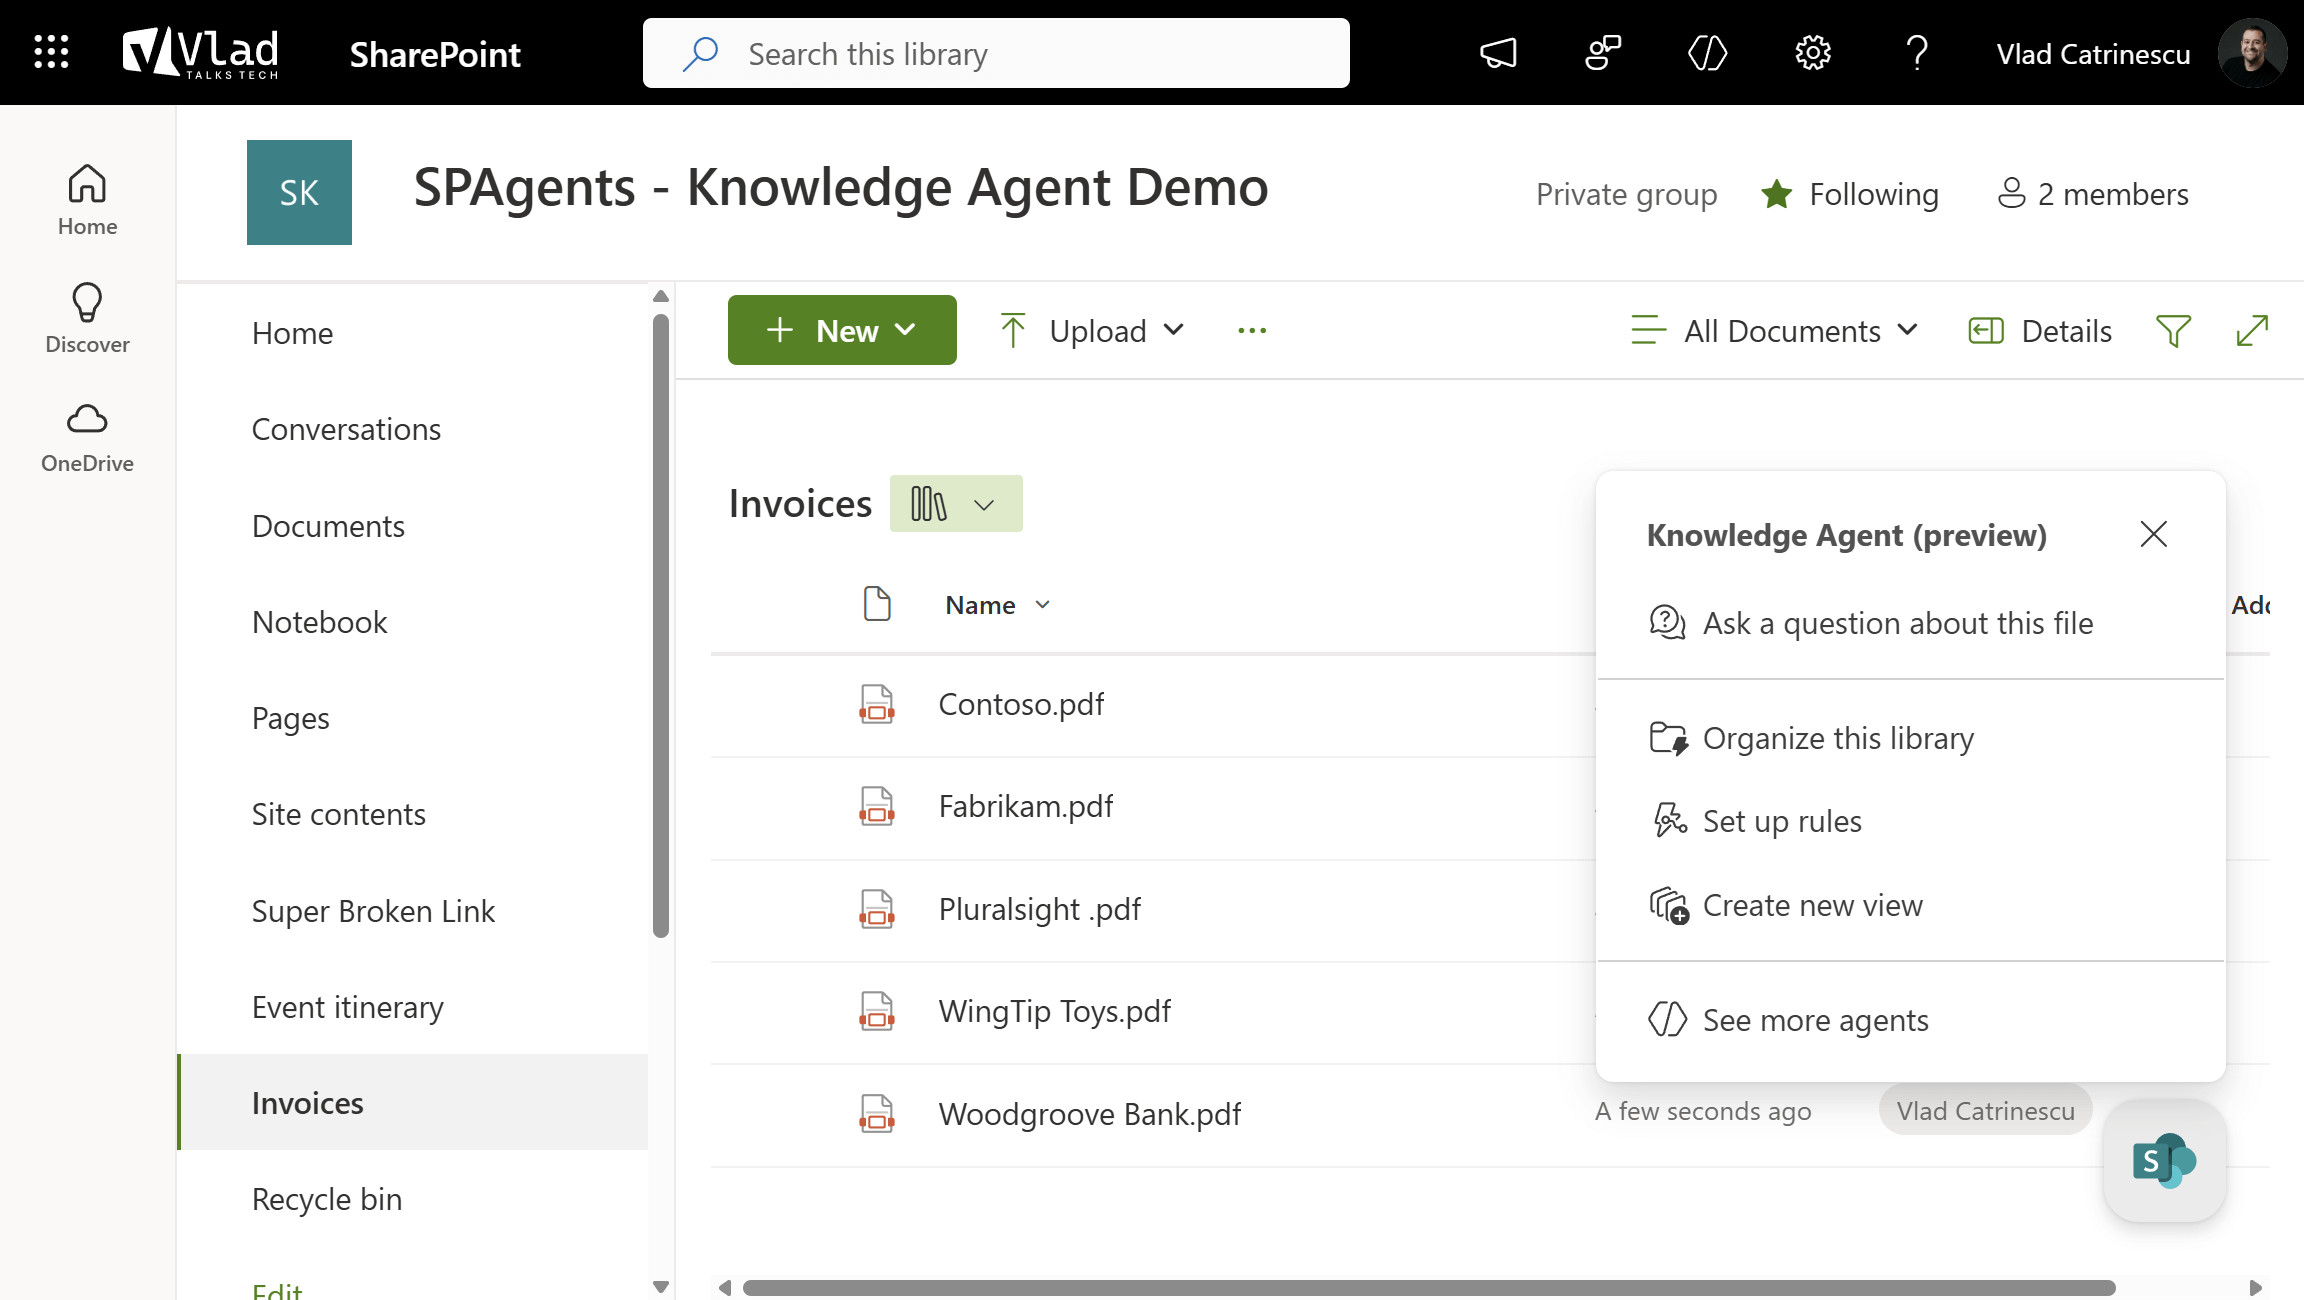
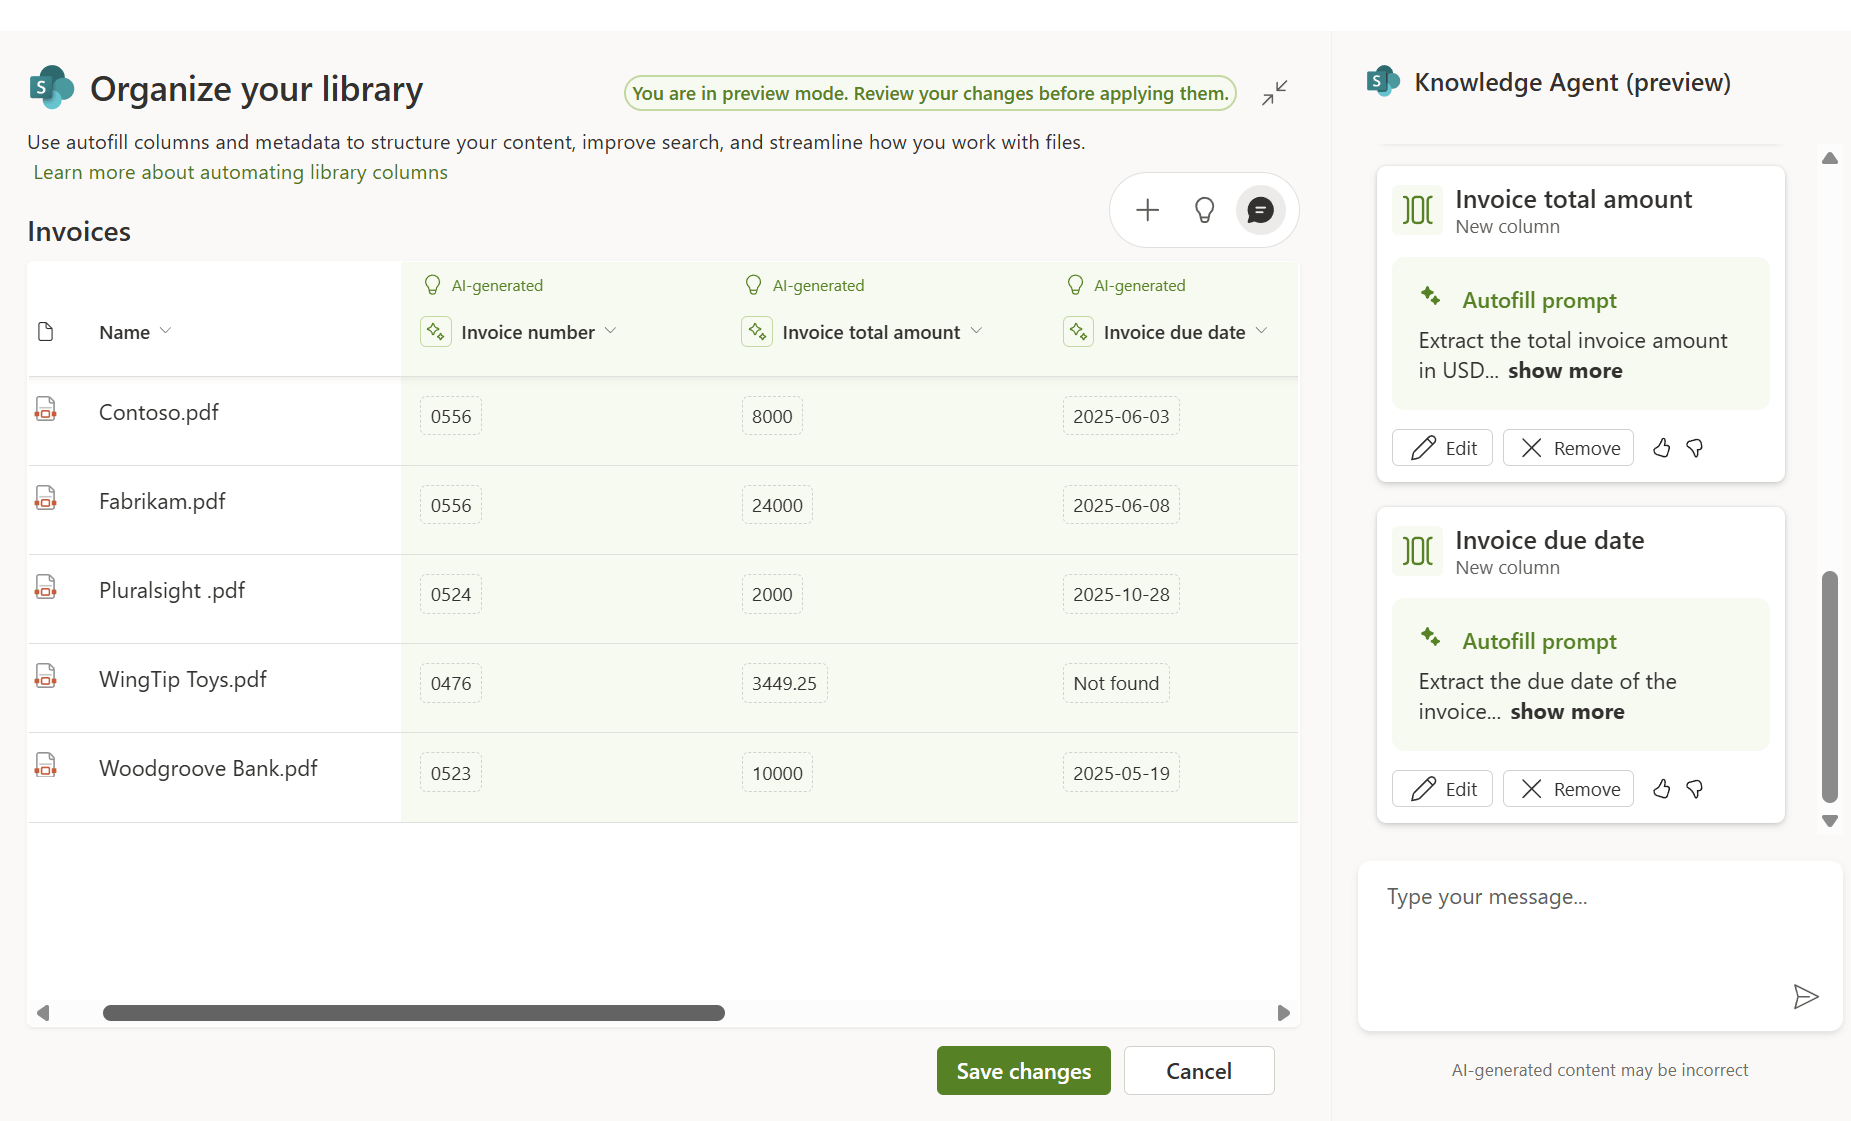
While the “Setup rules” and “Create new view” options are pretty self-explanatory, the Organize this library functionality is the newest feature, and honestly, the most amazing one. When you select it, Microsoft will use AI to analyze the current files in your library and propose three new columns for your library in order to add metadata to it. You can choose to keep them or not, nothing is saved until you apply the changes, so no worries. It will also use Autofill columns (prompt-based extraction) to automatically extract information from your documents, so you can see what the result would be.
Now, of course, you can use Autofill columns in “standalone” mode without the Knowledge agent (I do have a full tutorial here, or you can learn about them in our free SharePoint Content AI, Solutions, and Advanced Administration eBook), but the Knowledge agent is smart enough to automatically suggest columns for you. In addition, according to Microsoft documentation, during the public review, the content you get from columns using the Knowledge Agent is included with Microsoft 365 Copilot and not a pay-as-you-go extra, so it’s definitely time to improve those libraries. I recommend you double-check with your Microsoft licensing specialist beforehand.
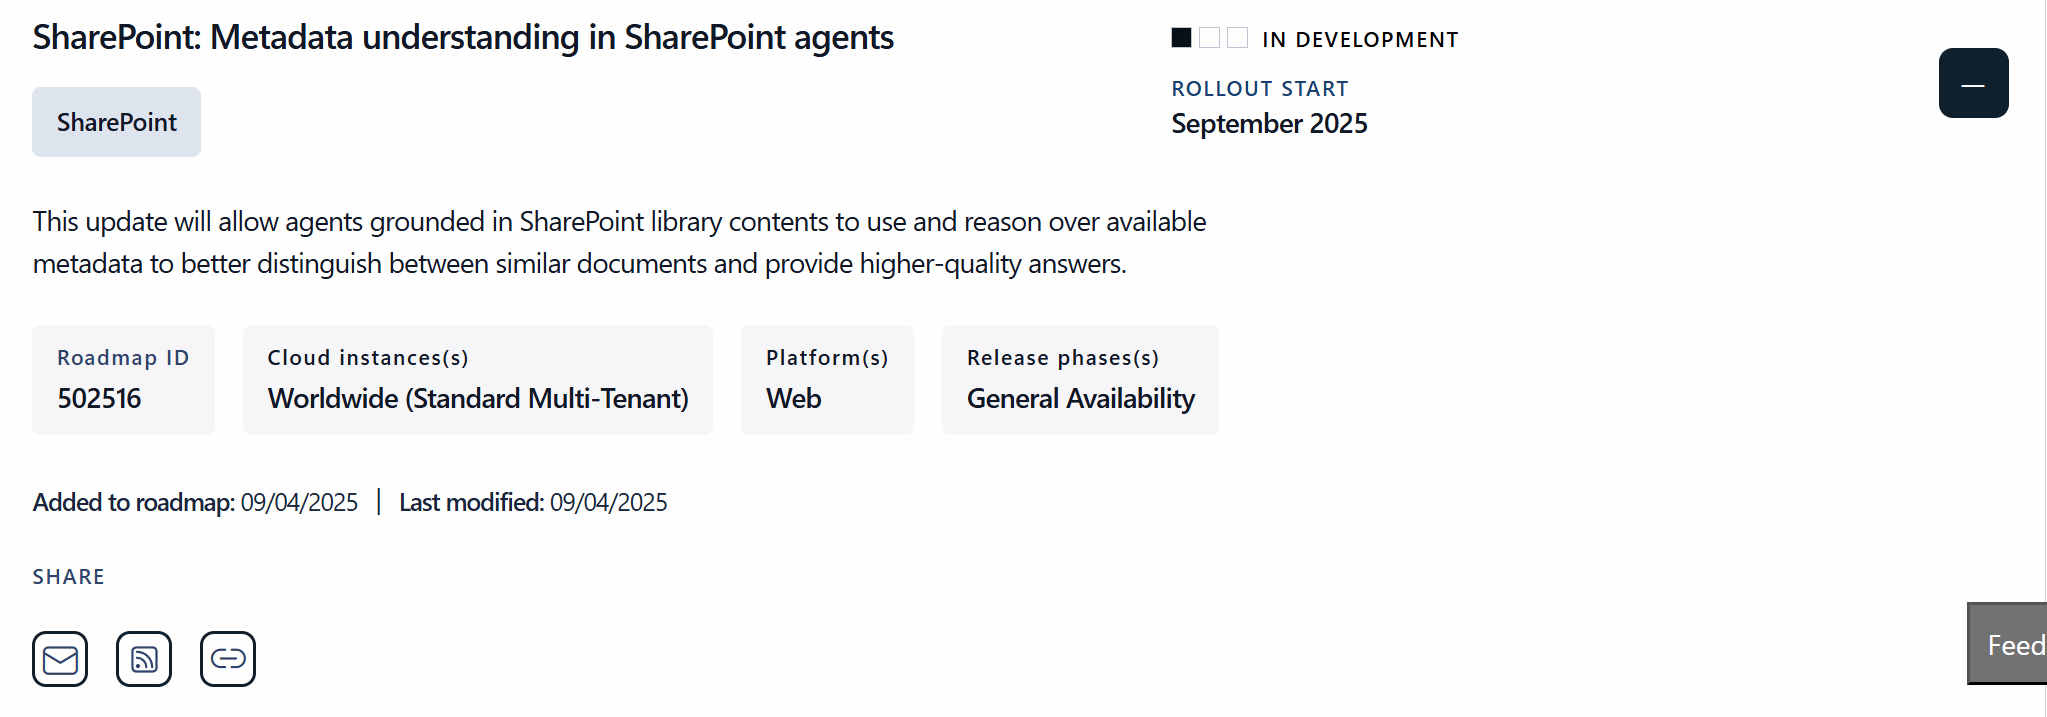
Adding metadata to libraries is even more important since, starting in October, Copilot and agents will be able to understand metadata on files for more accurate results, so this metadata will finally matter when it comes to Copilot.
Back to our Knowledge Agent and the Organize this library functionality, you can keep working on your library to add more columns, change the prompts, preview everything and once you click Apply, autofill will kick in and in a few minutes all the metadata will be populated.
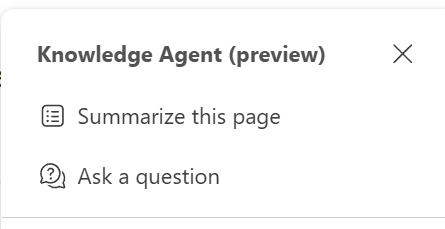
In addition to all those site owner / content owner functionalities, the Knowledge Agent allows users to quickly get answers in context by Summarizing a page or Asking a question. This will open the default SharePoint agent configured on that site, allowing you to ask questions and be more productive with AI.
Turning on the Knowledge Agent
Now that you know what it is, how do you turn it on? First, at least during preview, the knowledge agent is only available to users with a Microsoft 365 Copilot license and needs to be turned on by admins at the tenant level. As of today, you have two options to turn on the Knowledge Agent:
- Enable it on all the sites in your tenant.
- Enable it on all the sites in your tenant other than the sites you explicitly exclude from the list.
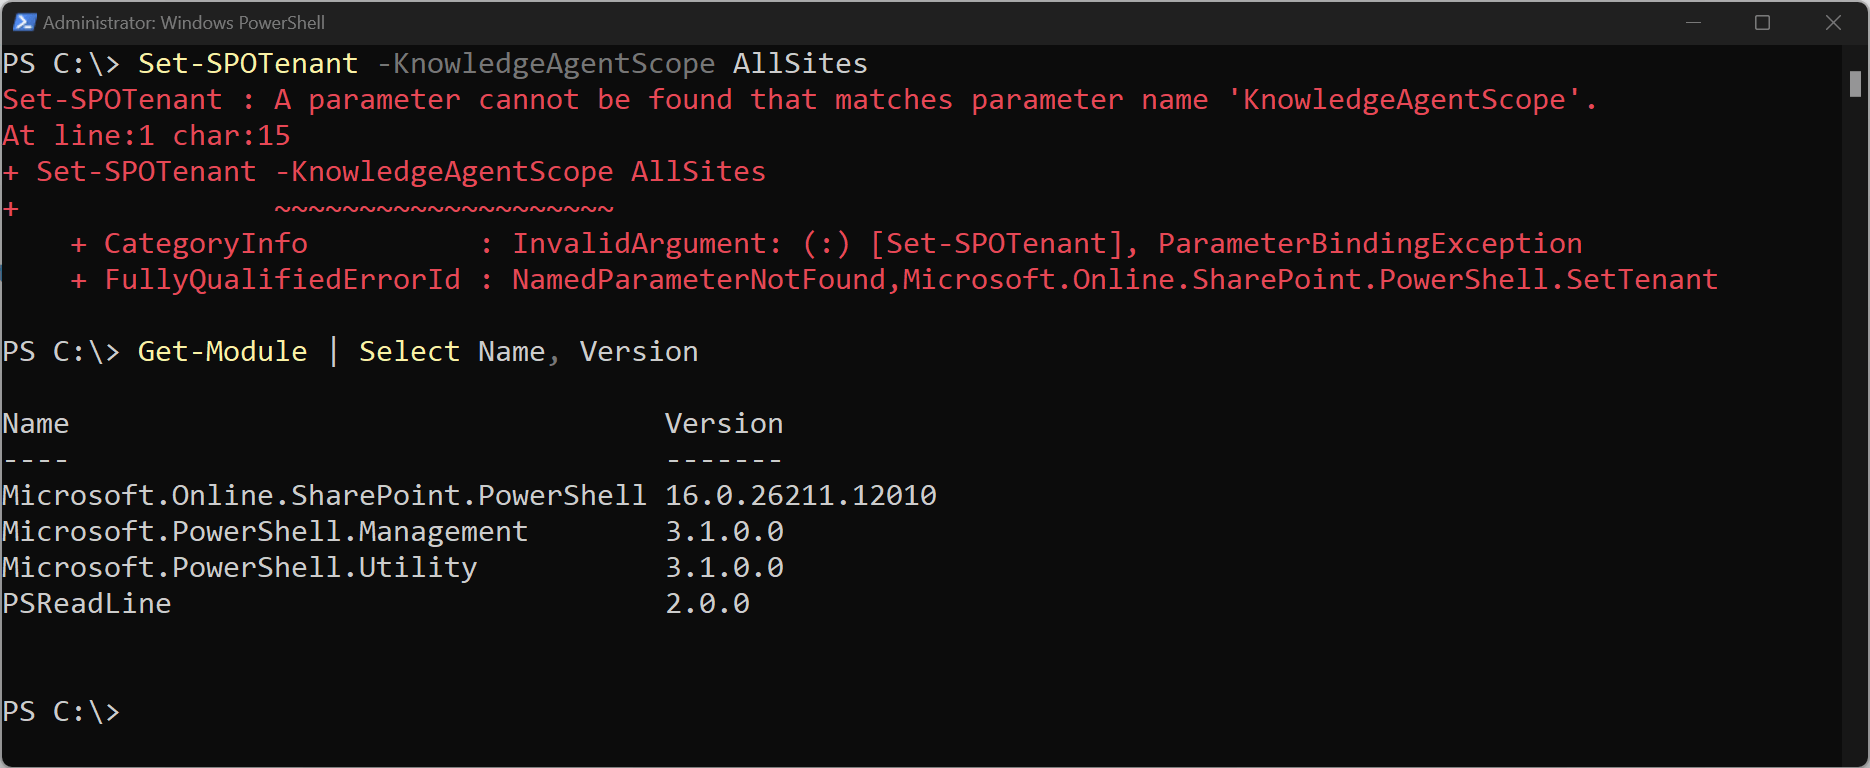
Right now, there is no way to only turn it on for selected sites only (let’s say only on 2 sites) , but Microsoft promised that will be coming in November 2025. Before you run those cmdlets, make sure that you update your SPO PowerShell module to the latest version, or you will get an error like the one below.
Enable Knowledge Agent on all sites
- Connect to SharePoint Online admin center
Connect-SPOService https://yourtenant-admin.sharepoint.com- Enable Knowledge Agent for all sites in the tenant
Set-SPOTenant -KnowledgeAgentScope AllSitesEnable Knowledge Agent on all sites except specified sites
- Connect to SharePoint Online admin center
Connect-SPOService https://yourtenant-admin.sharepoint.com- Set Knowledge Agent to be available on all sites except selected sites
Set-SPOTenant -KnowledgeAgentScope ExcludeSelectedSites- Specify sites to exclude from Knowledge Agent (initial exclusion list)
Set-SPOTenant -KnowledgeAgentSelectedSitesList
@("https://yourtenant.sharepoint.com/sites/site1",
"https://yourtenant.sharepoint.com/sites/site2")
- Add additional sites to the existing exclusion list (if needed)
Set-SPOTenant -KnowledgeAgentSelectedSitesList
@("https://yourtenant.sharepoint.com/sites/site3") -
KnowledgeAgentSelectedSitesListOperation AppendOther important notes
Something else that I highly advise SharePoint admins to understand is the permission structure for the knowledge agent, so who can do what with it. Microsoft has documented everything on Microsoft Support, but they did create 4 different roles for it:
- Content Consumer
- Content Creator
- Content Manager
- Site Manager
While I wish they simply mapped it to the default of Viewer/Member/Owner in SharePoint, the bright side is that everything is documented in the Microsoft support link above.
Final thoughts
The knowledge agent in SharePoint brings a ton of new functionality for Microsoft 365 Copilot users that will benefit your organization, whether you are just doing an AI pilot or plan to do a full rollout. No matter if you plan to deploy M365 Copilot at scale, fixing broken links, retiring dated pages, and adding metadata to your files will improve search and your general user experience.
However, some limitations such as not being able to activate it only on specific sites, might be a blocker for many organizations until Microsoft enables the feature, and of course, Microsoft 365 admins need to keep an eye out on licensing for the knowledge agent after the preview is over to see if it still makes sense for their organization.